
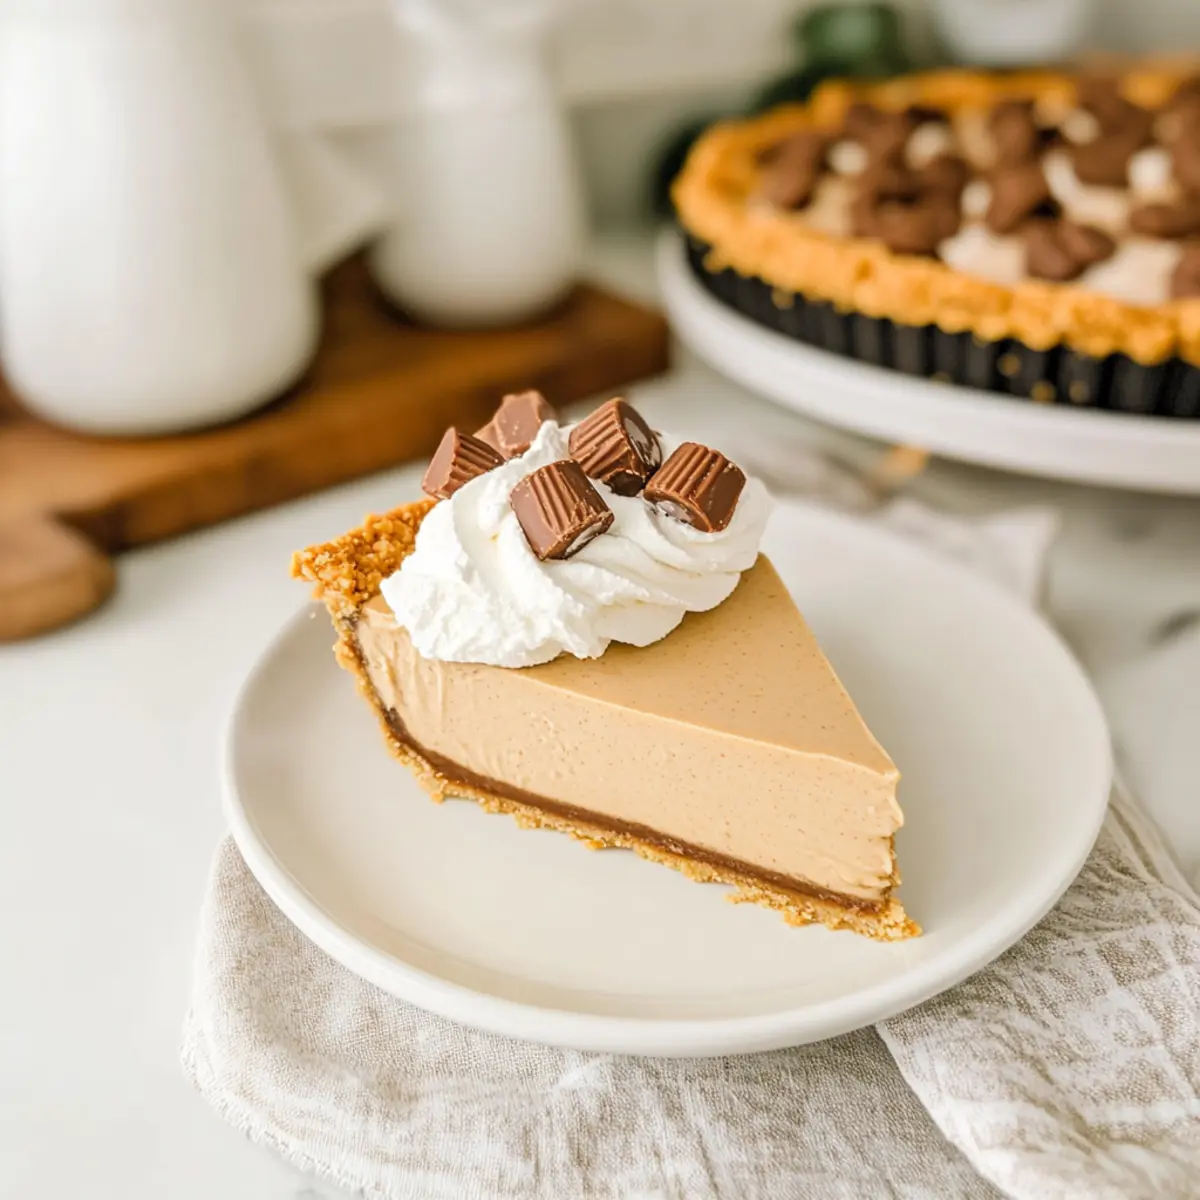
As I stood in my kitchen surrounded by a whirlwind of ingredients, the thought of making an indulgent dessert without turning on the oven was surprisingly exhilarating. Enter the No Bake Peanut Butter Pie—an effortless yet delightful treat that whisks me back to warm family gatherings where homemade sweets reign supreme. This recipe not only boasts a creamy, dreamy filling but is also incredibly quick to prepare, making it the perfect option for last-minute gatherings or cozy evenings in. Imagine tantalizing your taste buds with its smooth peanut butter richness while enjoying the crunch of a graham cracker crust. Who wouldn’t love a dessert that’s as comforting as it is easy? Stick around, and let’s dive into this creamy delight that’s guaranteed to please everyone at your table!
Why is this No Bake Peanut Butter Pie amazing?
Irresistible Flavor: A luscious blend of creamy peanut butter and smooth cream cheese creates a mouthwatering taste that appeals to all dessert lovers.
No Oven Needed: Perfect for those hot days or when you want to skip the heating up—simply mix, chill, and enjoy!
Crowd-Pleaser: Its nostalgic vibe paired with an inviting presentation makes it an instant hit at gatherings, just like Dump Bake Meatball or Garlic Butter Tofu.
Endless Customization: Feel free to swap peanut butter for almond butter or add chocolate chips for extra decadence, making each pie your own unique creation!
Simple Ingredients: With just a few easy-to-find components, you’re on your way to dessert bliss without the fuss.
Make Ahead Friendly: Prepare it the day before, and you’ve got the ultimate stress-free dessert waiting in your fridge for those spontaneous celebrations!
No Bake Peanut Butter Pie Ingredients
• Dive into the sweet simplicity of this delightful dessert with these easy-to-find ingredients!
For the Crust
- Graham Cracker Crust – Provides a sweet and crunchy base; you can use store-bought for convenience or make your own at home.
For the Filling
- Cream Cheese – Adds richness; ensure it’s softened for a creamier texture before mixing.
- Creamy Peanut Butter – This is the star of the show, bringing that signature flavor to your No Bake Peanut Butter Pie!
- Powdered Sugar – Sweetens the pie and helps achieve a smooth filling; sift for even mixing.
- Cool Whip – Essential for lightness and fluffiness; it gives the filling its signature no-bake creaminess.
For Optional Topping
- Reese’s Cup Minis – Great for a crunchy, chocolatey contrast; sprinkle them on top for added fun during serving!
Step‑by‑Step Instructions for No Bake Peanut Butter Pie
Step 1: Prepare Filling
In a large mixing bowl, start by beating together 8 ounces of softened cream cheese and 1 cup of creamy peanut butter using an electric mixer on medium speed. Mix until the mixture is smooth and well combined, about 2-3 minutes. Make sure there are no lumps visible. Add in 1 cup of powdered sugar, blending until fully incorporated and you achieve a creamy consistency.
Step 2: Incorporate Cool Whip
Next, gently fold in 2 cups of Cool Whip to the peanut butter filling mixture. Use a spatula to carefully add the Cool Whip, folding it in until the filling is light and airy. This incorporation will ensure that your No Bake Peanut Butter Pie has that desirable fluffiness, taking about 1-2 minutes of gentle mixing.
Step 3: Fill Crust
Now it’s time to fill your prepared graham cracker crust. Pour the creamy peanut butter filling into the crust, using a spatula to spread it evenly across the surface. Smooth out the top with the spatula so it looks inviting and polished. This step creates the delightful layers for your pie, taking about 2-3 minutes to complete.
Step 4: Chill
Once filled, cover the pie with plastic wrap and refrigerate for at least 4 hours, or ideally overnight. This chilling period helps the filling firm up, making it easier to slice when serving. While it chills, the flavors meld beautifully together, enhancing your No Bake Peanut Butter Pie’s overall taste.
Step 5: Serve
Finally, when ready to serve, remove the pie from the refrigerator. Slice it into wedges with a sharp knife for clean cuts and top with additional Cool Whip and chopped Reese’s Cup Minis for that extra sweet touch. Each slice should reveal the luscious filling and crunchy crust—perfect for indulgent moments!
What to Serve with No Bake Peanut Butter Pie
Enhance your dessert experience by pairing this creamy delight with complementary flavors and textures that take it to new heights.
- Fresh Berries: Juicy strawberries or raspberries add a burst of freshness, beautifully balancing the richness of the pie.
- Whipped Cream: A cloud-like topping of freshly whipped cream enhances the pie’s creaminess, creating a delightful texture contrast.
- Chocolate Drizzle: Drizzling melted chocolate over each slice provides an elegant touch and adds a rich, indulgent layer of flavor.
- Ice Cream: Scoop up a scoop of vanilla or chocolate ice cream alongside. The cold creaminess pairs perfectly with the rich peanut butter filling.
- Coffee: A warm cup of coffee with hints of chocolate offers a robust contrast and complements the pie’s sweetness wonderfully.
- Banana Slices: Placing ripe banana slices on the pie or the plate elevates the dessert’s comforting flavors while adding natural sweetness.
- Nutty Granola: Serving a sprinkle of nutty granola provides a crunchy texture and a wholesome touch, enhancing every bite.
- Chocolate Milkshake: A thick and creamy milkshake makes a fun, nostalgic pairing, echoing that childhood joy while indulging the peanut butter flavor.
- Mint Leaves: Garnishing your pie with fresh mint leaves can add a pleasant aroma that refreshes the palate after each slice.
No Bake Peanut Butter Pie Variations
Feel free to explore these delightful twists that make this easy dessert even more inviting!
-
Nutty Twist: Substitute almond butter for peanut butter for a lovely, different flavor. Each slice will surprise your taste buds with a new nutty depth.
-
Chocolate Lovers: Fold in ½ cup of mini chocolate chips into the filling for an extra layer of decadence. Imagine the delightful contrast as the chocolate melts in your mouth!
-
Whipped Cream Alternative: Use fresh whipped cream instead of Cool Whip for a more homemade feel. The fresh texture elevates the entire dessert experience.
-
Coconut Bliss: Add shredded coconut to the filling for a tropical flair. This unexpected twist beautifully complements the creamy peanut butter, creating a delightful flavor fusion.
-
Spicy Kick: Mix in a dash of cayenne pepper or cinnamon to the filling for a surprise heat! This playful twist adds complexity to the taste that’s sure to intrigue your guests.
-
Fruit Addition: Top the pie with fresh berries, like raspberries or strawberries, right before serving. These fresh fruits bring a bright pop of flavor that cuts through the richness beautifully.
-
Decadent Drizzle: Drizzle melted chocolate or caramel sauce over the top before serving. Not only adds flavor, but creates a visually stunning presentation—just like my Garlic Butter Tofu.
-
Crunchy Layer: For added texture, sprinkle crushed pretzels over the filling before chilling. You’ll enjoy that delightful salty-sweet contrast with every bite.
Feel free to get creative, and turn this already comforting classic into a truly unique indulgence!
Expert Tips for No Bake Peanut Butter Pie
-
Soften Cream Cheese: Always ensure the cream cheese is well-softened; this prevents lumps and guarantees a flawlessly smooth filling.
-
Chill Thoroughly: Don’t rush the chilling process! Allowing the pie to set for at least 4 hours will help it hold its shape when sliced.
-
Customize Your Crust: Swap the classic graham cracker crust for a chocolate cookie crust for a delicious twist; it complements the peanut butter beautifully!
-
Add Texture: For extra crunch, consider folding in chopped nuts or mini chocolate chips into the filling before spreading it in the crust.
-
Store Properly: Keep any leftover No Bake Peanut Butter Pie covered in the fridge for up to 3-4 days, or freeze for longer storage.
How to Store and Freeze No Bake Peanut Butter Pie
Fridge: Keep the pie covered in the refrigerator for up to 3-4 days to maintain its freshness. This simple storage tip ensures every slice remains creamy and delightful!
Freezer: For longer storage, freeze the pie for up to 2 months. Wrap it tightly in plastic wrap and aluminum foil to avoid freezer burn.
Thawing: When ready to enjoy, transfer the pie to the fridge for several hours or overnight to thaw, ensuring it regains its creamy texture.
Reheating: Since this recipe is served chilled, there’s no need for reheating. Just slice and serve instead, savoring the luscious flavors of your No Bake Peanut Butter Pie!
Make Ahead Options
This No Bake Peanut Butter Pie is absolutely perfect for meal prep enthusiasts looking to save time during busy weeknights! You can easily prepare the filling and fill the graham cracker crust up to 24 hours in advance, refrigerating it until you’re ready to serve. To maintain that fluffy texture, just make sure to cover the pie tightly with plastic wrap. When you’re ready to delight your guests, simply top the pie with additional Cool Whip and chopped Reese’s Cup Minis (if desired), and slice it up. This way, you get to enjoy a stress-free dessert that tastes just as delicious as if it were freshly made!
No Bake Peanut Butter Pie Recipe FAQs
How do I select the best cream cheese for the filling?
Always choose block-style cream cheese, not the spreadable one in a tub, as it contains more stabilizers and won’t blend as smoothly. Ensure it’s well-softened to room temperature before mixing; this typically takes about 30 minutes on the counter. A smooth, creamy texture is key to a flawless filling!
How should I store leftover No Bake Peanut Butter Pie?
You can keep your pie covered in the refrigerator for up to 3-4 days. This way, each slice stays fresh and creamy. I often place a layer of plastic wrap directly on the pie surface to avoid any exposure to air, preserving its delightful texture and flavor.
Can I freeze No Bake Peanut Butter Pie, and if so, how?
Absolutely! To freeze the pie, wrap it tightly in plastic wrap followed by aluminum foil to prevent freezer burn. It will stay fresh for up to 2 months. When you’re ready to enjoy it, simply transfer the pie to the refrigerator for several hours or overnight until thawed. This slow thawing method helps maintain its creamy consistency.
What can I do if my filling turns out lumpy?
If your filling has lumps, it’s likely due to not softening the cream cheese properly. To fix this, transfer the filling to a food processor and blend it until smooth. Alternatively, you can try mixing it longer with a hand mixer, ensuring to scrape down the sides to incorporate everything evenly.
Can I make this pie vegan or suitable for those with nut allergies?
Yes! For a vegan version, substitute the cream cheese with a dairy-free alternative and opt for a nut-free butter or sunflower seed butter instead of peanut butter. You can also find gluten-free graham crackers to create a suitable crust for gluten-sensitive or celiac diners. Always check labels for potential allergens based on your guests’ needs!
What if I don’t have Cool Whip on hand?
You can easily swap Cool Whip for homemade whipped cream! To make it, whip together 1 cup of heavy cream with 2 tablespoons of powdered sugar until soft peaks form. Fold this into your filling just as you would with Cool Whip, creating a similarly fluffy texture.
Decadent No Bake Peanut Butter Pie That's a True Crowd-Pleaser
Ingredients
Equipment
Method
- In a large mixing bowl, beat together cream cheese and peanut butter until smooth, about 2-3 minutes.
- Add powdered sugar and blend until fully incorporated for a creamy consistency.
- Gently fold in Cool Whip until the filling is light and airy, about 1-2 minutes.
- Pour the creamy filling into the graham cracker crust, smoothing the top with a spatula.
- Cover with plastic wrap and refrigerate for at least 4 hours or overnight to firm up.
- Slice and serve topped with additional Cool Whip and Reese’s Cup Minis.
Leave a Reply