
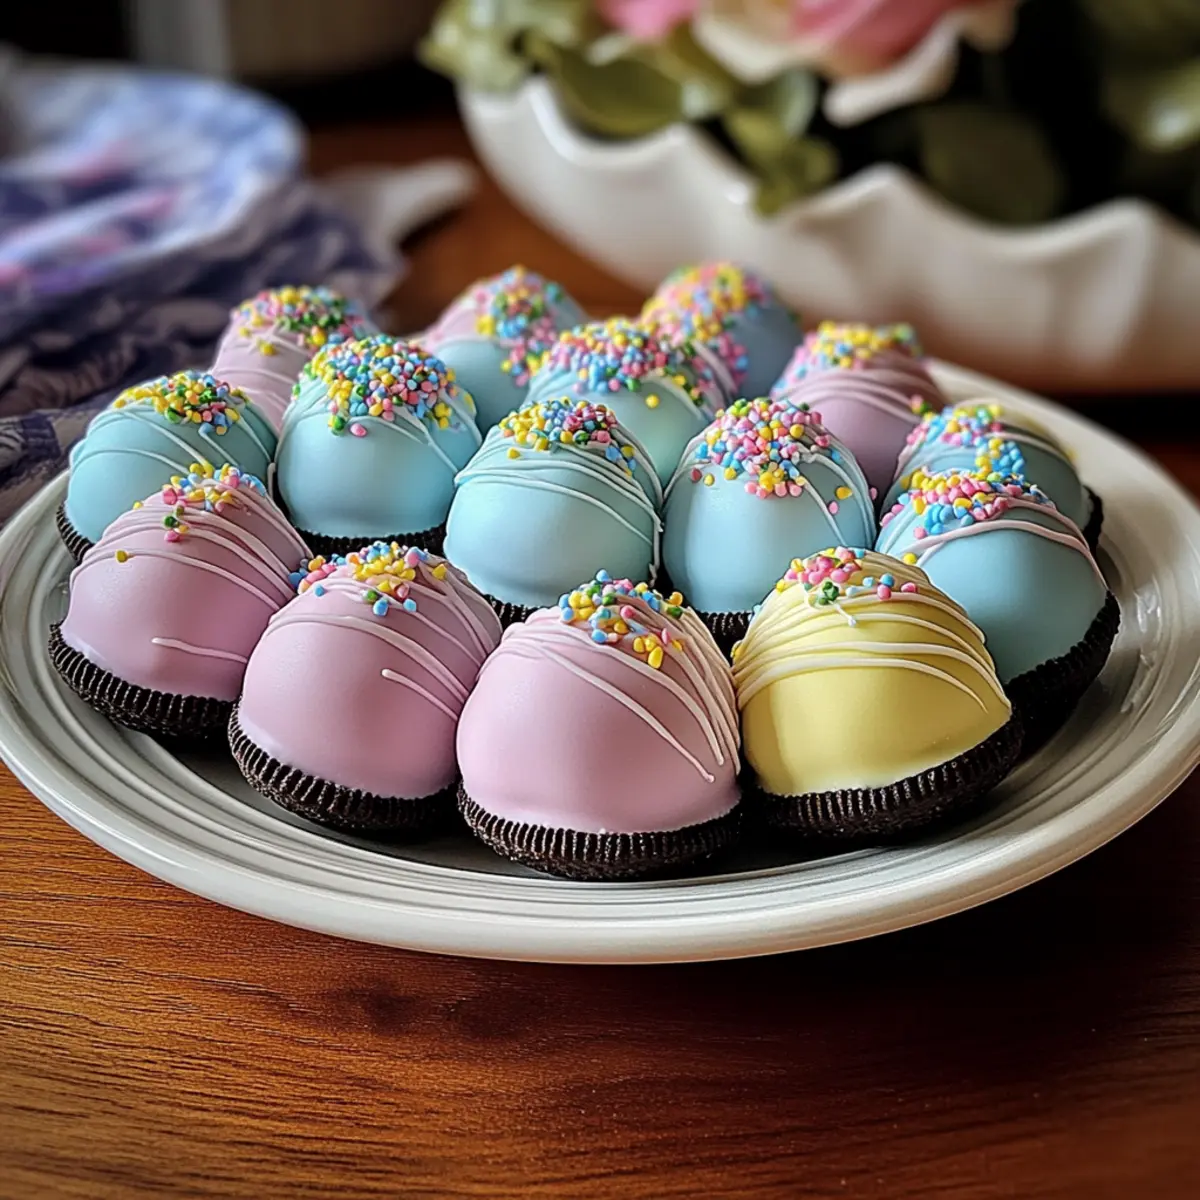
As I walked through the vibrant aisles of my local grocery store, I couldn’t help but notice the lively Easter displays—full of colorful candies and whimsical decorations that sparked childhood memories. This spring, I wanted to capture that joy in a fun, festive dessert: Easter Egg Oreo Balls. These no-bake delights are not only quick to whip up, making them perfect for busy home chefs, but they also invite creativity with customizable decorations that kids will adore. With a creamy Oreo filling enveloped in a sweet candy shell, they are sure to be a hit at any gathering, bringing smiles to both young and old. Are you ready to dive into the world of delicious Easter-themed treats? Let’s hop right in!
Why Are Easter Egg Oreo Balls Special?
Uniquely Festive: These Easter Egg Oreo Balls are perfect for adding a playful touch to your Easter celebrations.
No-Bake Fun: Enjoy the simplicity of a no-bake dessert that saves you time in the kitchen, allowing for more moments with family and friends.
Customizable Creations: Get creative! The decorations are easily customizable, offering endless possibilities to suit your style and flavor preferences.
Kid-Approved: Children will love helping to make these treats—it’s a fun activity that transforms into delicious rewards.
Perfect for Gifting: Pack them into Easter baskets or arrange them on a platter; these treats make memorable gifts for family gatherings. Celebrate the season with vibrant, delightful sweets, and if you’re in need of more easy recipes, check out Greek Chicken Meatballs for a savory complement to your dessert table or indulge in some Gluten Free Chocolate for a sweet treat that fits dietary needs!
Easter Egg Oreo Balls Ingredients
• Dive into the delightful world of Easter Egg Oreo Balls with these essential ingredients!
For the Filling
- Oreo cookies – The star of the show, providing a rich chocolate flavor and a satisfying crunch; feel free to experiment with any chocolate sandwich cookie.
- Cream cheese – This ensures a creamy texture that holds your filling together—opt for reduced-fat or dairy-free options for a lighter treat.
- Vanilla extract (optional) – A splash of vanilla enhances the flavor, adding a lovely depth to the filling.
For the Coating
- White candy melts (or white chocolate chips) – The smooth outer layer; candy melts are best for an easy melting process. For chocolate chips, mix in a teaspoon of coconut oil for smoother coating.
- Pastel food coloring – Brighten up your candy coating; gel coloring works wonders for vibrant hues without thinning.
For the Toppings
- Sprinkles/sanding sugar/drizzle – Optional decorations that boost the festive flair—get creative to make your Easter Egg Oreo Balls truly one-of-a-kind!
Step‑by‑Step Instructions for Easter Egg Oreo Balls
Step 1: Crush Oreos
Start by crushing the Oreo cookies into fine crumbs. This can be done using a food processor for a quick and smooth result, or you can place the cookies in a zip-top bag and crush them with a rolling pin. Aim for a fine crumb consistency to ensure a smooth filling. Set aside your crushed Oreos for the next step.
Step 2: Mix Filling
In a large mixing bowl, combine the crushed Oreos with softened cream cheese. Using a spatula or your hands, mix until a thick, cohesive dough forms. If desired, add a splash of vanilla extract for added flavor. Be sure to mix thoroughly, ensuring there are no dry spots. The filling should be creamy and easy to shape into balls.
Step 3: Shape Balls
Take about 1 tablespoon of the Oreo mixture and roll it between your palms to form egg shapes. Place the shaped balls onto a parchment-lined baking sheet to keep them from sticking. Ensure they are evenly shaped to maintain a consistent look. Continue until all the filling is shaped, leaving space between each ball on the sheet.
Step 4: Chill
Once your Oreo balls are shaped, refrigerate them for 30 minutes or freeze for 15 minutes. This chilling step is crucial, as it helps the balls firm up, making them easier to dip in the coating. The balls should feel firm to the touch and hold their shape well when ready for the next step.
Step 5: Melt Coating
While the Oreo balls chill, prepare the coating. In a microwave-safe bowl, melt the white candy melts or white chocolate chips in 30-second intervals, stirring in between until fully melted and smooth. If you’re using chocolate chips, mix in 1 teaspoon of coconut oil to achieve a smoother consistency. Once melted, add gel food coloring if desired for a festive touch.
Step 6: Dip Eggs
Remove the chilled Oreo balls from the refrigerator. Using a fork, carefully dip each ball into the melted coating, ensuring it is fully covered. Allow any excess coating to drip off before placing the coated balls back onto the parchment-lined baking sheet. The coating should appear glossy and even for a polished finish.
Step 7: Decorate
Before the candy coating hardens, get creative with your decorations! Add sprinkles or drizzle with extra melted candy melts or chocolate. This is the moment to let your imagination shine—experiment with colors and designs to make your Easter Egg Oreo Balls special and festive.
Step 8: Set
Finally, let the coated Oreo balls sit at room temperature for about 15 minutes to set, or place them in the refrigerator for 10 minutes for quicker results. The coating should be firm to the touch but still have a slightly soft center. Store the finished Easter Egg Oreo Balls in the fridge until you’re ready to serve them.

Easter Egg Oreo Balls: Customizable Delights
Get ready to unleash your creativity in the kitchen with these delightful Easter Egg Oreo Balls, perfect for personalizing to your taste!
- Gluten-Free: Use gluten-free Oreos to make this treat suitable for those with gluten sensitivities.
- Flavor Twist: Consider adding a splash of almond extract to the filling for a nutty depth that pairs wonderfully with chocolate.
- Nutty Texture: Mix in finely chopped nuts or nut butter to the filling for added crunch and flavor. Almonds or peanuts work great here, adding a delightful contrast.
- Fruit Fusion: Incorporate mini chocolate chips, or a bit of dried fruit into the filling to enhance sweetness and texture; think raisins or cranberries.
- Chocolate Lovers: Opt for a dark chocolate coating for a richer, more indulgent treat that will delight any chocolate fan’s palate.
- Coconut Coating: For a tropical twist, skip the candy coating and instead roll the balls in shredded coconut after decorating for a sweet flair.
- Kid-Friendly Spice: Sprinkle in a pinch of cinnamon or even crushed up candy canes for a festive, unexpected kick that kids will love during Easter.
- Fun Colors: Experiment with different colors of chocolate melts to create a vibrant assortment that adds to your festive spread and draws the eyes.
Why not take your Easter celebration a step further by combining these treats with other delicious offerings, such as savory Greek Chicken Meatballs or delightful Gluten Free Chocolate for a well-rounded feast? Enjoy the process of creating not just a dish, but cherished memories!
How to Store and Freeze Easter Egg Oreo Balls
Fridge: Keep your Easter Egg Oreo Balls in an airtight container in the refrigerator for up to 5 days. This helps maintain their creamy texture and ensures they stay fresh.
Freezer: For longer storage, freeze the Oreo balls in a single layer on a baking sheet until firm. Then, transfer them to a freezer-safe container for up to 2 months.
Thawing: When ready to enjoy, thaw them in the refrigerator for a few hours before serving, ensuring they retain their delicious flavors and textures.
Reheating: There’s no need to reheat these no-bake treats; simply enjoy them cool and refreshing straight from the fridge or after thawing!
Make Ahead Options
These Easter Egg Oreo Balls are a fantastic choice for meal prep! You can prepare the filling (crushed Oreos mixed with cream cheese) up to 24 hours in advance and store it in an airtight container in the refrigerator. Alternatively, once shaped into balls, they can be frozen for up to 2 months; simply freeze them on a baking sheet, then transfer to a freezer bag. When you’re ready to serve, just thaw them in the refrigerator overnight, then coat and decorate as directed. To ensure they remain just as delicious, avoid dipping them until you’re ready to present these delightful treats, retaining their freshness and texture!
What to Serve with Easter Egg Oreo Balls
Indulging in sweet, chocolatey bites brings a celebration of flavors, so why not create a delightful spread that complements your festive mood?
-
Fresh Fruit Skewers: A refreshing assortment of strawberries, pineapple, and melon balances the sweetness of the Oreo balls. These vibrant pops of color add both taste and nutrition to your dessert table.
-
Chocolate Dipped Strawberries: Keep the chocolate theme going! These juicy strawberries not only taste heavenly but also add a romantic touch to your Easter gathering.
-
Vanilla Ice Cream: A scoop of creamy vanilla ice cream makes for indulgent pairings. As you savor the contrasting temps, the ice cream melts slightly into the rich flavors of the Oreo balls—pure bliss!
-
Carrot Cake Slices: Serve up slices of moist carrot cake with creamy frosting for a classic Easter delight. The spices and textures surefire enhance everyone’s dessert experience.
-
Mint Lemonade: Refreshing mint lemonade provides a zingy contrast to the sweetness of the Oreo balls. Its vibrant flavor can uplift your gathering and keep everyone hydrated!
-
Coconut Macaroons: These chewy, sweet macaroons will echo the sweetness of your Oreo balls while providing a crispy texture. Their enchanting coconut flavor will transport your guests to a tropical paradise!
-
Hot Chocolate Bar: For a cozy touch, set up a hot chocolate bar with various toppings. It makes for a fun, interactive addition, allowing guests to customize their warm drinks alongside sweet treats.
-
Spring-themed Cupcakes: Decorate fluffy cupcakes with pastel shades to match your Easter Egg Oreo Balls. Their soft, moist crumb brings another layer of sweetness to the feast, tying the theme together beautifully.
-
Iced Tea: A chilled glass of iced tea, light and refreshing, acts as the perfect palate cleanser. Complement herbal or fruity infusions that won’t compete with the desserts but rather invite more indulgence.
-
Whipped Cream Topping: Offer a side of whipped cream for those who wish to take their bites to the next level, adding a fluffy layer of sweetness that dances on the palate with every munch!
Expert Tips for Easter Egg Oreo Balls
-
Chill Thoroughly: Ensure the Oreo balls are fully chilled before dipping. This will help them maintain their shape and prevent them from falling apart in the coating.
-
Creative Coating: Mix and match decorations to make each ball unique—let your creativity flow with colors and designs that reflect your style and Easter theme.
-
Smooth Coating Secrets: For a smoother chocolate coating, add one teaspoon of coconut oil when melting chocolate chips. This will help achieve the desired glossy finish.
-
Go Easy on Color: When using food coloring, add it gradually to the melted coating. Too much can thin the mixture and make it difficult to adhere properly; you can always add more if needed.
-
Alternate Flavor Base: Feel free to substitute Oreos with Golden Oreos or other chocolate sandwich cookies to explore new flavor combinations while making your Easter Egg Oreo Balls!

Easter Egg Oreo Balls Recipe FAQs
What type of Oreo cookies should I use for Easter Egg Oreo Balls?
Absolutely! You can use classic Oreo cookies for a rich, chocolate flavor, but feel free to experiment with any chocolate sandwich cookie variant. Golden Oreos or even sugar-free cookies can make a flavorful twist!
How should I store Easter Egg Oreo Balls?
For optimal freshness, keep your Easter Egg Oreo Balls in an airtight container in the refrigerator. They will stay delicious for up to 5 days. If you’re saving them for a later date, see below for freezing info!
Can I freeze Easter Egg Oreo Balls?
Yes! To freeze, place the shaped Oreo balls on a baking sheet and freeze them until they are firm. Once set, transfer them to a freezer-safe container. They can be stored frozen for up to 2 months. When ready to enjoy, simply thaw them in the refrigerator for a few hours before serving.
What should I do if the candy coating isn’t smooth?
Very! If your candy coating isn’t smooth, it might be due to overheating or using too much food coloring. To fix this, add a teaspoon of coconut oil to the melted candy melts or chocolate chips. Stir well until smooth, and remember to add color gradually to avoid thinning the mixture too much.
Are Easter Egg Oreo Balls suitable for those with allergies?
Always check your ingredients! Easter Egg Oreo Balls contain cream cheese and cookies that may not be allergen-friendly. For a dairy-free version, opt for dairy-free cream cheese and verify that your cookie choice is free from allergens like nuts. If you have pets, be sure to keep these treats away as chocolate is toxic to dogs and cats.
How long does it take to prepare Easter Egg Oreo Balls?
Great question! On average, it takes about an hour to prepare these tasty treats. This includes 30 minutes of chilling time before dipping and decorating. So feel free to whip them up while catching your favorite show!

Easter Egg Oreo Balls: A Fun No-Bake Treat for Everyone
Ingredients
Equipment
Method
- Start by crushing the Oreo cookies into fine crumbs. Set aside your crushed Oreos.
- In a large mixing bowl, combine the crushed Oreos with softened cream cheese and mix until a thick, cohesive dough forms.
- Take about 1 tablespoon of the Oreo mixture and roll it into egg shapes. Place shaped balls onto a parchment-lined baking sheet.
- Refrigerate for 30 minutes or freeze for 15 minutes to firm up the balls.
- Melt the white candy melts in a microwave-safe bowl in 30-second intervals until smooth. Add gel food coloring if desired.
- Dip each ball into the melted coating, allowing excess to drip off before placing back on parchment.
- Decorate with sprinkles before the coating hardens and let them set at room temperature for 15 minutes.
- Store the finished Easter Egg Oreo Balls in the fridge until ready to serve.
Leave a Reply