
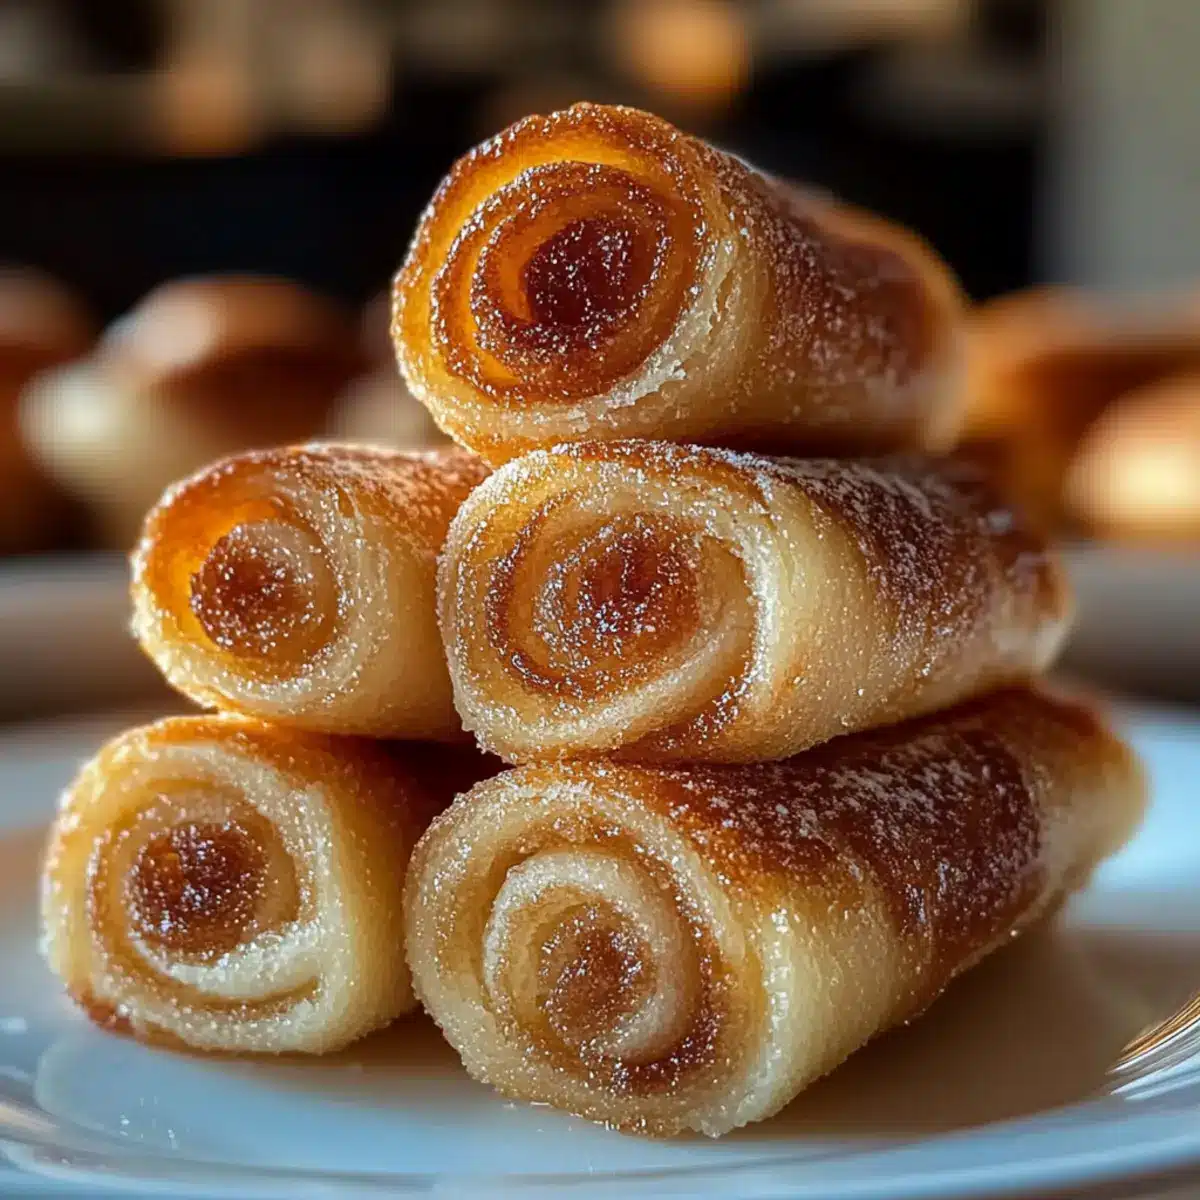
Stepping into my kitchen, the sweet aroma of baking fills the air, instantly transporting me to a cozy café on a lazy Sunday morning. That’s exactly the feeling I want to share with you through these Soft and Buttery Sugar Snails. These delightful pastries, with their tender spirals and caramelized sweetness, are the perfect treat to elevate any brunch spread or afternoon snack. Crafted with just a few simple ingredients, they promise a charming baking experience without the fuss of complicated techniques or heavy frosting. Whether you choose to keep it classic or venture into variations like Cinnamon or Lemon Sugar Snails, each bite is a reminder that homemade delights can be quick, comforting, and irresistibly delicious. Ready to awaken your inner pastry chef? Let’s dive into this scrumptious recipe together!

Why are Sugar Snails so special?
Irresistible Aroma: The moment these pastries start baking, your kitchen will be filled with a comforting, sweet scent that beckons everyone to the table.
Simple Yet Delicious: With only a few pantry staples, you can whip up these fluffy wonders without any complicated methods, making them perfect for bakers of all skill levels.
Versatile Treats: Whether you prefer a classic Cinnamon Sugar Snail or a zesty Lemon variation, these pastries adapt beautifully to your flavor preferences.
Perfect for Brunch: Impress your guests with a unique treat that rivals the traditional brunch staples, like Sugar Cookie Cheesecake, all while being quick to prepare!
Portable Delight: Ideal for sharing, these snails make wonderful snacks for gatherings—everyone will be reaching for seconds!
Sugar Snails Ingredients
-
For the Dough
-
All-purpose flour – Provides structure while keeping the dough soft; spoon and level for accuracy.
-
Yeast – Active dry or instant yeast; ensure it’s fresh for proper rise.
-
Milk – Whole milk for richness; can substitute with warmed 2% milk to activate yeast.
-
Unsalted butter – Essential for flavor and texture; use softened for easy spreading.
-
Granulated sugar – Develops the irresistible caramelized sweetness that defines these Sugar Snails.
-
Egg – Adds richness and binds the dough together.
-
Salt – Enhances flavor, balancing the sweetness; do not skip this ingredient.
-
For the Variations
-
Vanilla extract – Use for Vanilla Sugar Snails for a comforting flavor twist.
-
Cinnamon – Opt for classic Cinnamon Sugar Snails by adding this warm spice.
-
Lemon zest – A delightful addition for a refreshing citrusy flavor in Lemon Sugar Snails.
-
Finely chopped nuts – Incorporate for a Nutty Sugar Snail variation that adds texture and crunch.
Step‑by‑Step Instructions for Sugar Snails
Step 1: Prepare Dough
Warm the milk gently in a saucepan until it’s just warm to the touch, avoiding boiling. In a mixing bowl, combine the warmed milk with active dry yeast and a teaspoon of granulated sugar, then let it sit for about 5–10 minutes until foamy—this means your yeast is alive and kicking, ready for baking these delightful Sugar Snails!
Step 2: Combine Ingredients
In a large mixing bowl, whisk together the remaining granulated sugar, a beaten egg, melted unsalted butter, and salt. Gradually add in the all-purpose flour, mixing until a soft dough forms. The dough should come together easily and look slightly shaggy—this will be the base for your delicious Sugar Snails!
Step 3: Knead Dough
On a lightly floured countertop, turn out your dough and knead it for 8–10 minutes until it’s smooth and elastic. You’ll want the dough to feel slightly tacky but not sticky, which indicates that the gluten is developing nicely. Once achieved, form the kneaded dough into a ball, ready for the first rise.
Step 4: First Rise
Place the formed dough into a greased bowl and gently cover with a clean kitchen towel or plastic wrap. Let it rise in a warm, draft-free spot for about 1 to 1.5 hours, or until it has doubled in size. This process will give your Sugar Snails the perfect fluffy texture.
Step 5: Roll Out
Once the dough has risen, turn it out onto a floured surface. Using a rolling pin, roll the dough into a large rectangle, about ¼-inch thick. Aim for an even thickness to ensure all parts of your Sugar Snails rise uniformly and achieve that delightful, tender bite we love.
Step 6: Add Filling
Spread softened unsalted butter evenly over the entire surface of your rolled-out dough. Then, generously sprinkle granulated sugar (and any desired spices or variations) over the butter, ensuring an even coverage that will create layers of sweet goodness in each Sugar Snail.
Step 7: Shape Snails
Starting from the long side of your rectangle, carefully roll the dough tightly into a log. Use a sharp knife or unflavored dental floss to slice the log into even pieces, about 1 to 1.5 inches thick. This is where your beautiful Sugar Snails will take shape, ready for their second rise.
Step 8: Second Rise
Place the sliced pieces of dough into a greased baking dish, spacing them snugly but not crowded. Cover the dish again and let the snails rise in a warm area for about 30–45 minutes, until they’ve puffed up beautifully—this is crucial for achieving that irresistible soft texture.
Step 9: Bake
Preheat your oven to 350°F (175°C). Carefully uncover the baking dish and place it in the oven. Bake your Sugar Snails for 20–25 minutes, or until they turn a lovely golden brown and exude a sweet, warm aroma. You want the tops to be lightly crisp while the insides remain soft and fluffy.
Step 10: Cool
Once baked, remove the Sugar Snails from the oven and let them rest in the pan for about 10 minutes. This resting time allows the sugar to set and form that glossy finish, enhancing the delightful appearance of your homemade treats. They’re now ready to be enjoyed!
Make Ahead Options
These Sugar Snails are perfect for meal prep enthusiasts! You can prepare the dough up to 24 hours in advance by following the first four steps; simply mix and knead, then cover and refrigerate the dough after the first rise. This keeps it fresh and just as delicious! When you’re ready to bake, roll it out, add your filling, and let it rise again for 30–45 minutes before baking. Alternatively, you can shape the snails and place them in the baking dish, cover tightly, and refrigerate for up to 3 days. When it’s time to enjoy, allow them to come to room temperature before baking for the best results. This way, you’ll have bakery-quality treats with minimal effort on busy mornings!
Sugar Snails Variations & Substitutions
Embrace your creativity and make these Sugar Snails your own by trying out exciting twists and flavorful swaps!
-
Vanilla Sugar Snails: Add 1-2 teaspoons of vanilla extract to the dough for a comforting, aromatic flavor.
-
Cinnamon Sugar Snails: Sprinkle cinnamon into the sugar mixture before spreading it on the dough for a classic twist that excites the senses.
-
Lemon Sugar Snails: Incorporate the zest of one lemon into the dough or sugar for a bright, zesty finish that will awaken your taste buds. Each bite will bring a refreshing zing that lifts the overall flavor.
-
Nutty Sugar Snails: Mix finely chopped almonds or pecans into the sugar filling for a delightful crunch. This adds a lovely texture contrast that’s sure to please nut lovers in your family.
-
Glazed Sugar Snails: Drizzle a simple powdered sugar glaze over the warm pastries for an extra hint of sweetness. It can elevate your snails, making them even more irresistible as a brunch centerpiece—perfect alongside a slice of Sugar Cookie Cheesecake.
-
Dairy-Free Sugar Snails: Swap butter with coconut oil and milk with your favorite plant-based milk for a delicious dairy-free option. You won’t miss the creaminess, and it opens the door for more allergy-friendly brunches.
-
Chocolate Chip Sugar Snails: Fold in mini chocolate chips into the dough or sprinkle them on the filling for a sweet, decadent treat that chocolate lovers will go gaga over. Each roll will be a delightful surprise!
-
Spicy Sugar Snails: Add a pinch of cayenne or a dash of nutmeg for a warm flavor boost that perfectly balances with sweetness. It’s a fun way to explore new taste horizons!
Expert Tips for Sugar Snails
-
Fresh Yeast Matters: Always check the expiration date on your yeast. Fresh yeast is crucial for ensuring soft and fluffy Sugar Snails that rise beautifully.
-
Avoid Overmixing: When combining the ingredients, mix just until a soft dough forms. Overmixing can lead to tough pastries instead of the tender texture we aim for.
-
Correct Rolling Technique: Roll the dough to an even ¼-inch thickness for uniform baking. Uneven thickness can lead to some snails overbaking while others remain underdone.
-
Use Dental Floss: For neat cuts, use unflavored dental floss instead of a knife. This technique prevents squishing the dough, maintaining the roll’s shape for perfectly spiraled Sugar Snails.
-
Monitor Baking Time: Keep an eye on your Sugar Snails as they bake. They should be golden brown but not too dark—remove them from the oven to prevent dryness.
What to Serve with Soft and Buttery Sugar Snails?
Imagine a delightful brunch table spread that elevates your Sugar Snails to star status, creating an atmosphere filled with warmth and flavor.
-
Fresh Fruit Salad:
A colorful, vibrant mix of seasonal fruits adds a refreshing and juicy contrast to the rich sweetness of your pastries. -
Savory Quiche:
A slice of savory quiche provides the perfect balance to the sweet Sugar Snails, turning your brunch into a well-rounded meal. Its creamy texture complements the fluffy pastries, offering delightful harmony. -
Whipped Cream:
A dollop of softly whipped cream enhances the indulgent experience, inviting each bite to be luxuriously creamy while keeping it light. -
Herbal Tea:
A steaming cup of herbal tea, like chamomile or mint, pairs beautifully with the sugary notes, inviting warmth and relaxation to your brunch gathering. -
Caramel Drizzle:
A light drizzle of caramel sauce over the Sugar Snails intensifies their sweetness and adds a touch of elegance that’s truly irresistible. -
Espresso or Coffee:
The rich, robust flavor of espresso or a well-brewed coffee offers a delightful contrast to the pastries, making every bite even more enjoyable and grounding. -
Chocolate Sauce:
A thin pour of chocolate sauce elevates your Sugar Snails into a decadent dessert, adding a rich, bittersweet note that enhances the experience. -
Lemonade:
A refreshing glass of homemade lemonade brings a bright, zesty flavor that cuts through the sweetness and cleanses the palate, perfect for sunny brunch days.
Each pairing not only complements the soft, buttery Sugar Snails but also creates a memorable dining experience that will have everyone talking long after the last bite.
How to Store and Freeze Sugar Snails
Room Temperature: Store Sugar Snails in an airtight container for up to 2 days at room temperature to maintain their softness and delightful texture.
Fridge: Keep them in the refrigerator for up to 5 days. Use wax paper to separate layers if stacking to avoid sticking together.
Freezer: For longer storage, freeze baked Sugar Snails individually wrapped in plastic wrap for up to 3 months. Thaw at room temperature before reheating.
Reheating: Reheat in a preheated oven at 350°F (175°C) for about 5-10 minutes to restore that fresh-out-of-the-oven softness. Enjoy your sugar snails warm!
Sugar Snails Recipe FAQs
How do I choose ripe ingredients for Sugar Snails?
Absolutely! For the best flavor, make sure your milk is at a comfortable warming temperature—just warm to the touch—and ensure your yeast is fresh. Check the expiration date on the yeast package. The all-purpose flour should be fresh and free of clumps, ensuring the dough turns out soft and fluffy.
What is the best way to store leftover Sugar Snails?
Very simply! Store your Sugar Snails in an airtight container at room temperature for up to 2 days. If you want to keep them longer, you can refrigerate them for up to 5 days. To prevent sticking, I recommend placing wax paper between layers if you stack them.
Can I freeze Sugar Snails for later enjoyment?
Absolutely! To freeze your baked Sugar Snails, wrap each one individually in plastic wrap and then place them in a freezer-safe bag or container. They can be stored this way for up to 3 months. When you’re ready to enjoy them, simply thaw at room temperature and reheat in a preheated oven at 350°F (175°C) for about 5-10 minutes.
What if my Sugar Snails don’t rise properly?
Very frustrating! If your dough isn’t rising as expected, check that the yeast was fresh and properly mixed with warm milk. If the dough feels too dense, it might have been overworked or not given enough time to rise. Be patient! Allowing the dough to double in size during the first rise is crucial for fluffy pastries.
Are there any allergy concerns for Sugar Snails?
Definitely! If you’re making Sugar Snails for someone with allergies, remember they contain common allergens like gluten from the all-purpose flour and dairy from the milk and butter. You can substitute with gluten-free flour blends and dairy-free alternatives to make them more inclusive for everyone!
Can I customize the Sugar Snails for my dietary preferences?
The more, the merrier! These Sugar Snails are incredibly versatile. You can easily make them dairy-free by using plant-based butter and milk. For a refined sugar-free option, consider using coconut sugar or your favorite natural sweetener as an alternative for granulated sugar. Make them your own!
Irresistibly Soft Sugar Snails for Your Perfect Brunch Treat
Ingredients
Equipment
Method
- Warm the milk gently in a saucepan until just warm to the touch. Combine with yeast and a teaspoon of sugar; let sit for 5-10 minutes until foamy.
- In a large bowl, whisk together sugar, beaten egg, melted butter, and salt. Gradually add flour, mixing until a soft dough forms.
- Knead dough on a floured surface for 8-10 minutes until smooth and elastic. Form into a ball.
- Place dough in a greased bowl, cover, and let it rise in a warm area for 1 to 1.5 hours until doubled in size.
- Roll the dough into a large rectangle, about ¼-inch thick.
- Spread softened butter over the dough and sprinkle with sugar and any desired spices.
- Roll the dough tightly into a log and slice into 1-1.5 inch pieces.
- Place the slices into a greased baking dish, cover, and let rise for 30-45 minutes.
- Preheat oven to 350°F (175°C). Bake for 20-25 minutes until golden brown.
- Let the snails cool in the pan for 10 minutes before serving.
Leave a Reply