
As I dove into my kitchen, the aroma of spring filled the air, mingling with a hint of nostalgia. This No-Bake Easter Dirt Cake Casserole has quickly become a staple in my holiday celebrations, combining creamy layers of delightful sweetness with a crunchy Oreo crust. What I adore most about this easy no-bake dessert is how it offers both a playful presentation and a rich flavor profile that appeals to kids and adults alike. It’s perfect for those busy spring festivities when time is short, but smiles are essential. Plus, the joy of personalizing it with different pudding flavors or toppings adds an extra layer of fun. Curious about how to whip up this crowd-pleaser and make your Easter memorable? Let’s get started!

Why Is This Recipe So Special?
Simplicity: This no-bake Easter Dirt Cake Casserole is as easy as pie—or should I say cake? With just a few simple steps, you’ll have a delightful dessert ready to impress.
Rich, Creamy Layers: The combination of softened cream cheese and fluffy whipped topping creates a decadently creamy filling that contrasts beautifully with the crunchy Oreo crust.
Customizable Fun: Whether you want to switch it up with chocolate pudding or add gummy worms on top for a playful touch, the possibilities are endless!
Perfect for Gatherings: This festive treat is ideal for Easter celebrations, family dinners, or even kid’s parties, guaranteed to bring smiles all around.
Make-Ahead Magic: You can prepare this casserole in advance, saving you time and stress on busy holiday weekends!
Discover more delightful recipes like this Hobo Casserole Ground or create a heartwarming meal with Zuppa Toscana Casserole.
Easter Dirt Cake Casserole Ingredients
Here’s everything you need to create this fun and scrumptious Easter treat!
For the Crust
- Crushed Oreo Cookies – Provides a sturdy base for the dessert; substitute with gluten-free cookies if needed.
For the Cream Filling
- Softened Cream Cheese – Adds smoothness and a rich texture; ensure it’s fully softened for easy mixing.
- Unsalted Butter – Contributes richness to the cream mixture; can be swapped with margarine for a dairy-free option.
- Powdered Sugar – Sweetens the filling; use less for a mildly sweet version or if you prefer less sweetness.
- Instant Vanilla Pudding Mix – Thickens the filling for the creamy texture; can be swapped for chocolate pudding for a flavor twist.
- Cold Milk – Activates the pudding mix; any milk will do, dairy or non-dairy works perfectly.
- Whipped Topping (Cool Whip) – Creates a light, fluffy texture; feel free to substitute with homemade whipped cream for a fresh touch.
For the Decoration
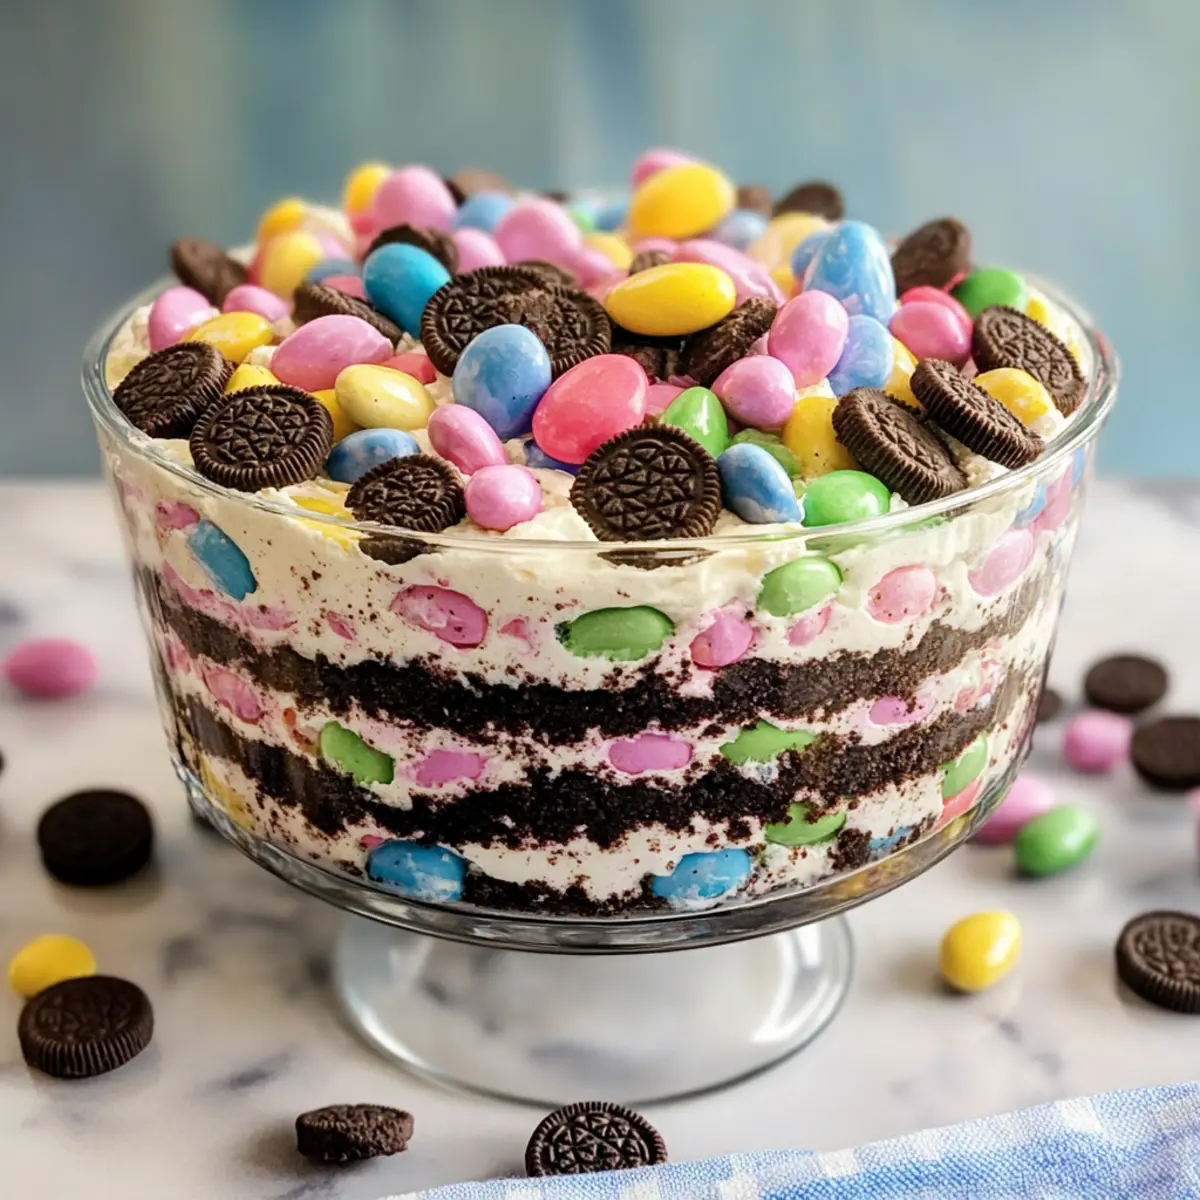
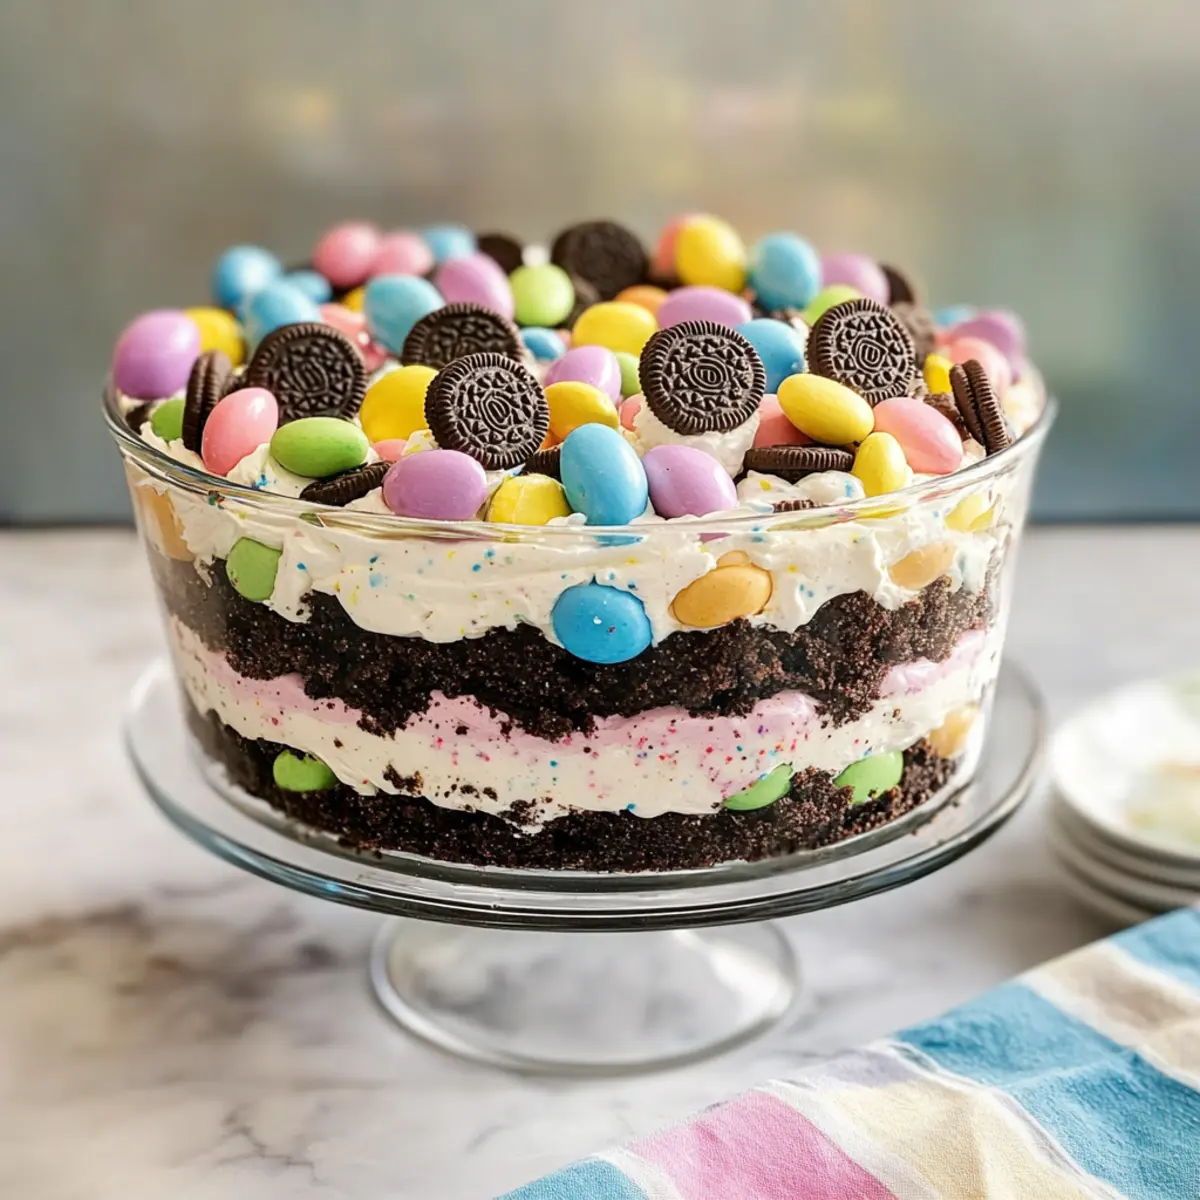
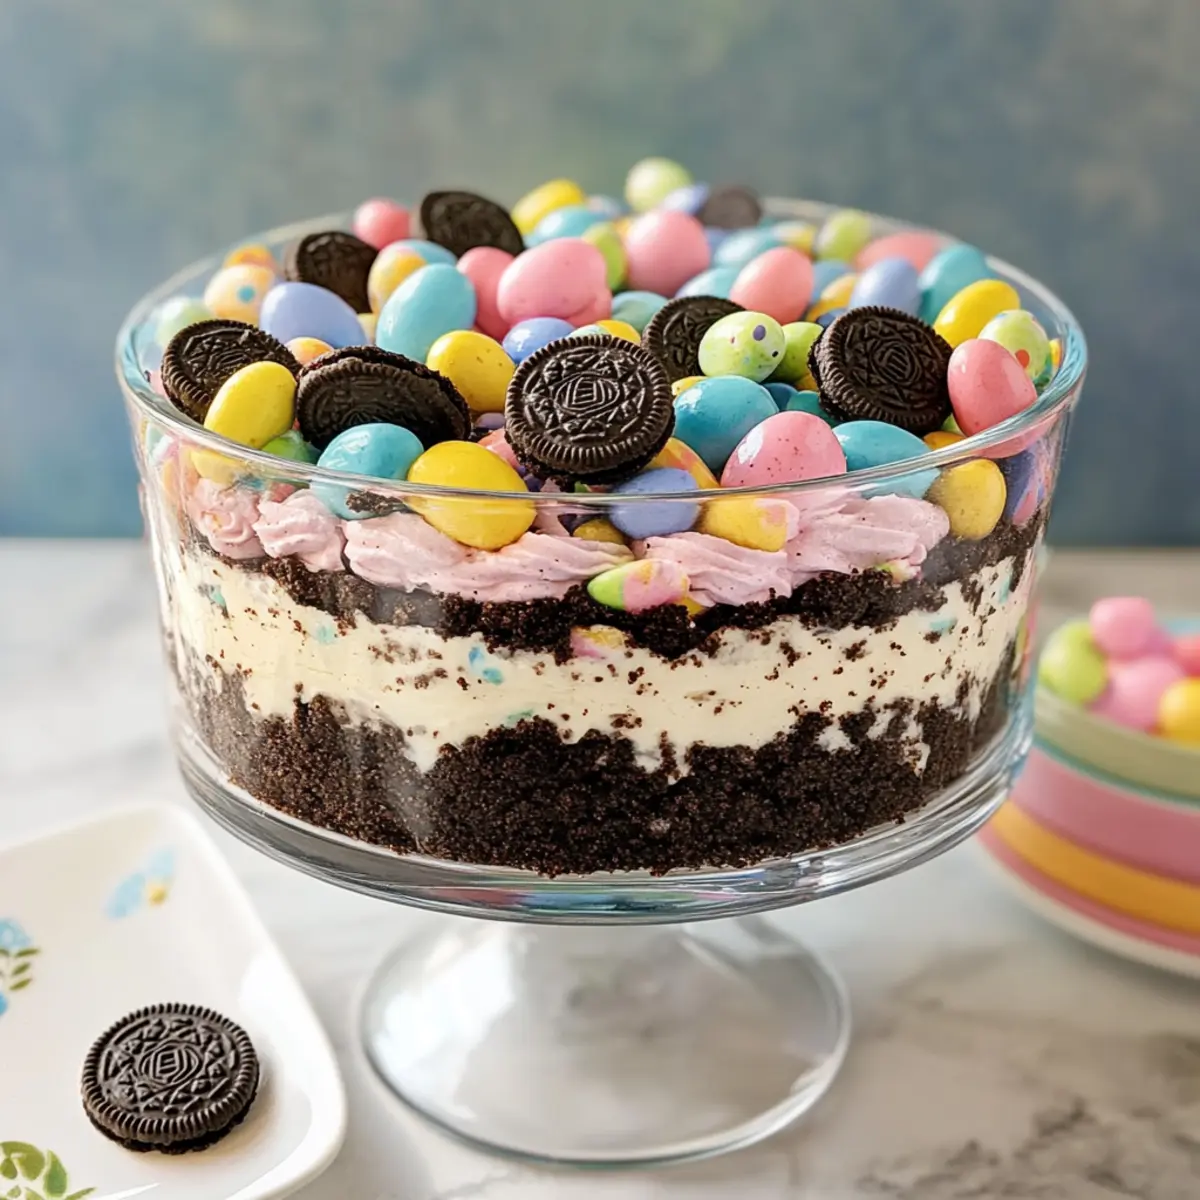
- Pastel Candy-Coated Chocolates – Adds delightful color to your dessert; alternatives include mini chocolate eggs or seasonal sprinkles for variety.
- Mini Oreo Cookies – Used for topping to enhance the crunch and visual appeal; optional based on your preference.
Prepare to create this indulgent no-bake Easter Dirt Cake Casserole and watch as it becomes a cherished favorite at your spring gatherings!
Step‑by‑Step Instructions for Easter Dirt Cake Casserole
Step 1: Prepare the Crust
Begin by finely crushing the Oreo cookies using a food processor or a zip-top bag and rolling pin until they resemble sand. Reserve ½ cup of the crumbs for the topping. Firmly press the remaining crumbs into the bottom of a 9×13 inch baking dish to form a solid crust, ensuring it’s evenly spread for stability.
Step 2: Make the Filling
In a large mixing bowl, use an electric mixer to beat the softened cream cheese, unsalted butter, and powdered sugar together until the mixture is smooth and creamy, approximately 2-3 minutes. Once combined, gently fold in the thawed whipped topping until it’s fluffy and well mixed, creating a luscious filling for your Easter Dirt Cake Casserole.
Step 3: Combine Pudding
In an additional bowl, whisk together the instant vanilla pudding mix with 2 cups of cold milk until the mixture thickens, about 5 minutes. It should have a pudding-like consistency that holds its shape. Carefully fold the thickened pudding into the cream cheese mixture, making sure everything is well combined and has a uniform texture.
Step 4: Layer the Casserole
Evenly spread the creamy filling over the prepared Oreo crust using a spatula to smooth the top. This layer will be the heart of your Easter Dirt Cake Casserole. Sprinkle the reserved Oreo crumbs on top, followed by mini Oreos and colorful pastel candies for a festive touch, ensuring a bright and cheerful look.
Step 5: Chill
Cover the dish tightly with plastic wrap or a lid, and refrigerate for at least 2 hours, allowing the filling to set properly. This chilling time enhances the texture and helps the flavors meld together. When you’re ready to serve, the casserole should be firm enough to slice while still maintaining its creamy allure.
Expert Tips for Easter Dirt Cake Casserole
-
Soften Ingredients Wisely: Allow your cream cheese and butter to reach room temperature for easy mixing; this prevents lumps in your creamy filling.
-
Crush Uniformly: Ensure your Oreo cookies are finely crushed for a sturdy base that holds together well. Uneven chunks can lead to a crumbly crust.
-
Chill, Chill, Chill: If possible, let the casserole chill longer than 2 hours. This extra time allows flavors to blend and makes for cleaner slices when you serve the Easter Dirt Cake Casserole.
-
Customization is Key: Experiment with different pudding flavors beyond vanilla. Chocolate offers a richer taste, while banana could add a delightful twist.
-
Presentation Counts: Use a variety of toppings, like colorful sprinkles or fresh fruit, to make your Easter Dirt Cake Casserole visually stunning—it’s all about that festive look!
Easter Dirt Cake Casserole Variations
Customize your Easter Dirt Cake Casserole with delightful twists that add fun flavors and textures to this beloved dessert!
-
Chocolate Twist: Swap the vanilla pudding for chocolate pudding for a rich, decadent flavor that chocolate lovers will adore.
-
Gluten-Free Delight: Use gluten-free Oreo cookies to make this recipe suitable for gluten-sensitive friends while keeping that beloved crunch.
-
Dairy-Free Option: Substitute the cream cheese and whipped topping with non-dairy alternatives. It will still be creamy and delicious without the dairy!
-
Gummy Worms: Top your casserole with gummy worms for a childhood-inspired touch that adds a playful vibe, making it a hit with kids.
-
Fruit Surprise: Add fresh strawberries or raspberries between layers for a fruity surprise that brings a refreshing twist to this sweet treat.
-
Nutty Crunch: Incorporate chopped nuts like pecans or walnuts into the crust for an added crunch and nutty flavor that contrasts beautifully.
-
Caramel Drizzle: Drizzle caramel sauce over the top before serving to introduce an indulgent sweetness that pairs perfectly with the creamy layers.
-
Festive Sprinkles: Don’t forget to sprinkle seasonal sprinkles over the decorations for a pop of color and fun, enhancing the presentation for your celebrations!
Remember, you can enjoy this fun dessert anytime! For more easy and scrumptious recipes, check out my beloved Tater Tot Casserole or whip up my comforting Mac and Cheese Meatloaf Casserole.
Storage Tips for Easter Dirt Cake Casserole
- Fridge: Store any leftovers covered in the refrigerator for up to 3 days. Make sure it’s tightly sealed to maintain its freshness and flavor.
- Freezer: Avoid freezing the casserole as it can alter the creamy texture and affect overall quality. It’s best enjoyed fresh!
- Reheating: If needed, serve chilled straight from the fridge. The Easter Dirt Cake Casserole is intended to be served cold, enhancing its delightful taste.
- Make-Ahead: This dessert can be prepared a day in advance; just keep it well covered in the fridge to save time before your gathering.
What to Serve with Easter Dirt Cake Casserole
As you savor the delightful layers of this no-bake dessert, consider these perfectly complementary dishes and drinks to craft a complete spring feast.
-
Creamy Mashed Potatoes: The smooth, velvety texture of mashed potatoes makes a lovely contrast to the crunchy casserole, adding heartiness to your meal.
-
Fresh Garden Salad: Tossed with a light vinaigrette, this refreshing salad provides a crisp and vibrant balance, enhancing the sweetness of the dessert.
-
Grilled Veggies: Smoky, charred vegetables like peppers and zucchini bring a taste of the grill that pairs deliciously with the rich Easter Dirt Cake Casserole.
-
Honey Glazed Carrots: Their natural sweetness echoes the dessert while contributing a pop of color and a burst of flavor to your plate.
-
Lemonade Iced Tea: This invigorating beverage marries the tartness of lemon with the sweetness of tea, making it a perfect springtime refresher alongside dessert.
-
Berry Parfait: Layered with yogurt, granola, and fresh berries, a fruit parfait offers a light, tangy finish that cleanses the palate beautifully after a rich meal.
-
Chocolate Chip Cookies: Simple yet beloved, these warm cookies can add a nostalgic touch, especially for those with a sweet tooth after the casserole.
Make Ahead Options
These Easter Dirt Cake Casserole preparations are a dream for busy home cooks looking to save time! You can easily prepare the crust and filling up to 24 hours in advance, which allows flavors to blend beautifully. Simply crush the Oreo cookies and press them into your baking dish, then mix the cream filling and layer it as instructed. To maintain the casserole’s delightful texture, cover it tightly with plastic wrap in the refrigerator. When you’re ready to serve, just top it with the reserved crumbs, mini Oreos, and pastel candies, allowing for a festive presentation that tastes just as delicious, all while saving precious time for your celebrations!
Easter Dirt Cake Casserole Recipe FAQs
How do I select the right Oreo cookies for the crust?
Absolutely! Opt for classic Oreo cookies for that authentic flavor, but feel free to choose gluten-free Oreos if you’re catering to dietary needs. Make sure they’re fresh; look for packages without dark spots or expired dates.
What’s the best way to store leftover Easter Dirt Cake Casserole?
You can store any leftovers covered in the refrigerator for up to 3 days. I often keep mine in an airtight container or tightly wrapped in plastic wrap to maintain its delicious creaminess and flavor.
Can I freeze leftover Easter Dirt Cake Casserole?
I don’t recommend freezing this casserole, as it might compromise the creamy texture and overall taste. This treat is best enjoyed fresh, so it’s ideal to make only as much as you plan to eat!
What if my cream cheese is lumpy after mixing?
Oh no! If your cream cheese doesn’t mix smoothly, it may not have been softened enough. Next time, try letting it sit at room temperature for an hour or so. If you still encounter lumps, consider blending the mixture vigorously or using a hand mixer to achieve a creamy consistency.
Are there any dietary considerations for this recipe?
Certainly! For those who are lactose intolerant, substitute the cream cheese and whipped topping with dairy-free alternatives. Always double-check the labels of the Oreo cookies to ensure they’re suitable for anyone with gluten allergies. I often use gluten-free cookies for gatherings to accommodate all guests!
How can I customize the pudding flavor in my Easter Dirt Cake Casserole?
Very easy! To switch up the flavor, simply replace the instant vanilla pudding mix with chocolate or butterscotch pudding mix. After whisking it with cold milk, fold it into your cream cheese mixture as per the recipe. You can even combine flavors for a unique twist!
Easter Dirt Cake Casserole: Irresistibly Creamy and Fun!
Ingredients
Equipment
Method
- Begin by finely crushing the Oreo cookies using a food processor or a zip-top bag and rolling pin until they resemble sand. Reserve ½ cup of the crumbs for the topping. Firmly press the remaining crumbs into the bottom of a 9x13 inch baking dish to form a solid crust.
- In a large mixing bowl, use an electric mixer to beat the softened cream cheese, unsalted butter, and powdered sugar together until the mixture is smooth and creamy, approximately 2-3 minutes. Gently fold in the thawed whipped topping until it’s fluffy and well mixed.
- In an additional bowl, whisk together the instant vanilla pudding mix with 2 cups of cold milk until the mixture thickens, about 5 minutes. Carefully fold the thickened pudding into the cream cheese mixture.
- Evenly spread the creamy filling over the prepared Oreo crust using a spatula to smooth the top. Sprinkle the reserved Oreo crumbs on top, followed by mini Oreos and colorful pastel candies.
- Cover the dish tightly with plastic wrap or a lid, and refrigerate for at least 2 hours for the filling to set properly.
Leave a Reply