
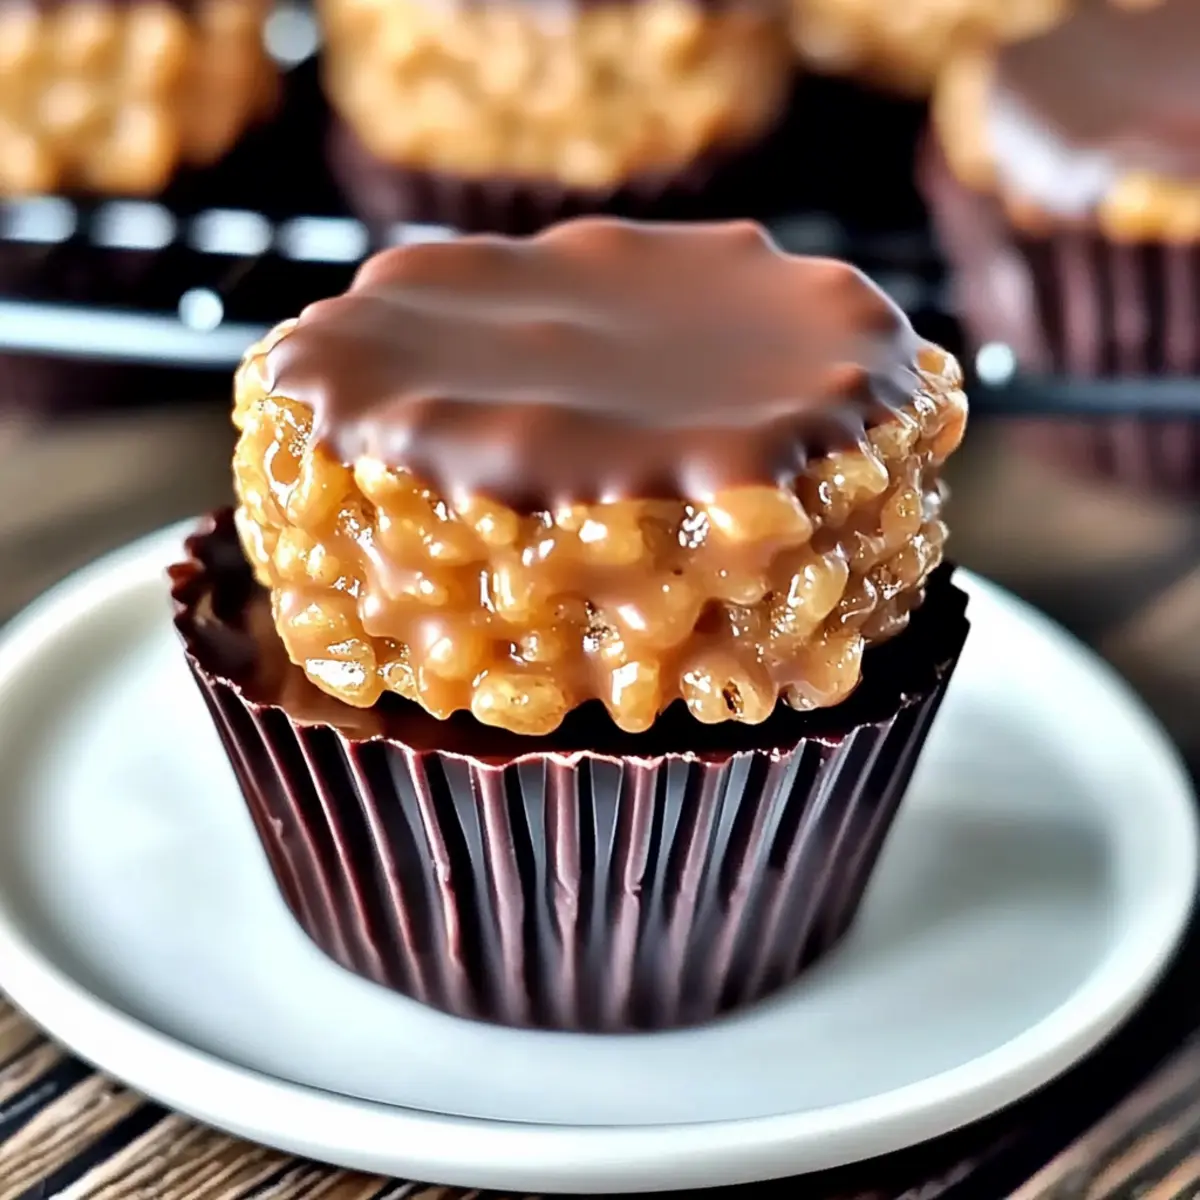
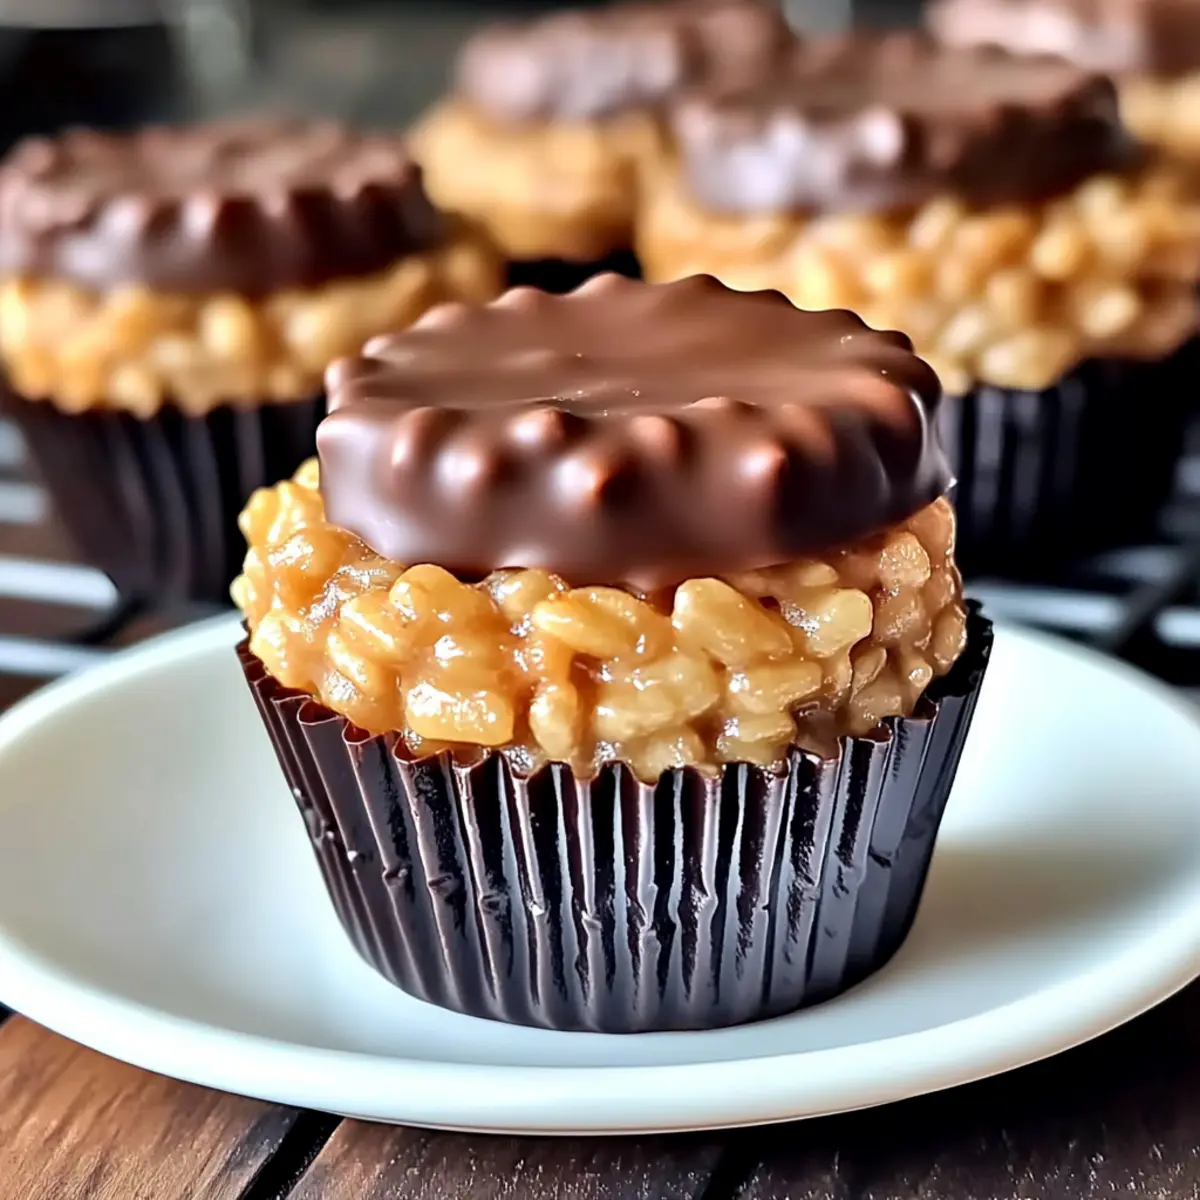
Just the other day, I was reminiscing about the carefree days of my childhood, when school days were punctuated by sweet goodies tucked into lunchboxes. One treat that always made my heart skip a beat? Chocolate Peanut Butter Rice Krispie Cups! These delightful, no-bake desserts combine rich chocolate and creamy peanut butter with the satisfying crunch of Rice Krispies. Not only are they quick and easy to whip up, but they also make for a perfect gluten-free indulgence that satisfies any sweet tooth. Whether you’re hosting a gathering or just want to treat yourself, these little cups are sure to impress while also allowing for endless variations to suit your dietary needs. So, are you ready to bring a bit of nostalgia into your kitchen? Let’s dive into this irresistible recipe!
Why are these rice krispie cups special?
Nostalgic Delight: These Chocolate Peanut Butter Rice Krispie Cups are not just a dessert, but a heartfelt trip down memory lane for both kids and adults alike.
No-Bake Convenience: With a quick preparation method, you can whip up these tasty treats without turning on the oven—perfect for last-minute cravings!
Customizable Goodness: Feel free to swap peanut butter for almond or cashew, or play with different types of chocolate to create a unique twist.
Gluten-Free Option: Made with certified gluten-free Rice Krispies, these cups are a guilt-free indulgence for everyone!
Crowd-Pleasing Treat: Whether you’re hosting a party or simply want a sweet pick-me-up, these cups consistently impress and leave guests asking for seconds! Don’t forget to try them alongside a scoop of ice cream for an unforgettable dessert experience!
Chocolate Peanut Butter Rice Krispie Cups Ingredients
For the Cups
• Smooth Peanut Butter – Adds creaminess and a rich flavor; substitute with natural peanut butter for a less sweet option.
• Honey or Light Corn Syrup – Acts as a binding agent for the cereal mix; honey is preferable for a natural sweetener alternative.
• Vanilla Extract – Enhances flavor depth; no substitutions necessary, but can be omitted for a simpler taste.
• Rice Krispies Cereal – Provides crunch and texture; use gluten-free certified rice cereal if needed.
For the Topping
• Semi-Sweet Chocolate Chips – The top layer providing sweetness and richness; dark chocolate can be used for a healthier variant.
• Unsalted Butter – Helps to melt the chocolate for a smooth topping; can be substituted with coconut oil for a vegan option.
Experience the delightful combination of flavors with these Chocolate Peanut Butter Rice Krispie Cups that bring a touch of nostalgia to your table!
Step‑by‑Step Instructions for Chocolate Peanut Butter Rice Krispie Cups
Step 1: Combine Peanut Butter and Sweetener
In a medium saucepan, set over low heat, combine 1 cup of smooth peanut butter and ½ cup of honey (or light corn syrup). Stir continuously for about 3-5 minutes until the mixture is smooth and fully blended, ensuring it doesn’t bubble. Once melted and creamy, remove from heat, letting it cool slightly before moving to the next step.
Step 2: Add Vanilla
Now, stir in 1 teaspoon of vanilla extract to the warm peanut butter mixture, enhancing the flavor depth. Mix thoroughly with a spatula until it’s well-combined. The mixture should have a delightful aroma as it cools down, setting the stage for the scrumptious Chocolate Peanut Butter Rice Krispie Cups.
Step 3: Mix with Rice Krispies
In a large mixing bowl, pour the creamy peanut butter mixture over 6 cups of Rice Krispies cereal. Gently fold the cereal into the mixture using a spatula or wooden spoon, ensuring each piece is thoroughly coated. This process should take about 2-3 minutes, and you’ll see that the cereal takes on a lovely, glossy appearance.
Step 4: Prepare Muffin Tin
Line a muffin tin with paper liners to create easy-to-remove cups. Using your hands or a spoon, press the cereal mixture firmly into each cup, filling them about three-quarters full. Aim for an even layer to ensure they hold together well, and this step should take around 5 minutes.
Step 5: Melt Chocolate
In a microwave-safe bowl, combine 1 cup of semi-sweet chocolate chips and 2 tablespoons of unsalted butter. Microwave the mixture in 30-second intervals, stirring in between until smooth and melted, which usually takes about 1-2 minutes total. Keep a close eye while melting to prevent any burning.
Step 6: Top with Chocolate
Using a spoon, generously drizzle the melted chocolate mixture over each Rice Krispie cup, spreading it evenly to cover the tops completely. Ensure each cup has a nice layer of chocolate, making them even more irresistible. This whole topping process should take approximately 5 minutes.
Step 7: Chill
Place the filled muffin tin in the refrigerator and let the Chocolate Peanut Butter Rice Krispie Cups chill for at least 30 minutes, or until the chocolate is fully set. The cool temperature will help solidify the chocolate and keep the cups intact for serving.
Step 8: Serve
Once set, remove the cups from the muffin tin by gently pulling on the paper liners. They can be enjoyed chilled straight from the fridge or allowed to come to room temperature. These delightful Chocolate Peanut Butter Rice Krispie Cups are now ready to bring a smile to your face!
How to Store and Freeze Chocolate Peanut Butter Rice Krispie Cups
Fridge: Store your Chocolate Peanut Butter Rice Krispie Cups in an airtight container in the refrigerator for up to one week. This keeps them fresh and ready for a sweet snack anytime!
Freezer: For long-term storage, place the cups in a freezer-safe container or wrap them tightly in plastic wrap—enjoy them for up to 3 months.
Thawing: When you’re ready to enjoy, simply remove the cups from the freezer and let them thaw at room temperature for about 15-20 minutes before serving.
Reheating: These cups can be enjoyed chilled. If you prefer them warm, microwave them for 10-15 seconds to slightly soften the chocolate without melting it entirely.
What to Serve with Chocolate Peanut Butter Rice Krispie Cups
Creating the perfect dessert experience is all about delightful pairings that enhance your sweet treats.
- Creamy Ice Cream: A scoop of vanilla or chocolate ice cream adds a delightful creaminess that contrasts beautifully with the crunchy cups.
- Fresh Fruit Salad: Light and refreshing, a mix of berries or tropical fruits brings a burst of freshness and color to your dessert table.
- Hot Chocolate: Cozy up with a warm cup of hot chocolate to complement the rich flavors of the chocolate peanut butter cups; spice it up with a hint of cinnamon!
- Nutty Granola Bars: Serve alongside homemade granola bars for added texture and a wholesome touch to balance the sweetness of the Rice Krispie cups.
- Whipped Cream: A dollop of freshly whipped cream serves as a light, airy topping that complements the rich flavors and adds a touch of elegance.
- Beverage Pairing: Consider a chilled glass of almond milk or a fruity mocktail to cleanse the palate between bites and add a festive sparkle to your spread.
Mix and match these options to create an unforgettable dessert that evokes nostalgia while impressing your guests at every gathering!
Expert Tips for Chocolate Peanut Butter Rice Krispie Cups
-
Natural Peanut Butter: Use natural peanut butter for a richer, more authentic flavor without unnecessary sugars. This helps your Chocolate Peanut Butter Rice Krispie Cups taste just right!
-
Sweetener Swap: If you’re opting for a healthier version, substitute corn syrup with honey or agave to maintain that lovely sticky texture without the extra sugar.
-
Add a Pinch of Salt: Sprinkle a pinch of sea salt into the chocolate mixture to elevate the overall flavor. It will enhance the sweetness and create a more balanced taste.
-
Use Quality Chocolate: Choose good-quality semi-sweet chocolate chips for the topping; it makes a world of difference in flavor and richness in your dessert.
-
Gluten-Free Assurance: Ensure you’re using certified gluten-free Rice Krispies to cater to those with gluten sensitivities, making your treats inclusive for everyone.
-
Customization Options: Feel free to mix in nuts, seeds, or even dried fruit for fun variation. This adds texture and nutritional value, taking your Chocolate Peanut Butter Rice Krispie Cups to another level!
Chocolate Peanut Butter Rice Krispie Cups Variations
Feel free to get creative with these delectable cups and make them your own, adding delightful twists to match your taste buds!
-
Nut Alternatives: Swap peanut butter for almond or cashew butter for a unique flavor profile. This simple change can introduce exciting new tastes that surprise your palate.
-
Chocolate Choices: Experiment with different chocolates, like dark, white, or even dairy-free varieties. Each option brings its own unique sweetness and richness, making every batch a new adventure!
-
Topping Upgrades: Top with caramel drizzle, coconut shavings, or colorful sprinkles for added visual appeal and flavor flair. Each addition elevates your cups into a charming dessert centerpiece that’s hard to resist.
-
Texture Twists: Add chopped nuts or seeds to the rice mixture for extra crunch and nutrition. The layers of flavors intertwined with those crunchy bits create a more satisfying experience.
-
Spicy Kick: Incorporate a hint of cinnamon or cayenne pepper into your chocolate for a surprising twist. This subtle heat can beautifully balance the sweetness, making each bite a delightful surprise!
-
Veggie Delight: Blend in some finely chopped kale or spinach to boost nutritional value. Your guests will be none the wiser, but the added greens offer incredible benefits!
-
Seasonal Flavors: For a festive touch, incorporate pumpkin spice or ginger during the fall season, or use peppermint extract around the holidays. These seasonal flavors will make your cups feel extra special all year round.
-
Indulgent Pairings: Serve these treats alongside a scoop of irresistible air fryer fried rice for a sweet and savory combo that delights both kids and adults alike!
Make sure to have fun with these variations—also consider trying them paired with an enchanting dessert like my delicious chocolate delight for a rich conclusion to your meal!
Make Ahead Options
These Chocolate Peanut Butter Rice Krispie Cups are perfect for busy home cooks looking to streamline their dessert preparation! You can prepare the Rice Krispie mixture and press it into the muffin tin up to 24 hours in advance; simply cover the tin with plastic wrap to maintain freshness. The melted chocolate topping can also be made ahead; just store it in an airtight container in the refrigerator. When you’re ready to serve, reheat the chocolate gently to restore its smoothness before spooning it over the chilled cups. With this method, you can enjoy these indulgent treats with minimal last-minute fuss, making your dessert experience just as delightful!
Chocolate Peanut Butter Rice Krispie Cups Recipe FAQs
What type of peanut butter should I use?
I highly recommend using natural smooth peanut butter as it lends a richer flavor and is less sweet than conventional varieties. It creates a more authentic taste in your Chocolate Peanut Butter Rice Krispie Cups!
How should I store my rice krispie cups?
To keep your Chocolate Peanut Butter Rice Krispie Cups fresh, store them in an airtight container in the refrigerator for up to one week. This method ensures they stay moist and delicious whenever you’re ready for a sweet treat!
Can I freeze these rice krispie cups?
Absolutely! For longer storage, place the cups in a freezer-safe container or wrap them tightly in plastic wrap. They can last in the freezer for up to 3 months. When you’re ready to enjoy, let them thaw at room temperature for about 15-20 minutes.
What if the mixture is too dry?
If you find your peanut butter mixture is too dry, it may be due to using a different brand of peanut butter or not enough sweetener. You can add a splash more honey or even a little warm water to help bind it together better. Mix well and adjust until it reaches the desired consistency.
Are these rice krispie cups gluten-free?
Yes, these Chocolate Peanut Butter Rice Krispie Cups can be made gluten-free by using certified gluten-free Rice Krispies. This makes them suitable for those with gluten sensitivities, allowing everyone to indulge in this delightful treat!
Chocolate Peanut Butter Rice Krispie Cups for Sweet Nostalgia
Ingredients
Equipment
Method
- In a medium saucepan, set over low heat, combine 1 cup of smooth peanut butter and ½ cup of honey (or light corn syrup). Stir continuously for about 3-5 minutes until the mixture is smooth and fully blended.
- Stir in 1 teaspoon of vanilla extract to the warm peanut butter mixture, mixing thoroughly with a spatula.
- In a large mixing bowl, pour the creamy peanut butter mixture over 6 cups of Rice Krispies cereal and gently fold until each piece is coated.
- Line a muffin tin with paper liners and press the cereal mixture firmly into each cup, filling them about three-quarters full.
- In a microwave-safe bowl, combine 1 cup of semi-sweet chocolate chips and 2 tablespoons of unsalted butter. Microwave in 30-second intervals, stirring until smooth.
- Drizzle the melted chocolate over each Rice Krispie cup, spreading it to cover the tops completely.
- Place the filled muffin tin in the refrigerator and let them chill for at least 30 minutes, or until the chocolate is fully set.
- Remove the cups from the muffin tin by gently pulling on the paper liners and enjoy!
Leave a Reply