
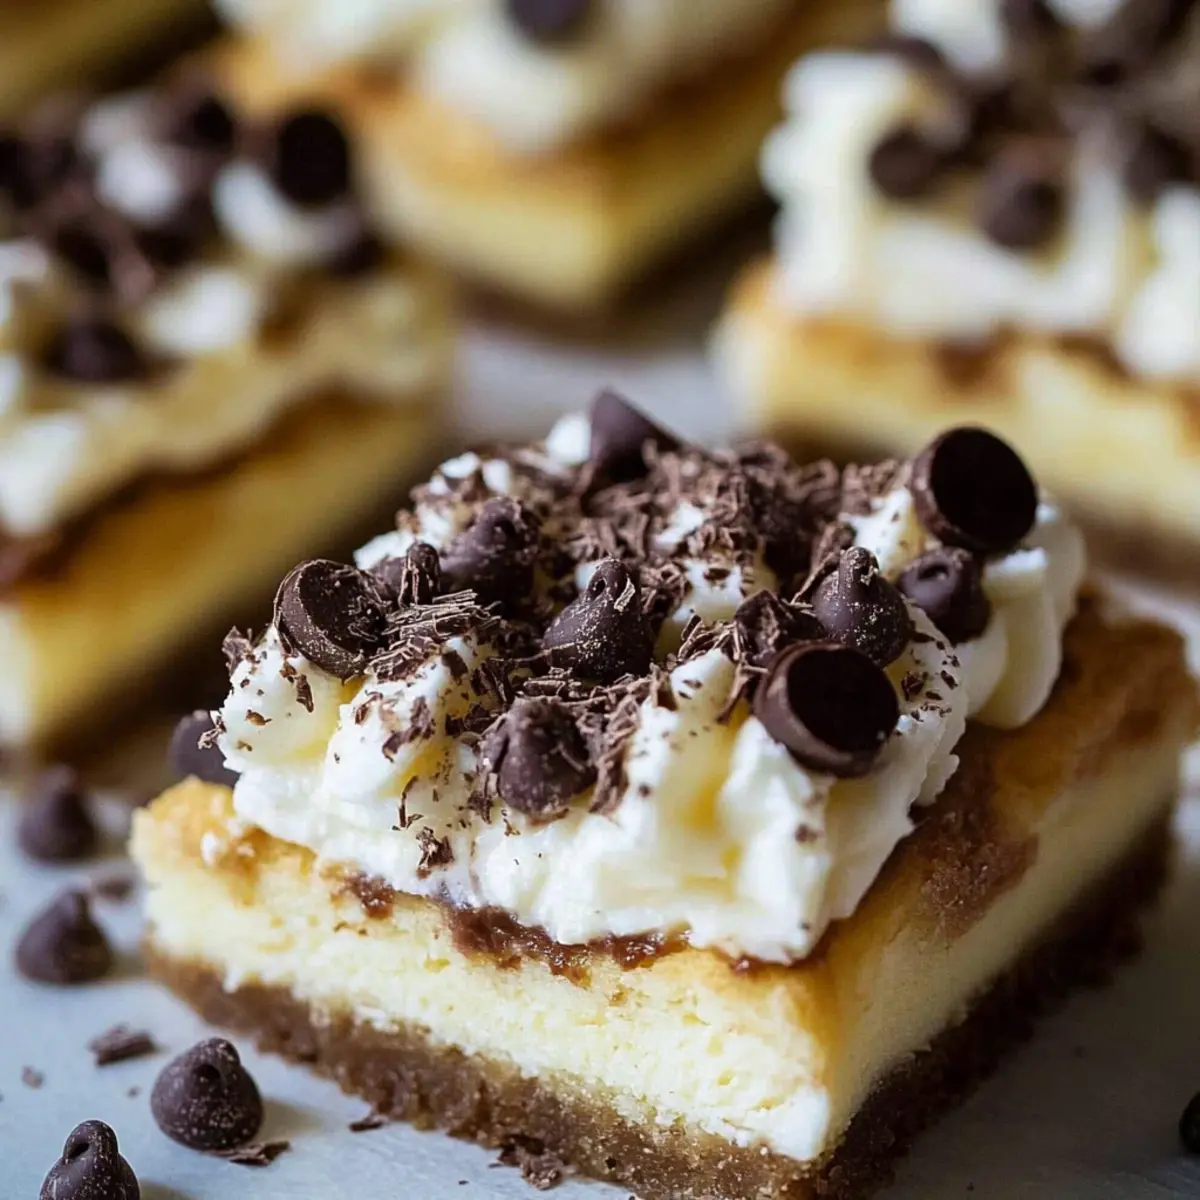
As the warm aroma of baked goods fills my kitchen, I can’t help but think about my growing love affair with Italian desserts, especially these indulgent Cannoli Bars. Imagine taking the luscious flavors of traditional cannoli—creamy ricotta, mini chocolate chips, and a zesty hint of citrus—and transforming them into an easy-to-make dessert that’s perfect for any occasion. Not only are these Cannoli Bars a delightful crowd-pleaser, but they also save you time with their quick prep and Bake once, enjoy later benefits. They’re ideal for parties, holidays, or simply enjoying a sweet moment at home. So, ready to elevate your dessert game? Let’s get baking!
Why are Cannoli Bars so special?
Simplicity at its Best: This recipe is a breeze, requiring just basic baking skills to whip up these delicious bars.
Creamy, Dreamy Filling: The rich combination of ricotta and cream cheese achieves a level of creaminess that mimics traditional cannoli, giving you the authentic taste without the fuss.
Versatile Indulgence: Enjoy these Cannoli Bars chilled or at room temperature, making them a perfect fit for any gathering or cozy night in.
Crowd-Pleasing Treat: With sweet mini chocolate chips and a hint of citrus zest, everyone will be asking for seconds—and there’s no shame in serving this delightful dessert at your next potluck!
Make Ahead Magic: You can prepare them in advance and store in your fridge, just like my cherished Ingredient Chocolate Oat cookies. Enjoy the sweet flavors today or tomorrow; these bars only get better with time!
Cannoli Bars Ingredients
For the Crust
- All-purpose flour – Essential for a sturdy cookie base; gluten-free flour can be used for a gluten-free option.
- Granulated sugar – Sweetens the crust; brown sugar adds a deeper flavor if desired.
- Unsalted butter – Provides richness and moisture; ensure it’s melted and cooled before mixing.
- Kosher salt – Enhances the overall flavor; sea salt is a suitable substitute.
- Vanilla extract – Contributes a wonderful aroma and depth; use pure vanilla for the best results.
- Ground cinnamon – Adds warmth and a hint of spice; feel free to omit for a milder flavor.
For the Filling
- Whole milk ricotta cheese – The star ingredient for creaminess; drain excess moisture if too wet.
- Cream cheese – Boosts richness of the filling; mascarpone can be used for a different texture.
- Powdered sugar – Adds smooth sweetness to the filling; adjust to your taste preference.
- Large eggs – Binds the filling and creates structure; opt for organic or free-range for better quality.
- Almond extract – Optional but highly recommended for added flavor complexity.
- Zest of orange or lemon – Brightens the filling and adds citrus notes; substitute with another citrus zest if preferred.
- Mini chocolate chips – Introduces sweetness and texture; chopped dark chocolate offers a richer taste option.
For the Topping
- Pistachios – Optional for an additional crunch and color; nuts like walnuts work as substitutes or omit for nut-free.
Miscellaneous
- Parchment paper – Used to line the baking pan for easy removal.
- Nonstick spray or butter – For greasing the pan beneath the parchment, ensuring nothing sticks.
With these Cannoli Bars ingredients at your fingertips, you’re well on your way to creating a sweet masterpiece that’s sure to be a hit! Dive into the world of homemade desserts and let the celebration of flavors begin!
Step‑by‑Step Instructions for Cannoli Bars
Step 1: Preheat and Prepare
Start by preheating your oven to 350°F (175°C). While it’s warming up, line a 9×9-inch baking pan with parchment paper, allowing some to hang over the edges for easy removal. Lightly grease the parchment with nonstick spray or butter to prevent sticking. This ensures that your delicious Cannoli Bars will come out without a hitch!
Step 2: Make the Crust Mixture
In a medium mixing bowl, combine all-purpose flour, granulated sugar, ground cinnamon, and kosher salt. Stir the dry ingredients together until well mixed. Next, pour in the melted and cooled unsalted butter along with vanilla extract, blending until the mixture resembles coarse crumbs. This step builds the foundation of flavor for your Cannoli Bars.
Step 3: Bake the Crust
Transfer the crust mixture into your prepared baking pan, pressing it down evenly with your fingers or a spatula. Ensure it’s compact, as this will create the perfect base. Place the pan in your preheated oven and bake for 10–12 minutes. The crust should be set but remain light in color, creating a lovely chewy texture for your bars.
Step 4: Prepare the Creamy Filling
While your crust is baking, work on the filling. In a large mixing bowl, beat cream cheese until completely smooth, then gradually mix in the whole milk ricotta until well combined. It’s essential that the filling is creamy for those delightful Cannoli Bars. This rich mixture is what brings all the traditional flavors together beautifully.
Step 5: Add Sweetness and Flavor
To the ricotta and cream cheese mixture, stir in powdered sugar, a pinch of salt, vanilla extract, almond extract, and your choice of citrus zest. Beat until the mixture is creamy and fully combined. Taste and adjust the sweetness as needed. This flavorful filling will make your Cannoli Bars truly irresistible!
Step 6: Incorporate the Eggs and Chocolate
Now, add the large eggs, one at a time, mixing on low speed until just incorporated after each addition. Lastly, gently fold in the mini chocolate chips for that signature sweetness and texture. Be careful not to overmix; you want your filling to remain light and fluffy, adding to the indulgent nature of these Cannoli Bars.
Step 7: Combine and Top
Once your filling is well-prepared, pour it over the pre-baked crust, smoothing it out with a spatula. If desired, sprinkle chopped pistachios on top for added crunch and a pop of color. This adds both flavor and visual appeal to your gorgeous Cannoli Bars, making them even more tempting.
Step 8: Bake to Perfection
Carefully place the pan back into the oven and bake for 30–35 minutes. The edges should be set and golden, while the center will have a slight wobble—this indicates that the filling is still creamy and luscious. Keep an eye on it towards the end to avoid overbaking, which could dry out the filling.
Step 9: Cool and Chill
Once done, allow the Cannoli Bars to cool in the pan at room temperature for about 30 minutes. Then, refrigerate them for at least 3 hours to set properly. Chilling intensifies the flavors and makes for easy slicing, ensuring you get that perfect, creamy slice every time.
Cannoli Bars Variations & Substitutions
Customize your Cannoli Bars to suit your taste with these delightful options!
-
Gluten-Free: Swap all-purpose flour with gluten-free flour for a totally inclusive dessert. You’ll still enjoy the same luscious flavors.
-
Lighter Filling: Use part-skim ricotta instead of whole milk for a lighter filling. The texture may vary slightly, but the taste remains delightful.
-
Nut-Free Option: Omit the pistachios or replace them with sunflower seeds for a similar crunch without the nuts—perfect for those with allergies.
-
Chocolate Twist: Substitute mini chocolate chips with chopped dark chocolate or even white chocolate for a uniquely sweet twist. Elevate the dessert experience with every bite!
-
Unique Extracts: Experiment with coconut extract or even maple extract instead of almond for a flavor profile that surprises and delights your guests.
-
Zesty Variations: Instead of orange or lemon zest, try lime or grapefruit zest for a refreshing citrus twist that adds a refreshing contrast to the rich filling.
-
Mix-In Magic: Add dried fruits like cranberries or apricots for a burst of flavor and chewy texture alongside the creamy filling. It’s a fantastic way to elevate every slice.
-
Cheesecake Style: For a richer filling, blend in some mascarpone cheese along with the cream cheese for a decadently creamy take that truly embodies dessert indulgence.
Infuse creativity into your Cannoli Bars with these variations! For even more inspiration, try my delightful Ingredient Chocolate Oat cookies for another sweet treat everyone will love.
Expert Tips for Making Cannoli Bars
-
Ricotta Drain Time: Drain ricotta well before using to prevent a soggy filling. A fine mesh strainer can help achieve the perfect texture.
-
Chill to Perfect: For the best texture, keep the Cannoli Bars chilled. Use a hot knife to slice through the bars cleanly and easily.
-
Flavor Improvement: The flavors of Cannoli Bars meld beautifully overnight. Making them a day ahead enhances their deliciousness and allows for the ideal serving.
-
Watch Baking Time: Keep an eye on the baking time; overbaking can lead to a dry filling. The center should wobble slightly for the perfect creamy texture.
-
Storage Secrets: Store in an airtight container in the refrigerator for up to 5 days. These treats also freeze well, so enjoy them later—just thaw in the refrigerator!
How to Store and Freeze Cannoli Bars
Fridge: Store Cannoli Bars in an airtight container in the refrigerator for up to 5 days. This helps maintain their creamy texture and flavor.
Freezer: For longer storage, freeze the bars for up to 2 months. Wrap them tightly in plastic wrap and place them in a freezer-safe container to prevent freezer burn.
Thawing: To enjoy the frozen Cannoli Bars, simply thaw in the fridge overnight before serving. This ensures they retain their delicious creamy goodness.
Reheating: There’s no need to reheat these bars; they’re best served chilled or at room temperature for the ultimate dessert experience.
Make Ahead Options
These Cannoli Bars are a perfect option for meal prep that saves you time during busy evenings! You can prepare the crust and the filling up to 24 hours in advance. Simply follow the baking instructions for the crust and let it cool, then refrigerate the filling separately in an airtight container. To maintain the quality, make sure to cover the filling tightly to prevent it from absorbing odors. When you’re ready to serve, just combine the chilled filling with the baked crust and bake as instructed. Letting the Cannoli Bars chill for at least 3 hours after baking enhances the flavors, making them even more delicious!
What to Serve with Cannoli Bars
Indulging in Cannoli Bars creates a delightful dessert experience that pairs beautifully with the right accompaniments.
- Espresso or Coffee: The bold, rich flavors of espresso complement the creamy sweetness of the bars, providing a perfect balance.
- Fresh Berries: Raspberries or strawberries add a refreshing tartness, enhancing the dessert’s sweetness with vibrant color and taste.
- Whipped Cream: A dollop of lightly sweetened whipped cream introduces a soft, airy texture that contrasts delightfully with the bars.
- Gianduja Chocolate Sauce: Drizzling a warm chocolate sauce over the bars brings a luxurious, velvety layer of richness to your dessert experience.
- Lemon Sorbet: The bright, citrusy flavors of lemon sorbet provide a refreshing counterpoint, making each bite more stimulating.
- Pistachio Ice Cream: The nutty creaminess of pistachio ice cream harmonizes beautifully with the flavors in Cannoli Bars, embracing the classic Italian spirit.
- Mint Leaves: Garnishing with fresh mint adds a fragrant touch and a refreshing burst that revitalizes the palate after the richness of the bars.
- Alcoholic Pairing: A light Prosecco or dessert wine enhances the meal with floral notes, providing a delightful toast alongside the bars.
- Chocolate-Covered Almonds: These create a delightful crunchy contrast, echoing the nutty flavors of the Cannoli Bars in each bite.
Cannoli Bars Recipe FAQs
How do I choose the right ricotta cheese for Cannoli Bars?
Absolutely! When selecting ricotta cheese, opt for whole milk ricotta for optimal creaminess. If it seems overly wet, drain it in a fine mesh strainer for about 30 minutes before using it to prevent a soggy filling. The quality of your ricotta significantly influences the taste, so choosing a fresh brand is key!
What’s the best way to store Cannoli Bars?
To keep your Cannoli Bars fresh, store them in an airtight container in the refrigerator for up to 5 days. This helps to preserve their creamy texture and rich flavors, making them just as delightful when you’re ready to enjoy them again.
Can I freeze Cannoli Bars?
Yes, you certainly can! Wrap the Cannoli Bars tightly in plastic wrap and place them in a freezer-safe container. They will stay fresh for up to 2 months. When you’re ready to indulge, just thaw them in the refrigerator overnight to maintain their lovely creaminess.
What should I do if my Cannoli Bars turn out too watery?
No worries, this can happen if the ricotta isn’t properly drained or if not enough time is given for the bars to cool and set. Before serving, make sure they chill in the fridge for at least 3 hours after baking, as this helps them firm up perfectly. If they do end up too moist, try reducing the humidity by slightly increasing the baking time—keep an eye on them until the edges are set, while ensuring the center still has a slight wobble.
Are Cannoli Bars suitable for people with nut allergies?
Yes, they can be made nut-free! Just omit the optional pistachios from the topping, and feel free to skip the almond extract if you want to avoid any nut exposure entirely. The rest of the ingredients are naturally nut-free, making them a delicious treat for those with allergies.
Can I adjust the sweetness in the filling?
Absolutely! The sweetness of the Cannoli Bars can be tailored to your taste. Start with the recommended amount of powdered sugar, and taste the filling mixture before baking. If you prefer a sweeter flavor, gradually add more sugar until it suits your preference, always remembering to mix well after each addition.
Irresistible Cannoli Bars with Creamy Chocolate Goodness
Ingredients
Equipment
Method
- Preheat your oven to 350°F (175°C) and line a 9x9-inch baking pan with parchment paper. Grease lightly.
- In a medium mixing bowl, combine flour, sugar, cinnamon, and salt. Stir until mixed. Pour in melted butter and vanilla, blending until coarse crumbs form.
- Transfer the crust mixture into the baking pan, pressing down evenly. Bake for 10–12 minutes until set but light in color.
- While baking, beat cream cheese in a large bowl until smooth, then mix in ricotta until combined.
- Stir in powdered sugar, salt, vanilla, almond extract, and citrus zest. Beat until creamy.
- Add eggs one at a time, mixing on low after each addition. Gently fold in chocolate chips.
- Pour filling over the baked crust, smoothing with a spatula. Sprinkle pistachios if desired.
- Bake for 30–35 minutes until edges are set and center has a slight wobble.
- Cool in the pan for 30 minutes, then refrigerate for at least 3 hours to set.
Leave a Reply