
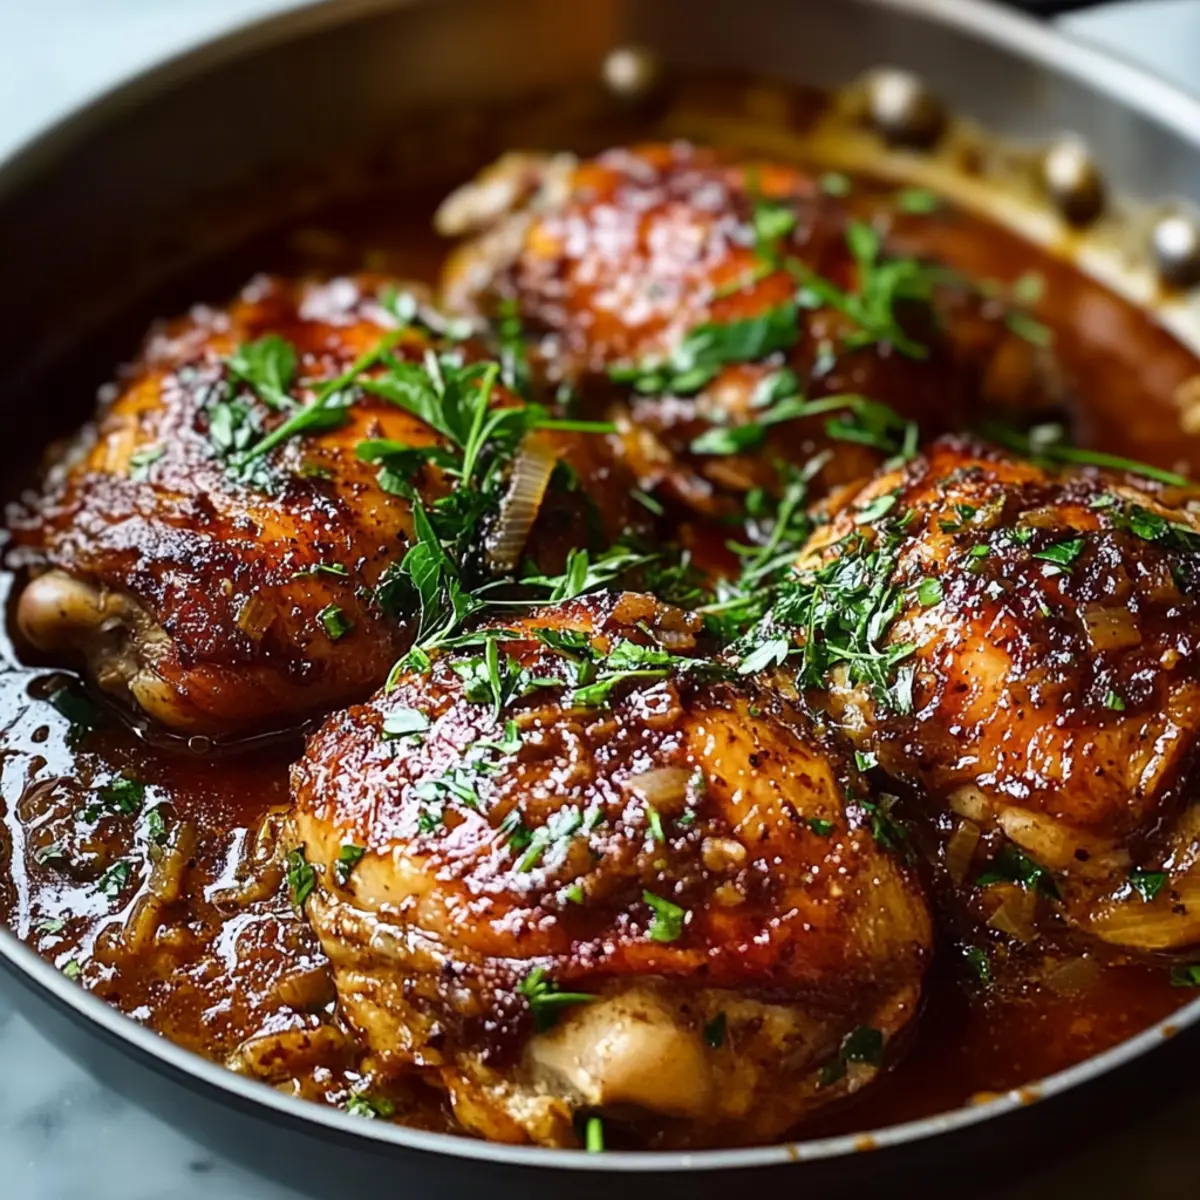
As I stood in the kitchen, the aroma of sizzling chicken wafted through the air, instantly transporting me to a world of cozy family dinners and cherished memories. This Homemade Braised Catalina Chicken is my go-to dish when I crave a meal that’s both comforting and incredibly satisfying. With tender chicken thighs bathed in a vibrant homemade Catalina sauce, it strikes the perfect balance of tangy sweetness and rich flavors. Not only does this recipe embody the essence of a warm, home-cooked meal, but it also ensures that you can whip it up with minimal effort—perfect for busy weeknights or special gatherings. Are you ready to elevate your dinner routine and bring a taste of nostalgia to your table? Let’s dive into this delightful recipe!
Why is Braised Catalina Chicken a Must-Try?
Comforting and Nostalgic: This Homemade Braised Catalina Chicken embraces the warmth of family meals, offering a taste that many remember fondly from their childhood.
Effortless Cooking: With straightforward steps and minimal prep time, it’s an easy dish that anyone can master—perfect for busy weeknights!
Flavor Explosion: The homemade Catalina sauce provides a unique tangy sweetness that elevates tender chicken thighs, ensuring every bite is packed with flavor.
Versatile Pairing: Serve it with your favorite sides like mashed potatoes or a fresh salad for a complete meal that your guests will love.
Healthy & Fresh: Using wholesome ingredients without preservatives means your family will enjoy a nutritious meal, reminiscent of simpler, hearty cooking—just like the Zesty Lemon Chicken or Cheesy Garlic Chicken you adore!
Braised Catalina Chicken Ingredients
• Discover the fresh flavors of homemade Catalina sauce!
For the Chicken
- Chicken Thighs – A tender and flavorful main protein that’s perfect for braising. Substitute with boneless thighs for quicker cooking.
- Olive Oil – Ideal for searing the chicken; adds richness to the dish. Any cooking oil can be substituted if needed.
- Salt and Pepper – Basic seasonings that enhance the overall flavor; always adjust according to your taste preferences.
For the Catalina Sauce
- Vinegar – Provides a tangy base for the sauce; apple cider or red wine vinegar can be your go-to options.
- Sweeteners (Brown Sugar or Honey) – Adds the sweet component that balances the sauce; adjust for desired sweetness.
- Spices (Garlic Powder, Onion Powder, Paprika) – Infuses layers of flavor into the sauce, making it vibrant and rich. Feel free to experiment with your favorite spices!
For Garnish
- Fresh Parsley – A pop of color and freshness on top of the dish; optional but highly recommended for presentation.
Step‑by‑Step Instructions for Braised Catalina Chicken
Step 1: Preheat the Oven
Begin by preheating your oven to 350°F (175°C) to ensure a consistent cooking temperature for the Braised Catalina Chicken. This crucial step prepares your kitchen for a perfect bake, allowing the flavors to meld beautifully during roasting.
Step 2: Prepare the Chicken
Pat the chicken thighs dry with paper towels, and generously season them with salt and pepper on both sides. This not only enhances the flavor but also helps achieve that desirable crispy skin.
Step 3: Sear the Chicken
In a Dutch oven, heat a tablespoon of olive oil over medium heat. Once hot, carefully place the chicken thighs skin-side down in the pot, searing them for 4-5 minutes until golden brown. Flip the thighs and sear the other side for another 2 minutes before removing them from the pot and setting them aside.
Step 4: Make the Catalina Sauce
In a mixing bowl, whisk together the vinegar, sweeteners, and spices to create your homemade Catalina sauce. Stir until smooth, adjusting the taste to your preference for tanginess or sweetness. This vibrant sauce is essential for coating your tender chicken and bringing it to life.
Step 5: Combine the Ingredients
Pour half of the Catalina sauce into the Dutch oven, ensuring it covers the base. Nestle the seared chicken thighs skin-side up back into the pot, then drizzle the remaining sauce over the top. This layering of flavors will create a rich, succulent dish.
Step 6: Bake the Chicken
Cover the Dutch oven with its lid and place it in the preheated oven. Bake for 45 minutes, allowing the chicken to braise and absorb the flavorful sauce. Keep an eye on it to ensure everything cooks evenly and beautifully.
Step 7: Uncover and Continue Baking
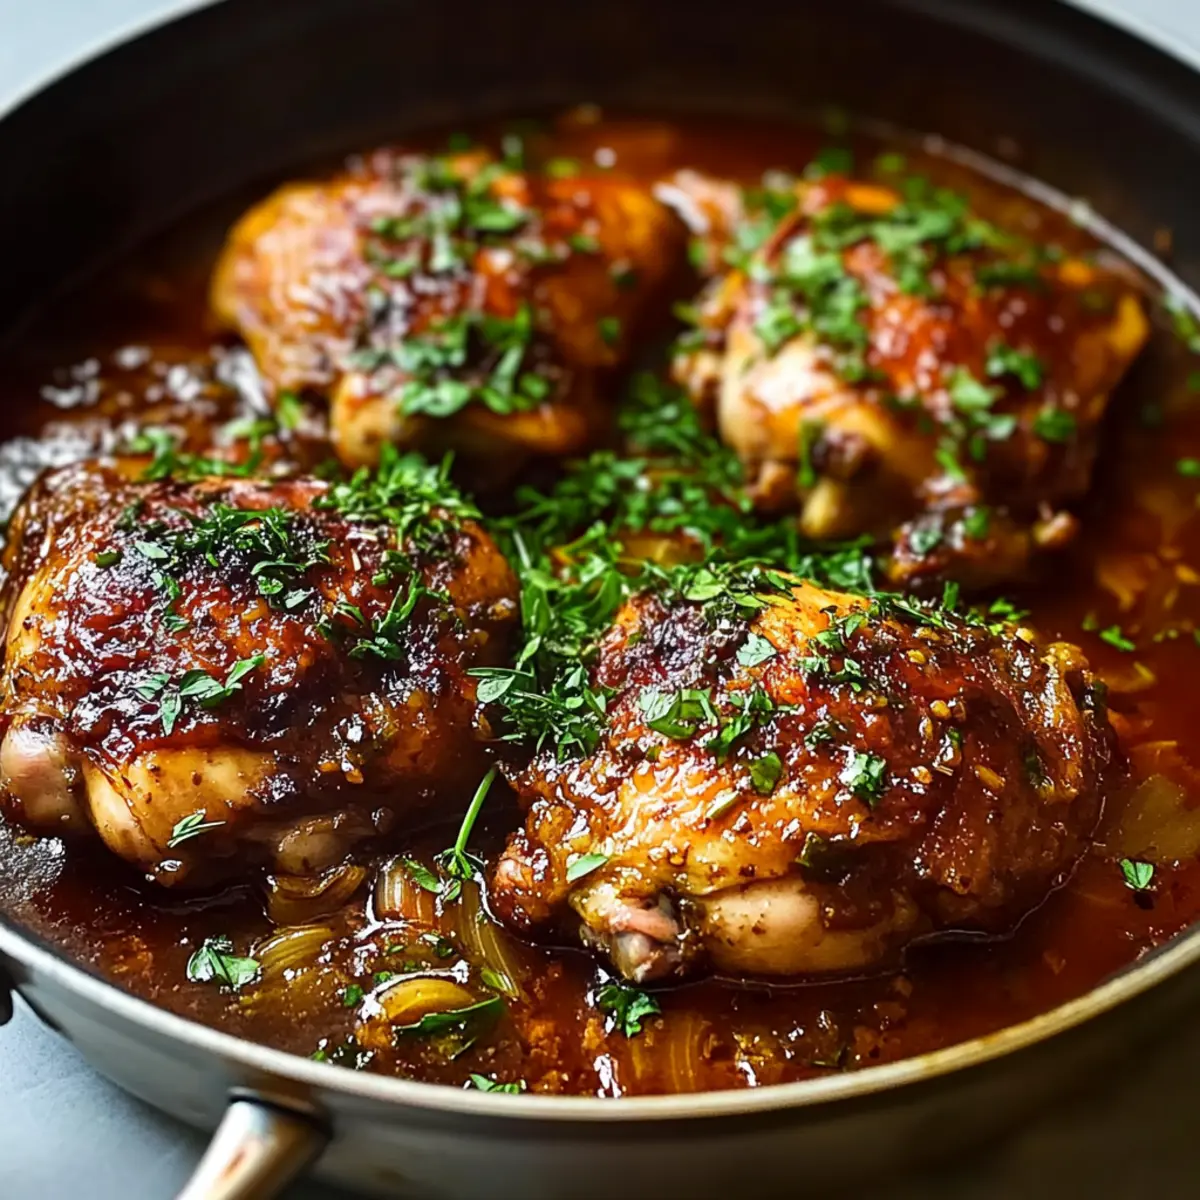
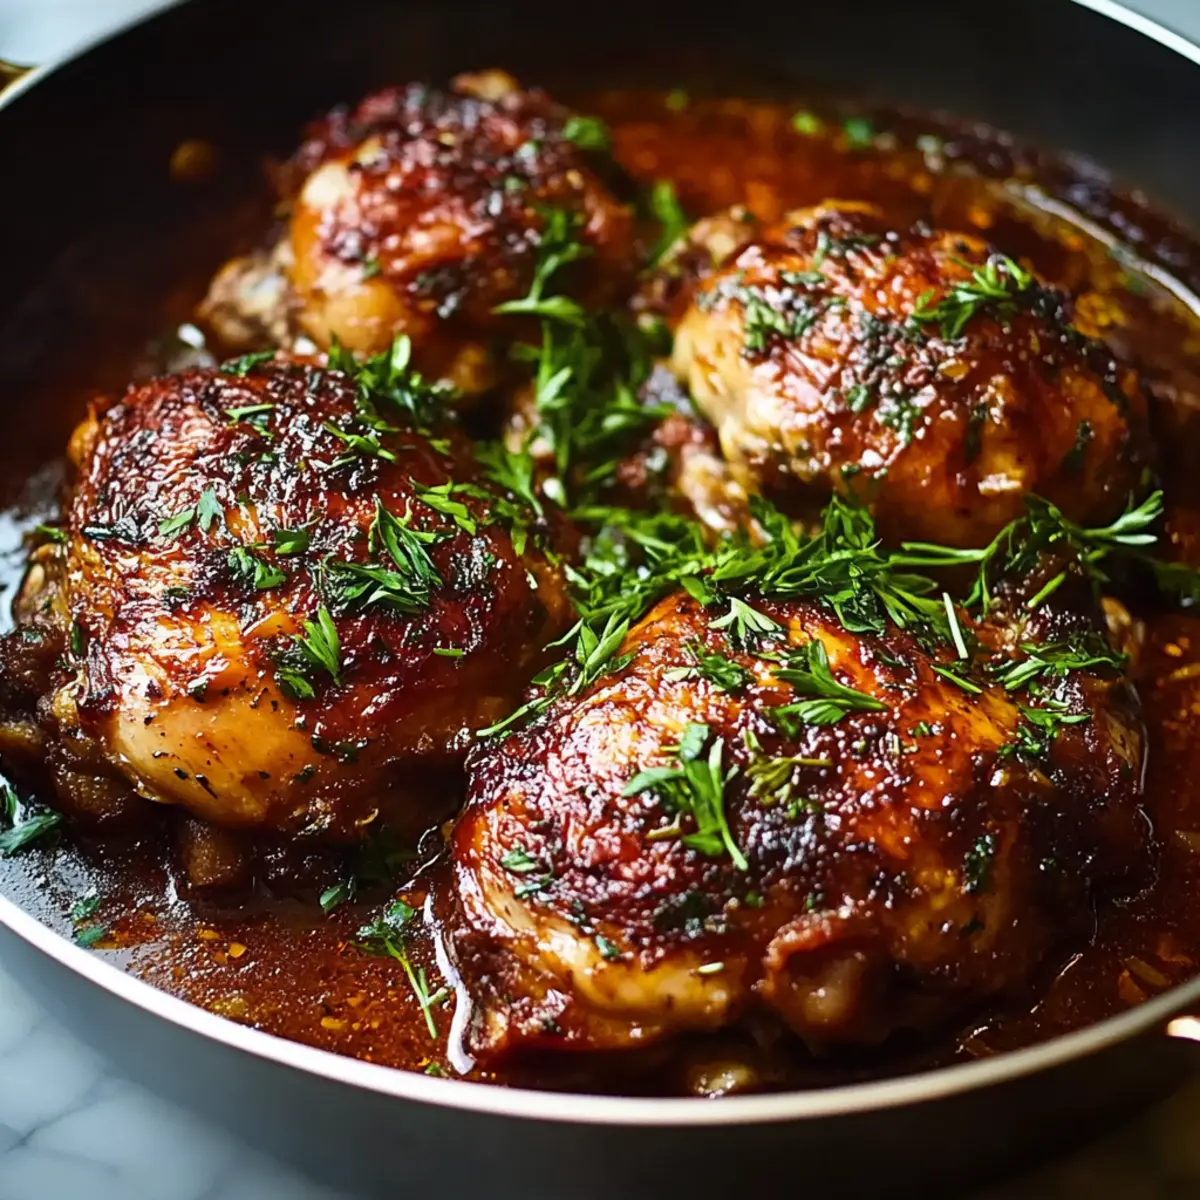
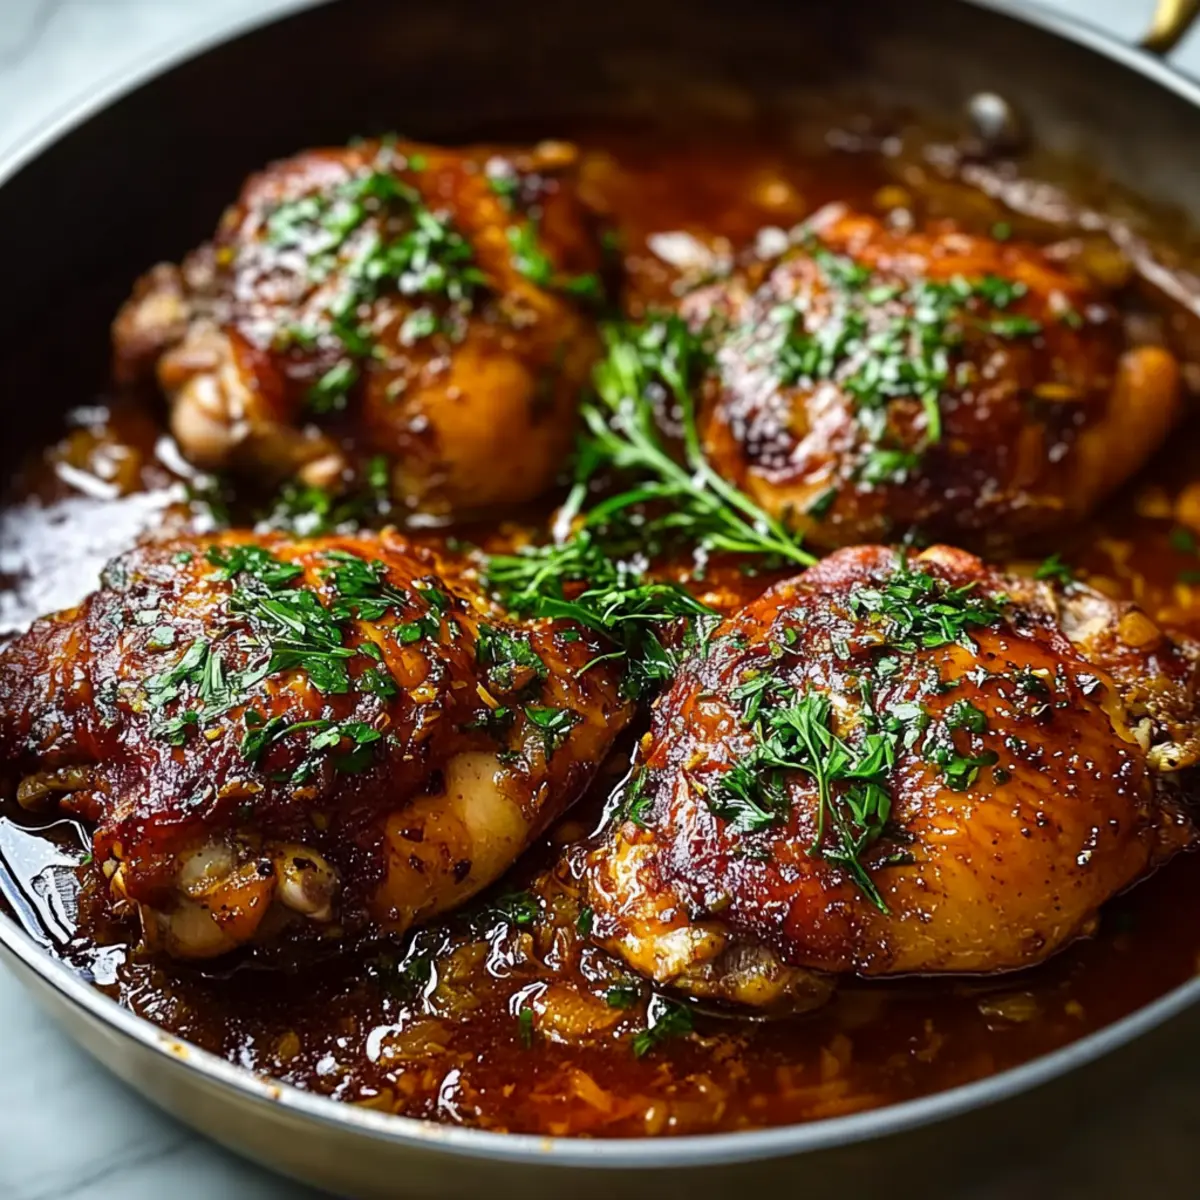
After 45 minutes, remove the lid and continue baking the Braised Catalina Chicken for an additional 20-25 minutes. This step caramelizes the sauce and allows it to thicken, resulting in that glossy, mouthwatering finish.
Step 8: Serve and Garnish
Once baked, carefully take the chicken out of the oven. Serve the Braised Catalina Chicken hot, spooning the luscious sauce over each thigh. Garnish with freshly chopped parsley for a burst of color and flavor, taking your meal to the next level.
Storage Tips for Braised Catalina Chicken
Fridge: Store leftovers in an airtight container for up to 4 days to maintain freshness and flavor.
Freezer: To preserve your homemade Braised Catalina Chicken for longer, freeze it in a freezer-safe container for up to 2 months.
Reheating: When ready to enjoy again, reheat gently in the oven at 325°F until warmed through, about 20-25 minutes. This helps keep the chicken moist and tender.
Thawing: If frozen, thaw in the refrigerator overnight before reheating for best results.
Expert Tips for Braised Catalina Chicken
- Perfectly Cooked Chicken: Ensure the chicken thighs are at room temperature before cooking to achieve even cooking and prevent drying out.
- Homemade Sauce Adjustment: Taste the Catalina sauce as you mix it; the balance of tanginess and sweetness can be adjusted based on personal preference.
- Avoid Overcrowding: When searing, don’t overcrowd the Dutch oven; cook in batches if necessary to achieve a nice golden brown on each piece of chicken.
- Moisture Maintenance: Always keep the pot covered while baking initially to lock in moisture; uncovering too soon can lead to dryness.
- Garnishing Joy: Add garnishes just before serving to maintain freshness and color; fresh parsley enhances the dish’s visual appeal and taste!
Braised Catalina Chicken Variations
Feel free to explore these creative twists on the classic recipe to make it your own!
- Lighter Option: Substitute chicken thighs with chicken breasts for a leaner meal—be sure to reduce cooking time to keep them moist!
- Veggie Boost: Toss in colorful vegetables like bell peppers or onions during baking for added nutrition and flavor. They soak up the sauce beautifully!
- Spicy Kick: Incorporate chopped jalapeños or a splash of hot sauce into the Catalina sauce for an extra punch—perfect for those who love a bit of heat.
- Herb Infusion: Swap out the parsley for fresh basil or cilantro for a unique herbaceous twist—this simple change can elevate the dish dramatically!
- Citrus Zing: Add the zest of an orange or lemon to the sauce for a bright pop of flavor that enhances the overall dish.
- Smoky Flavor: Stir in a dash of smoked paprika or chipotle powder for a delightful smoky touch that complements the sweetness beautifully.
- Honey Garlic Version: Replace the sweeteners with honey and add minced garlic for a sweet and savory combination that’s simply irresistible.
- Asian Flair: Mix in soy sauce and sesame oil for a tangy Asian-inspired version that still captures the essence of the original.
As you mix and match, don’t forget that each variation can lead to new family favorites, just like this Cheesy Garlic Chicken or the comforting vibe of Chicken Tortilla Soup. Enjoy your culinary adventures!
What to Serve with Braised Catalina Chicken
Bring the table to life with sides that perfectly complement the comforting flavors of this delightful dish.
- Creamy Mashed Potatoes: The velvety texture pairs seamlessly with the luscious Catalina sauce, creating a satisfying contrast that your family will love.
- Garlic Roasted Asparagus: This vibrant green side adds a fresh crunch and a light garlicky flavor to balance the richness of the chicken. It’s a simple way to elevate your plate!
- Crispy French Bread: Perfect for soaking up the sweet and tangy sauce, crusty bread brings a comforting touch to any meal. Serve warm and enjoy each delicious bite.
- Coleslaw: A tangy, crunchy slaw adds a refreshing element that cuts through the richness of the sauce. It’s the perfect side to bring out the chicken’s flavors!
- Wild Rice Pilaf: Earthy, nutty wild rice offers a delightful textural contrast while absorbing the sauce’s flavors, making each forkful a celebration of taste.
- Apple Crisp: For dessert, serve a warm apple crisp topped with vanilla ice cream. Its sweet and spicy flavors will round out the meal perfectly, creating a nostalgic finish.
Make Ahead Options
These Braised Catalina Chicken thighs are perfect for meal prep enthusiasts! You can prepare the Catalina sauce up to 3 days in advance; store it in an airtight container in the refrigerator to keep its vibrant taste. Additionally, you can season and sear the chicken thighs up to 24 hours ahead. Just be sure to refrigerate them promptly to maintain their quality. When ready to cook, simply nestle the chicken in the Dutch oven, pour over the prepared sauce, and bake as directed. This way, you save time on busy weeknights while still enjoying just as delicious and comforting a meal as if cooked fresh!
Braised Catalina Chicken Recipe FAQs
How do I pick the best chicken thighs for this recipe?
When selecting chicken thighs, look for ones that are plump, with no dark spots or blemishes. The skin should be intact and golden in color. Fresh thighs should have a slight give when pressed but not feel slimy. I prefer bone-in, skin-on for added flavor and moisture!
What’s the best way to store leftovers of Braised Catalina Chicken?
To keep your delicious Braised Catalina Chicken fresh, store it in an airtight container in the fridge for up to 4 days. Make sure it’s cooled down before sealing to avoid condensation. If you want to keep it longer, freezing is a great option!
Can I freeze Braised Catalina Chicken? If so, how?
Absolutely! To freeze, let the chicken cool completely, then place it in a freezer-safe container or heavy-duty freezer bag. Squeeze out as much air as possible before sealing. It can last for up to 2 months. When you’re ready to enjoy it again, just thaw it overnight in the refrigerator and reheat gently at 325°F until warmed through.
What if my chicken thighs are drying out while cooking?
If you notice your chicken is drying out, be sure to keep the Dutch oven covered during the baking process until the last 20-25 minutes. If you’re cooking boneless thighs, they will cook quicker, so reduce the baking time by about 15-20 minutes to prevent overcooking.
Can I modify this recipe for dietary restrictions?
Certainly! If you have dietary restrictions, you can substitute the chicken thighs with boneless breasts for a leaner option, just watch the cooking time. For a gluten-free version, ensure your sweeteners and spices are certified gluten-free. This dish is also naturally dairy-free, making it a versatile choice for many diets.
Is it safe for pets? Can I share leftovers with them?
While cooked chicken is generally safe for dogs, always check for bones and avoid giving them the sauce, which may contain ingredients that aren’t safe for pets, like onions or excessive sweeteners. Always better to play it safe and stick to plain chicken for your furry friends!
Braised Catalina Chicken: A Cozy Family Favorite Recipe
Ingredients
Equipment
Method
- Begin by preheating your oven to 350°F (175°C).
- Pat the chicken thighs dry with paper towels, and generously season them with salt and pepper on both sides.
- In a Dutch oven, heat a tablespoon of olive oil over medium heat. Add the chicken thighs skin-side down and sear for 4-5 minutes until golden brown. Flip and sear the other side for 2 minutes before removing them from the pot.
- In a mixing bowl, whisk together the vinegar, sweeteners, and spices to create your homemade Catalina sauce.
- Pour half of the Catalina sauce into the Dutch oven. Nestle the seared chicken thighs skin-side up back into the pot, then drizzle the remaining sauce over the top.
- Cover the Dutch oven and place it in the preheated oven. Bake for 45 minutes.
- After 45 minutes, remove the lid and continue baking for an additional 20-25 minutes to caramelize and thicken the sauce.
- Once baked, carefully take the chicken out of the oven. Serve hot, spooning the sauce over each thigh and garnish with freshly chopped parsley.
Leave a Reply