
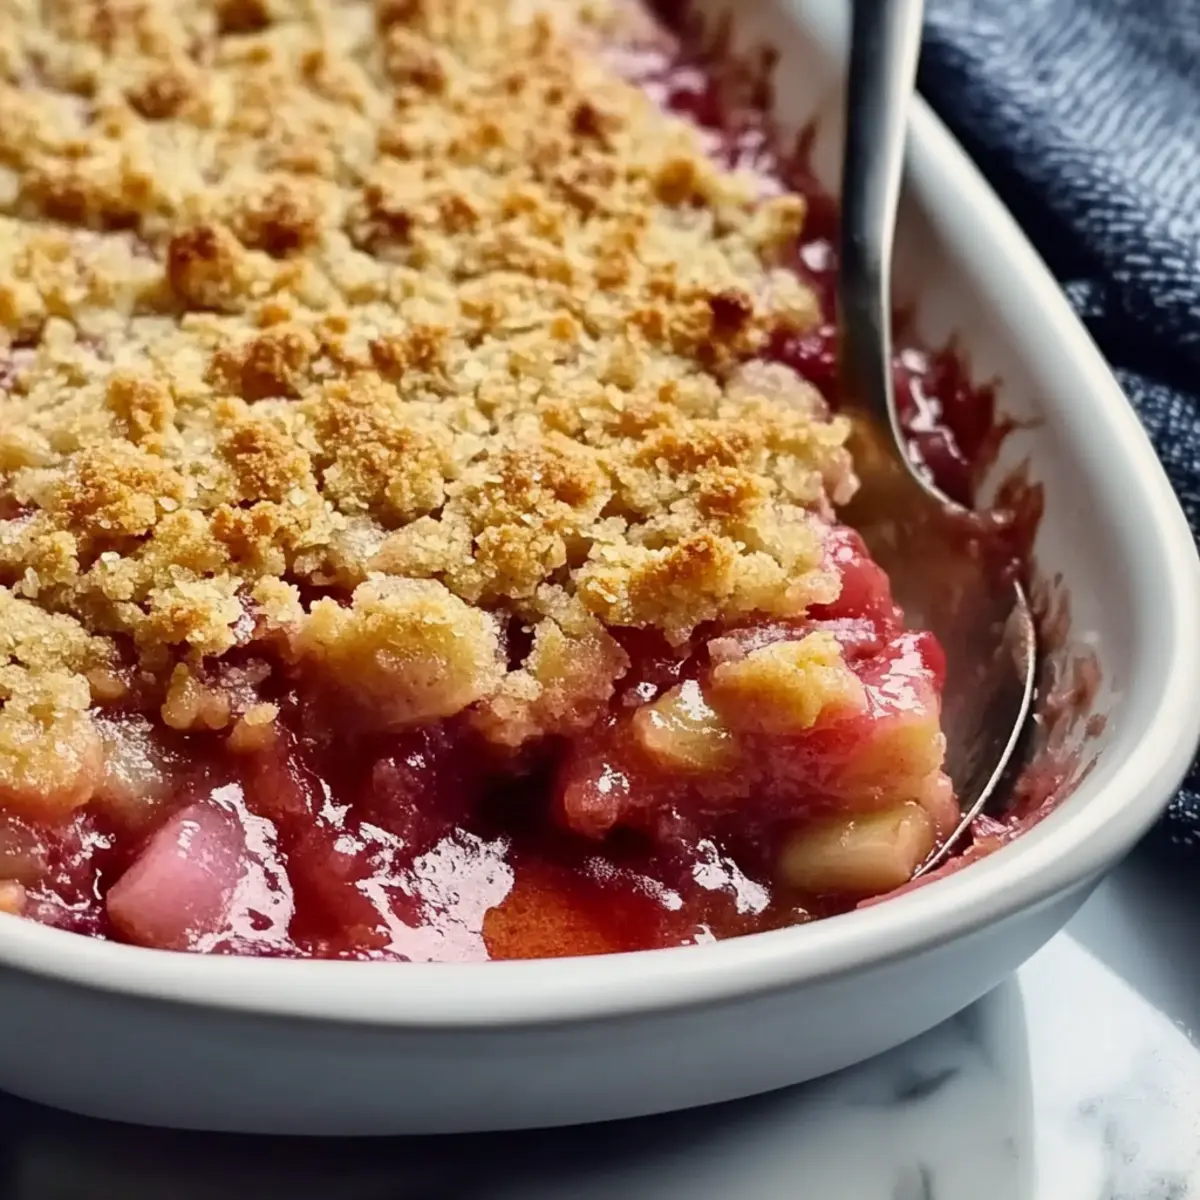
The sweet-sour fragrance of rhubarb wafts in the air, immediately transporting me back to sunny afternoons spent picking juicy stalks from the garden. This Classic Rhubarb Crisp with Frozen Rhubarb is a delightful way to enjoy this seasonal fruit all year long. What I adore about this recipe is its simplicity—no fuss, just a quick assembly that results in a dessert everyone loves. Plus, it’s incredibly versatile, allowing you to use frozen rhubarb straight from your freezer without missing a beat in flavor or texture. The irresistible buttery topping, combined with the tartness of the rhubarb, creates a comforting dish that brings friends and family together, no matter the season. Are you ready to fill your kitchen with the aroma of baking bliss? Let’s dive into this delightful recipe!
Why is Rhubarb Crisp a Must-Try?
Versatile and Convenient: You can easily use frozen rhubarb without any intricate preparations, making it a perfect last-minute dessert option.
Family-Friendly Flavor: This classic dessert appeals to all ages, delighting both kids and adults with its unique sweet-tart balance.
Simple Preparation: With just a few steps, you can create a delightful treat that saves you time in the kitchen—ideal for busy weeknights or unexpected guests.
Seasonal Joy: Enjoy the seasonal flavors of rhubarb any time of the year, bringing a touch of spring to your winter table.
Perfectly Irresistible: Serve it warm with a scoop of vanilla ice cream for a cozy dessert that will make everyone feel at home. Try it with a side of Lemon Butter Broccoli for a beautiful meal pairing!
Classic Rhubarb Crisp Ingredients
Get ready to bake this delightful Classic Rhubarb Crisp with Frozen Rhubarb!
For the Filling
- Rhubarb – Essential for that signature tart flavor; use frozen rhubarb directly from the freezer for convenience.
- Cornstarch – Thickens the filling beautifully, preventing a runny dessert—absolutely necessary!
For the Topping
- Oats – Adds a wholesome texture to the crispy topping; substitute with gluten-free oats if needed.
- Flour – Provides structure; almond flour can replace it for a gluten-free option.
- Sugar – Sweetens the mixture; opt for brown sugar for a richer flavor or granulated sugar for simplicity.
- Butter – Vital for that crumbly topping; always use cold butter for the best results.
- Cinnamon – Adds warmth and spice; feel free to adjust based on your preference.
With these ingredients at the ready, you’re just steps away from enjoying a homemade delight that will have everyone coming back for seconds!
Step‑by‑Step Instructions for Classic Rhubarb Crisp with Frozen Rhubarb
Step 1: Preheat the Oven
Begin by preheating your oven to 400°F (200°C). This ensures that your Classic Rhubarb Crisp bakes evenly and develops a lovely golden color. While the oven heats up, you can prepare the other ingredients, making the most of your time.
Step 2: Prepare the Casserole Dish
Lightly butter a 2-quart casserole dish, making sure to cover the bottom and sides evenly. This prevents the rhubarb from sticking and allows for easy serving. Set the dish aside while you continue preparing the filling, excited for the delicious layers to come.
Step 3: Mix the Rhubarb Filling
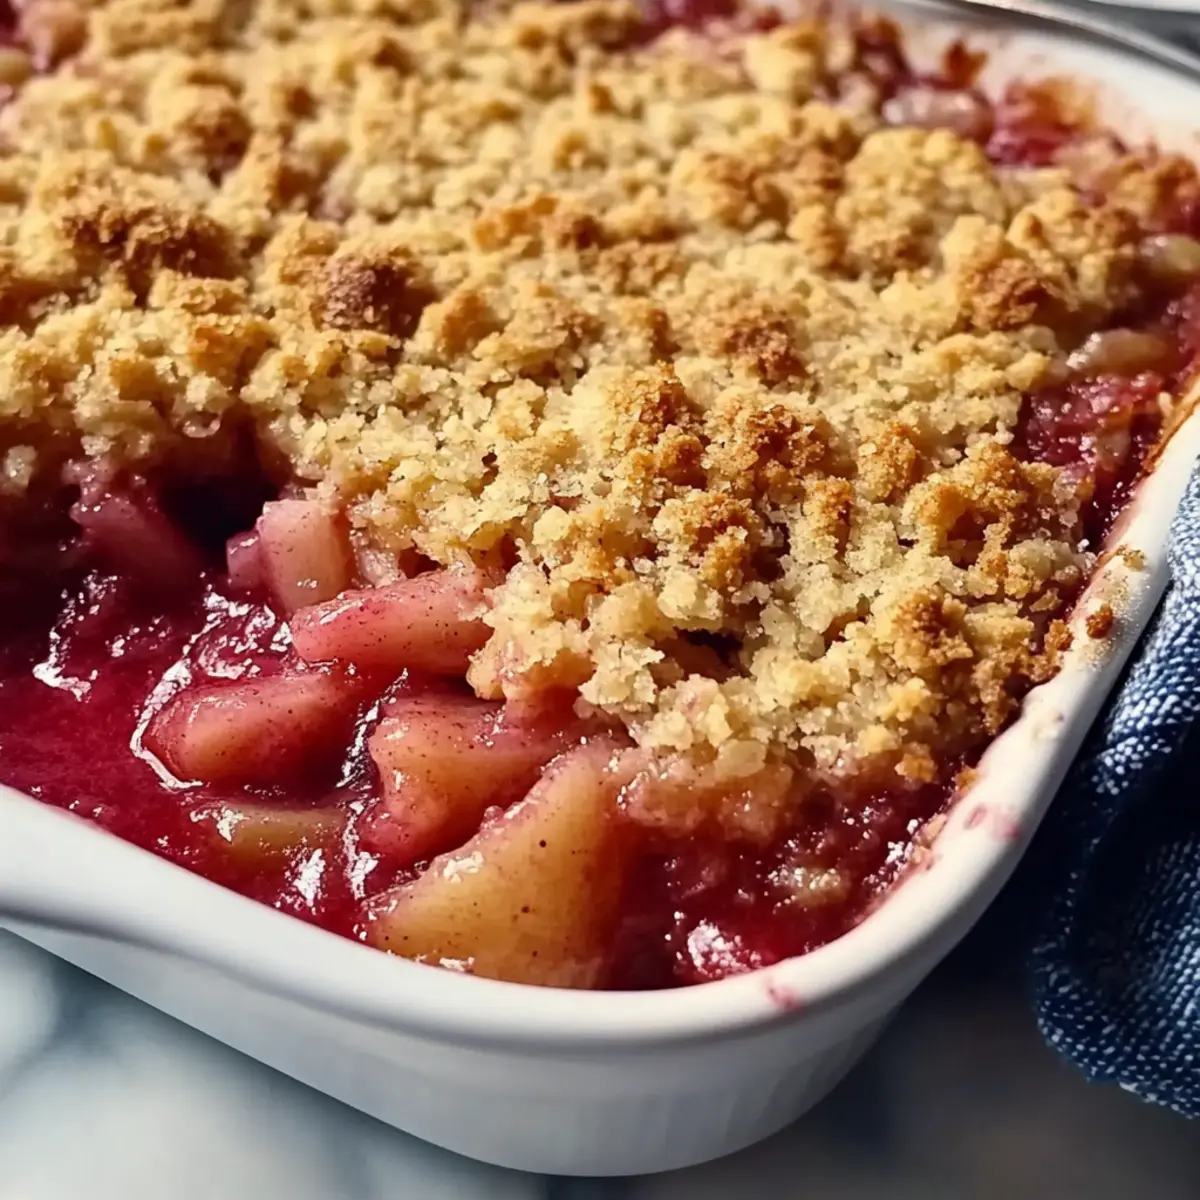
In a large mixing bowl, combine the frozen rhubarb and cornstarch, stirring until the rhubarb is well coated. The cornstarch is essential for thickening the juices released during baking. Once mixed, spread the rhubarb mixture evenly into the prepared casserole dish, creating a tart base for your crisp.
Step 4: Prepare the Crisp Topping
In another bowl, mix together the oats, flour, sugar, cinnamon, and a pinch of salt. Combine these dry ingredients thoroughly to ensure even distribution of flavors. This topping will create the delightful crunch that perfectly complements the tartness of the rhubarb in your Classic Rhubarb Crisp.
Step 5: Cut in the Butter
Take cold butter and cut it into the dry ingredients using a pastry cutter or your fingertips, until the mixture resembles coarse crumbs. It’s important to use cold butter to achieve that desired crumbly texture. Once ready, the mixture should hold together but still be slightly crumbly, ready to top your filling.
Step 6: Assemble the Crisp
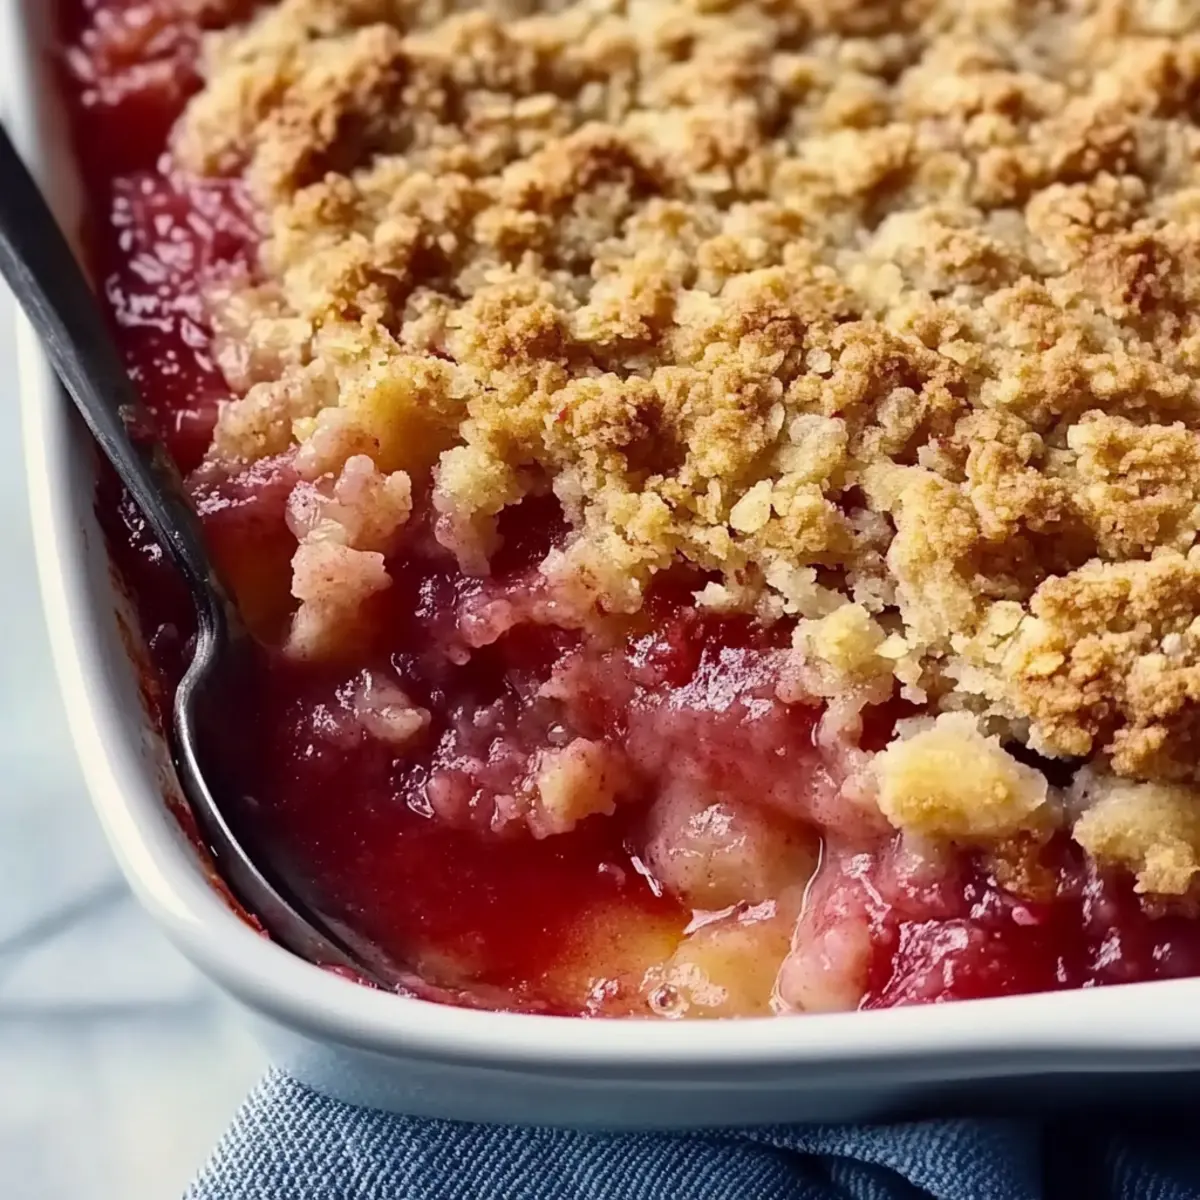
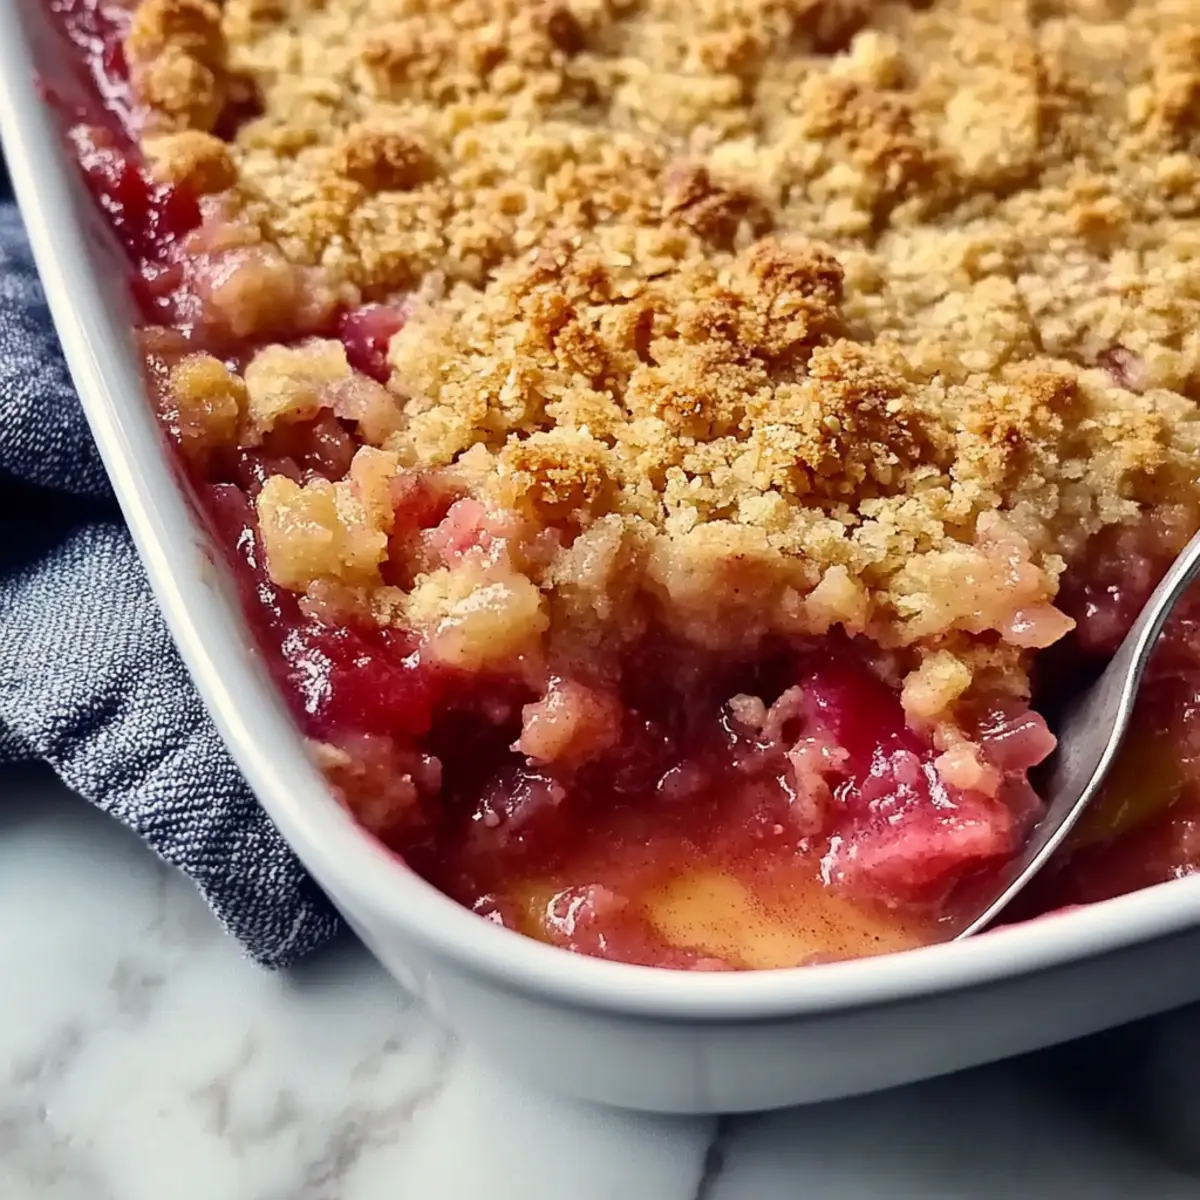
Evenly scatter the crumbly topping over the rhubarb filling in the casserole dish. Make sure to cover the rhubarb completely for even baking. This layer of oats and butter will create that irresistible crunchy topping that everyone loves in a classic rhubarb crisp.
Step 7: Bake to Perfection
Place the assembled Classic Rhubarb Crisp in the preheated oven and bake for about 35 minutes. Look for the topping to become golden brown and the filling to bubble slightly around the edges. This visual cue indicates that your dessert is coming together beautifully.
Step 8: Cool Before Serving
Once baked, remove the dish from the oven and let it cool for about 10 minutes. This cooling period allows the filling to set, making it easier to serve. The tantalizing aroma will fill your home as you wait to dish up this delightful dessert.
Step 9: Serve and Enjoy
Scoop the warm Classic Rhubarb Crisp into bowls, and consider pairing it with a scoop of vanilla ice cream or a dollop of whipped cream. This addition will complement the tart flavors beautifully, creating a cozy and inviting dessert experience for you and your loved ones.
Storage Tips for Classic Rhubarb Crisp with Frozen Rhubarb
Room Temperature: Allow the baked crisp to cool completely before covering it loosely with plastic wrap. It can be kept at room temperature for up to 2 days.
Fridge: Store any leftovers in the fridge, covered tightly in plastic wrap or an airtight container, for up to 5 days to maintain freshness and flavor.
Freezer: For longer storage, wrap the cooled crisp tightly in plastic wrap and then in aluminum foil. It will stay delicious in the freezer for up to 3 months.
Reheating: Reheat the Classic Rhubarb Crisp in a 350°F (175°C) oven for 15-20 minutes until warmed through, or microwave for a few minutes—note that the topping may lose some crispness in the microwave.
Expert Tips for Classic Rhubarb Crisp
Well-Drained Fruit: Ensure frozen rhubarb is well-drained post-thaw to prevent a soggy filling that could ruin your Classic Rhubarb Crisp.
Use Cold Butter: Always use cold butter for the topping; warm butter can lead to a dense and greasy crisp instead of a light and crumbly texture.
Baking Time Vigilance: Keep a close eye while baking; your crisp should bubble and have a golden top. Pull it out of the oven at around 35–40 minutes for best results.
Rest Period: Allow the crisp to rest for about 10-20 minutes after baking; this waiting time helps the filling set, ensuring perfect servings.
Add Variations: Consider mixing in strawberries or other fruits for a unique twist on the classic dessert that still highlights the rhubarb flavor.
What to Serve with Classic Rhubarb Crisp with Frozen Rhubarb
Savoring a warm slice of rhubarb crisp is made even better when paired with delightful accompaniments that elevate your dessert experience.
-
Vanilla Ice Cream: The creamy sweetness perfectly offsets the tartness of the rhubarb, creating a textural contrast that melts in your mouth.
-
Whipped Cream: A light dollop adds a frothy touch, harmonizing with the crisp’s buttery topping and enhancing the overall flavor with a touch of sweetness.
-
Custard Sauce: Pouring custard over the warm crisp creates a silky layer of deliciousness that elevates this classic dessert to a new level of indulgence.
-
Fresh Berries: Serve with a side of extra seasonal berries for a burst of freshness. They complement the rhubarb’s tartness, enhancing each bite.
-
Almond Biscotti: Crunchy and nutty, biscotti adds a delightful texture contrast while balancing the sweetness of the crisp.
-
Herbal Tea: A warm cup of chamomile or peppermint tea provides a soothing palette cleanser that complements the dessert’s flavors wonderfully.
-
Sparkling Water with Lime: A refreshing drink choice that hydrates while its zesty notes lift the dessert’s sweet-tart flavors, adding a fizzy twist.
-
Cinnamon Roll Muffins: A cozy companion, these muffins echo the flavors in the crisp while offering a tender, baked goodness that everyone loves.
Make Ahead Options
These Classic Rhubarb Crisp with Frozen Rhubarb are perfect for meal prep enthusiasts! You can prepare the rhubarb filling up to 24 hours in advance; simply mix together the rhubarb and cornstarch, then store it in the fridge, tightly covered. The crumble topping can also be made ahead and refrigerated for up to 3 days; just keep it in an airtight container to preserve its texture. When ready to serve, all you need to do is layer the prepared filling and topping in your baking dish, bake at 400°F for about 35 minutes, and enjoy a warm, comforting dessert with minimal fuss.
Classic Rhubarb Crisp Variations
Get ready to explore delightful twists on your Classic Rhubarb Crisp, bringing your personal touch to this beloved dessert!
- Strawberry Twist: Swap half of the rhubarb for strawberries for a sweet berry surprise. This combination adds a luscious layer of flavor you won’t want to miss.
- Nutty Delight: Add chopped walnuts or pecans on top for an extra crunch. The nuts not only enhance texture but also complement the tartness of the rhubarb beautifully.
- Natural Sweetener: Substitute maple syrup or honey for sugar to create a healthier sweet option. This swap brings a warm, rich flavor that elevates your dessert.
- Coconut Crunch: Use shredded coconut in the topping for a tropical twist. The coconut adds a delightful chewiness that pairs perfectly with the crisp, buttery layer.
- Gluten-Free Option: Replace all-purpose flour and oats with almond flour and gluten-free oats. This accommodating variation ensures everyone can indulge without worry.
- Spiced Flavor: Add a pinch of nutmeg or ginger to the filling for an extra depth of flavor. These warming spices can take this classic dessert to a whole new level.
- Citrus Zing: Incorporate a tablespoon of lemon or orange zest into the filling for a refreshing citrus twist. This brightens the tartness of rhubarb and adds a zesty flair.
As you stir up these variations, why not think about serving your Warm Classic Rhubarb Crisp with a scoop of vanilla ice cream or try some luscious Greek Chicken Orzo for a perfect meal? Enjoy the cooking adventure!
Classic Rhubarb Crisp with Frozen Rhubarb Recipe FAQs
How do I select the right rhubarb?
Absolutely! When choosing rhubarb, look for firm, vibrant stalks without any dark spots or wilting. If using frozen rhubarb, select high-quality brands or freeze your own when it’s in season; ensure to drain excess liquid after thawing for best results.
What are the best storage methods for Classic Rhubarb Crisp?
For short-term storage, cover the cooled crisp with plastic wrap or transfer to an airtight container, where it will stay fresh in the fridge for up to 5 days. I often keep mine at room temperature for 1-2 days if I plan to finish it quickly.
Can I freeze Classic Rhubarb Crisp?
Yes, you can! For freezing, wrap the cooled crisp tightly with plastic wrap followed by aluminum foil to protect it from freezer burn. It can last up to 3 months. When ready to enjoy, thaw in the fridge overnight and reheat in a 350°F oven for 15-20 minutes.
What if my rhubarb crisp is too runny?
Very! If you find your crisp too soupy, it’s likely due to excess liquid from the rhubarb. Be sure to drain frozen rhubarb well after thawing. You can also thicken it by mixing in extra cornstarch before baking. Next time, give a few minutes to cool after baking before serving; this allows the filling to set.
Are there any dietary considerations for this recipe?
Absolutely! This Classic Rhubarb Crisp can be adapted for various dietary needs. Use gluten-free oats and flour to make it gluten-free, and substitute sugar with maple syrup or honey for a natural sweetener. Always check for allergies when serving, especially with ingredients like butter or oats.
How should I reheat leftover rhubarb crisp?
For the best results, reheat your Classic Rhubarb Crisp in a preheated 350°F oven for about 15-20 minutes until warmed through; this helps to maintain its texture. The microwave can be a quicker option, but keep in mind the topping might not be as crispy afterward—just a few minutes should do the trick!
Classic Rhubarb Crisp with Frozen Rhubarb: A Cozy Delight
Ingredients
Equipment
Method
- Preheat the oven to 400°F (200°C).
- Lightly butter a 2-quart casserole dish and set aside.
- In a large mixing bowl, combine frozen rhubarb and cornstarch. Spread into the prepared casserole dish.
- In another bowl, mix oats, flour, sugar, cinnamon, and salt until well combined.
- Cut cold butter into the dry mixture until it resembles coarse crumbs.
- Scatter the crumbly topping evenly over the rhubarb filling.
- Bake for about 35 minutes until the topping is golden brown and the filling bubbles.
- Cool for about 10 minutes before serving.
- Serve warm, optionally with vanilla ice cream or whipped cream.
Leave a Reply