
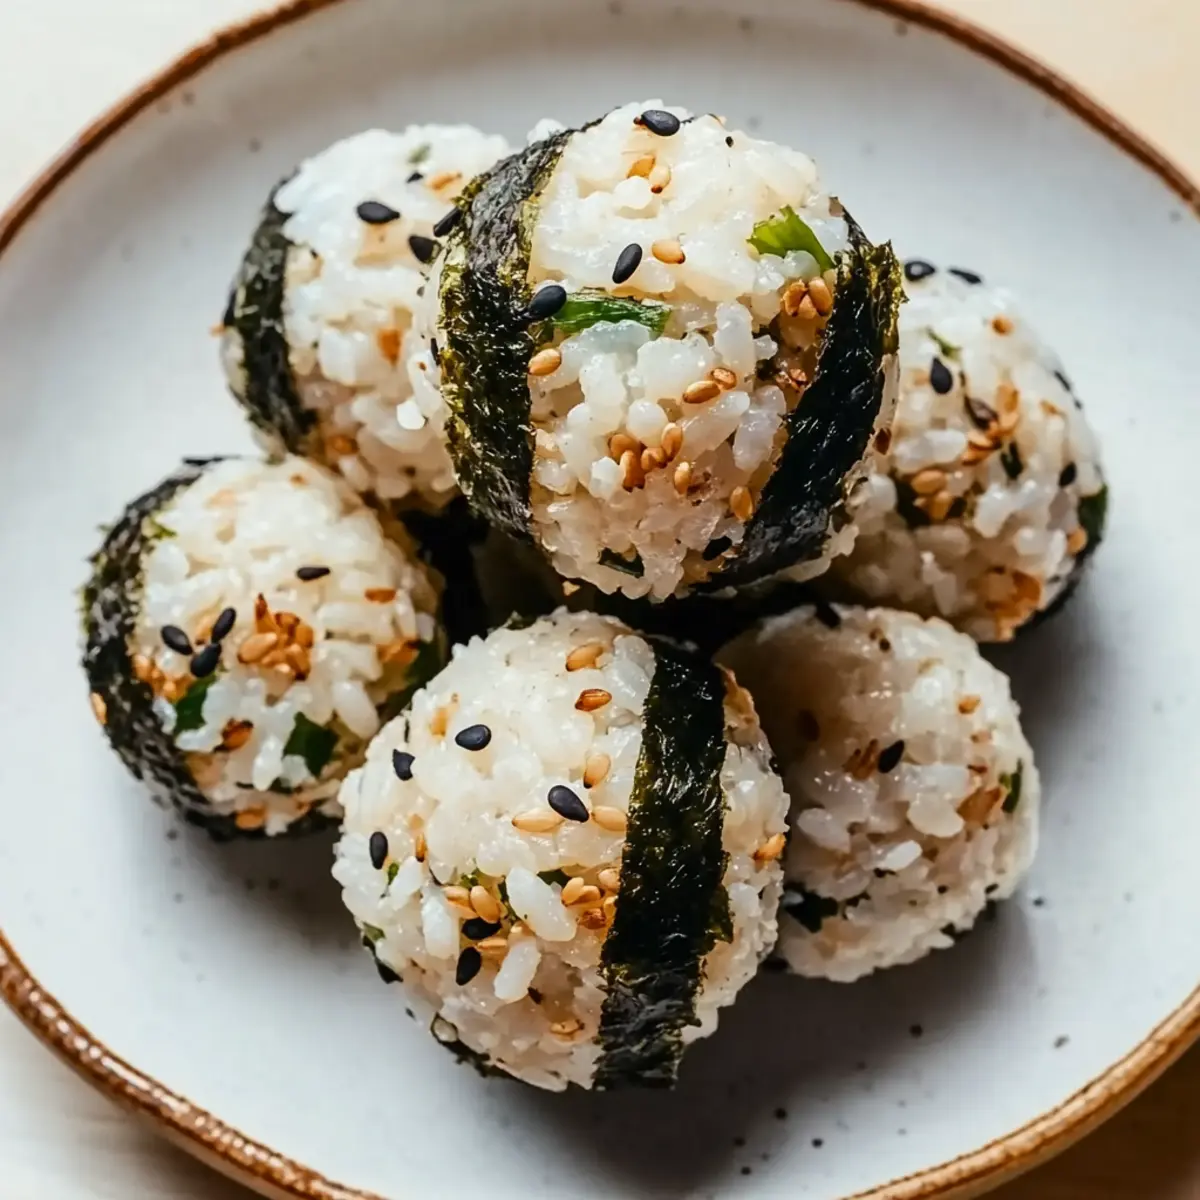
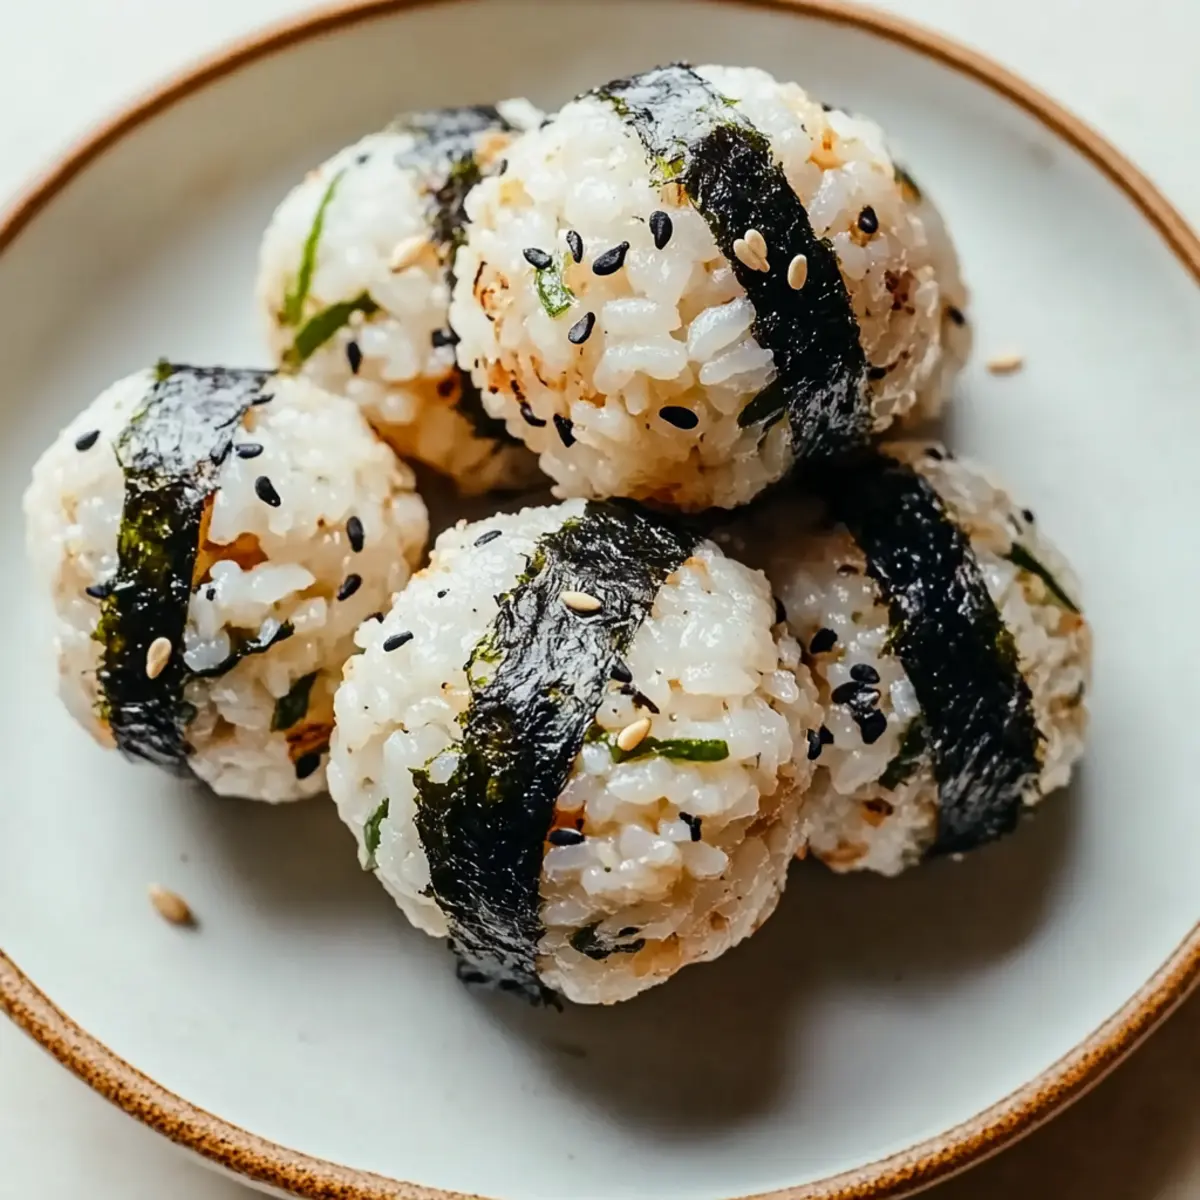
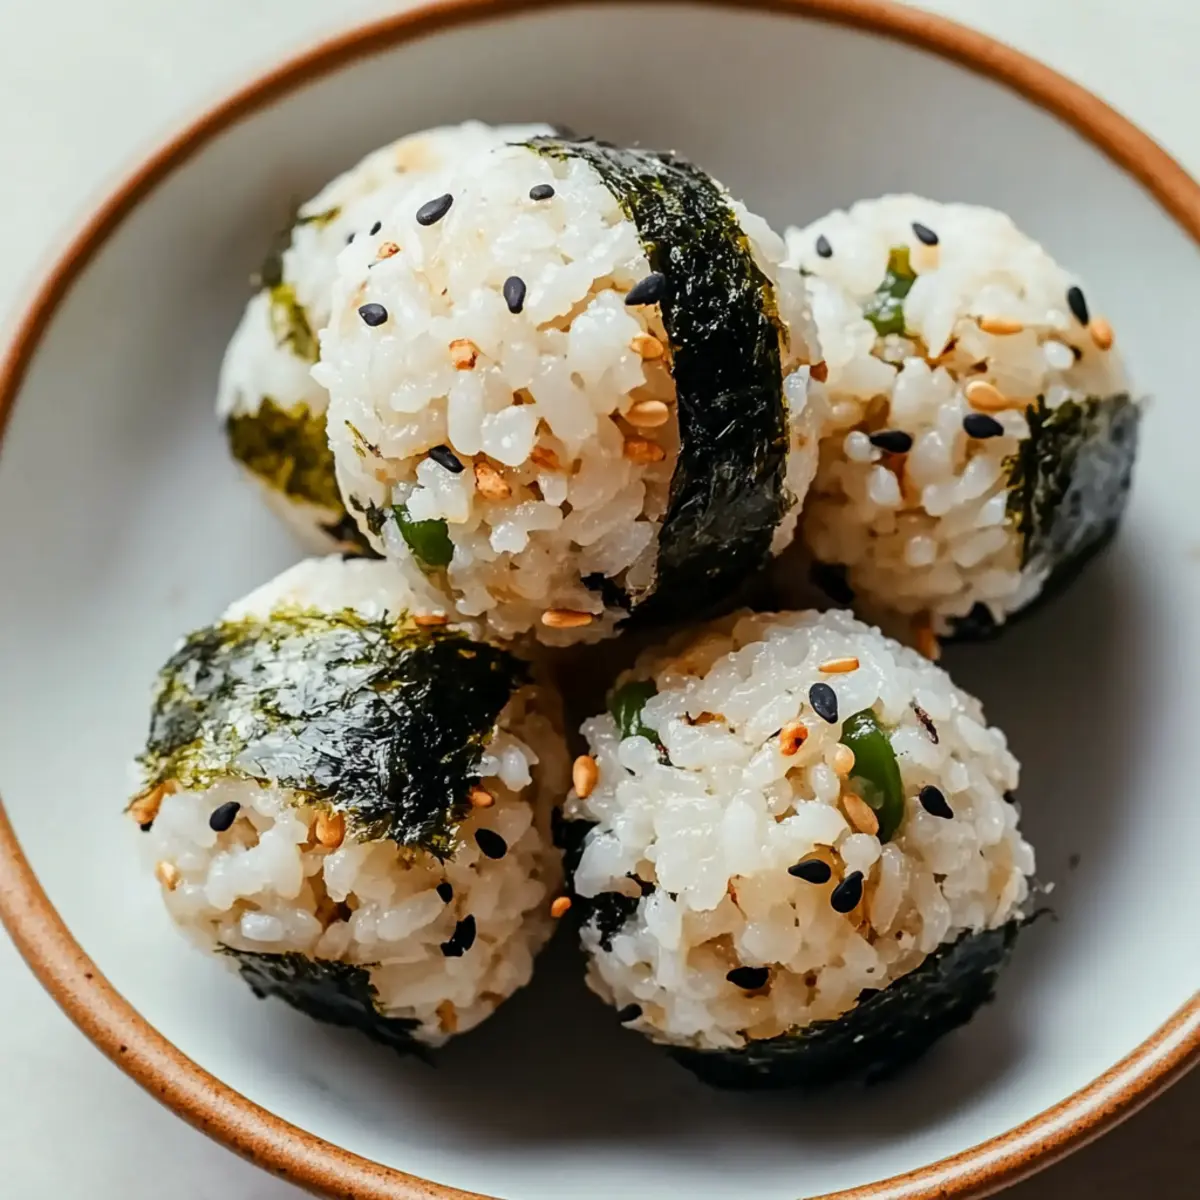
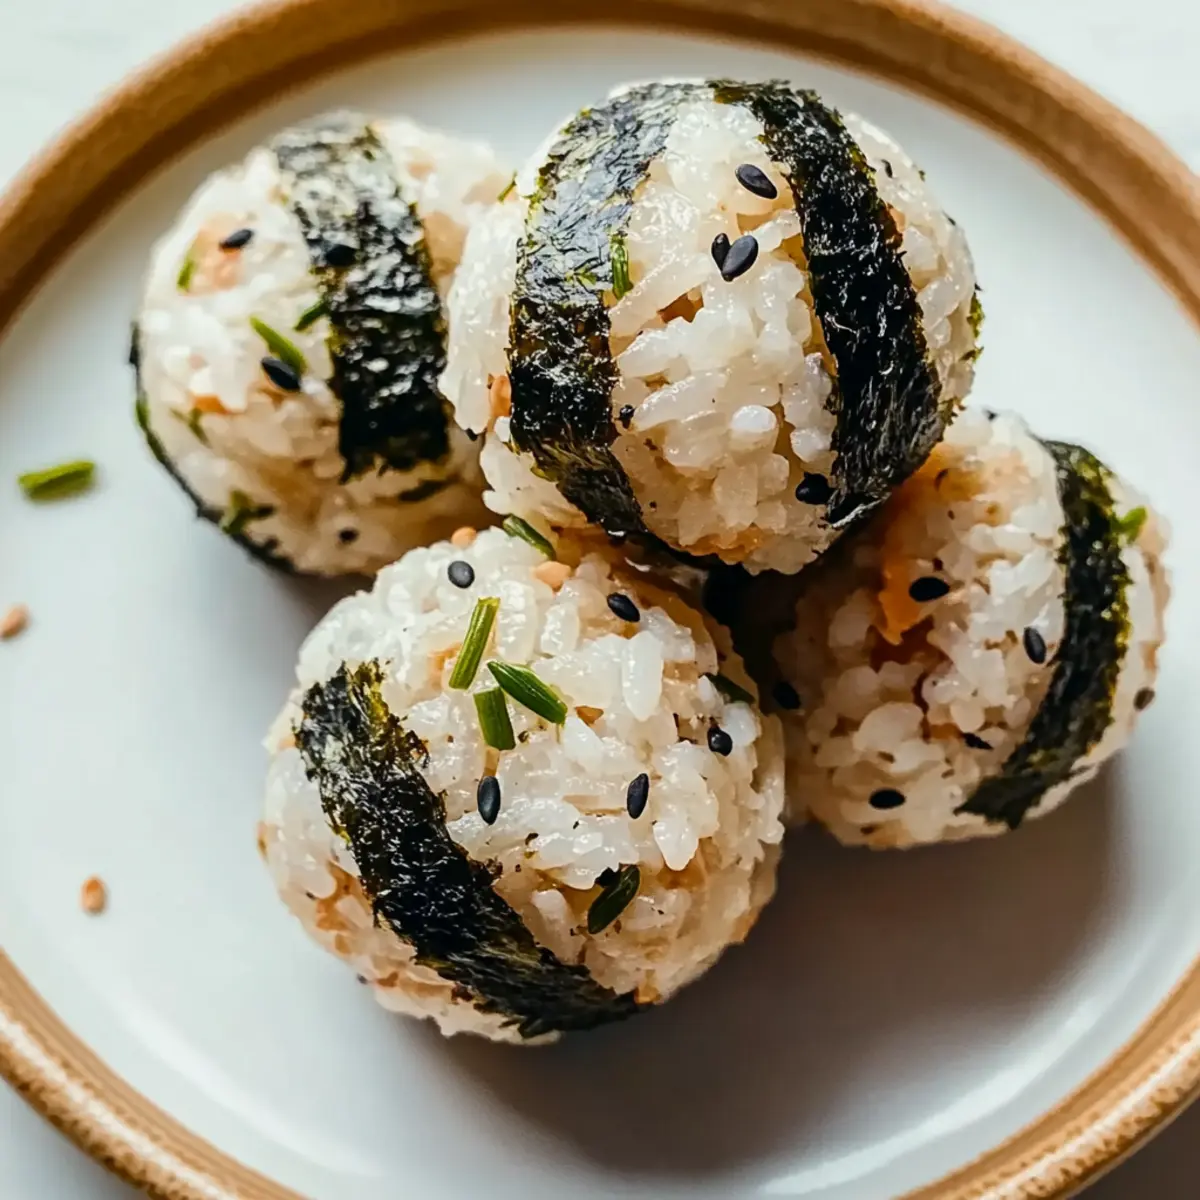
In the bustling rhythm of everyday life, finding easy and satisfying meal options can feel like a race against time. That’s where these Easy Tuna Rice Balls come to the rescue—a delightful fusion of savory tuna and fluffy rice wrapped into bite-sized treasures. Not only are they quick to whip up, making them a fantastic addition to your meal prep, but they also allow for creative adaptions with vegetarian and vegan substitutes. Perfect for using up leftover rice, these portable bites turn lunchtime into a flavorful celebration without breaking the bank. Ready to elevate your lunch game? Let’s dive into this simple yet fulfilling recipe!
Why You’ll Love Tuna Rice Balls
Versatile Options: Make these Tuna Rice Balls your own! They easily transform to accommodate both vegetarian and vegan diets. Swap tuna for mashed chickpeas or crumbled tofu to enjoy a meatless version.
Quick and Easy: Perfect for busy weekdays, these rice balls are a breeze to prepare. They come together in just a few simple steps, saving you precious time during hectic moments.
Budget-Friendly: With affordable ingredients such as canned tuna and leftover rice, you can whip up a satisfying meal without straining your wallet.
Flavorful Fun: Each bite bursts with savory goodness, enhanced by a touch of sesame oil and mayonnaise. You can also personalize flavors by adding herbs or spices to the mix!
Great for Meal Prep: Enjoy them fresh, or store in an airtight container for up to two days for an effortless grab-and-go meal. For more quick and delightful recipes, check out Coconut Chicken Rice or Ground Beef Rice!
Tuna Rice Balls Ingredients
Discover the essential ingredients to create your tasty Tuna Rice Balls.
For the Rice Mixture
- Rice – Choose white or brown rice as your base for a satisfying structure.
- Canned Tuna – Provides rich flavor and protein; try substituting with mashed chickpeas for vegetarian or crumbled tofu for a vegan option.
- Sesame Oil – Adds a delightful nutty undertone that enhances your rice balls’ overall taste.
- Mayonnaise – Utilizes creaminess for moisture; regular or vegan mayo works beautifully here.
For Flavoring
- Nori Sheets – Optional garnish that gives a hint of seaweed flavor; chop into tiny strips for a fun twist.
- Rice Vinegar & Sugar – Use to mimic the taste of sushi rice; adjust to suit your personal preference.
Step‑by‑Step Instructions for Tuna Rice Balls
Step 1: Prepare the Rice Mixture
Begin by cooking 2 cups of rice according to your package instructions. Once cooked, allow the rice to cool completely to room temperature—this is essential for forming your Tuna Rice Balls. In a large mixing bowl, combine the cooled rice with 1 tablespoon of sesame oil, 3 tablespoons of mayonnaise, and one 5-ounce can of drained tuna to create a flavorful base.
Step 2: Incorporate Additional Flavor
Mix the ingredients thoroughly until everything is well combined, ensuring the tuna and mayonnaise are evenly distributed. If the mixture feels too dry, add another tablespoon of mayonnaise for added creaminess. You might also want to chop up a sheet of nori and stir it in for that authentic sea flavor that complements your Tuna Rice Balls.
Step 3: Shape the Rice Balls
Spread the rice mixture evenly in the bowl, then use a spatula to divide it into 8 equal portions. With clean hands or gloves, take each portion and flatten it slightly, then roll it into tightly packed balls. Aim for a firm yet tender texture, as this will help the rice balls hold their shape when serving.
Step 4: Chill or Serve Immediately
Once all the rice balls are formed, you can either serve them immediately for the freshest taste or place them in an airtight container. If storing, let them sit uncovered in the fridge for about 30 minutes to firm up before sealing. This chilling step enhances the texture, making your Tuna Rice Balls a delightful snack or meal.
Step 5: Enjoy with Dipping Sauces
Finally, serve your Tuna Rice Balls alongside soy sauce, spicy mayo, or your favorite dipping sauce for an extra burst of flavor. These tasty bites are perfect for lunch boxes or quick snacks, showcasing the convenience and deliciousness of homemade food!
Make Ahead Options
These Tuna Rice Balls are a fantastic make-ahead solution for those busy weeknights! You can prepare the rice mixture and form the balls up to 24 hours in advance. Simply cool the rice completely before mixing in the tuna, sesame oil, and mayonnaise, then shape into balls and layer them in an airtight container. To maintain their delightful texture, refrigerate the balls uncovered for 30 minutes before sealing, and they will hold their shape beautifully. When ready to enjoy, simply serve them cold or at room temperature, paired with your favorite dipping sauce, ensuring a quick, satisfying meal with minimal effort!
Tuna Rice Balls Variations & Substitutions
Feel free to let your creativity shine! These easy swaps can elevate your Tuna Rice Balls to new heights of flavor and nutrition.
- Vegetarian Option: Swap canned tuna for mashed chickpeas or crumbled firm tofu for a satisfying meatless version. Add a pinch of cumin for extra depth.
- Vegan Delight: Use vegan mayonnaise in place of regular mayo and enjoy the same creamy texture without the eggs. If you love avocado, try substituting with mashed avocado instead!
- Grain Upgrade: Trade white rice for brown rice or quinoa to ramp up the nutrition while keeping that beloved chewy texture. The nuttiness of quinoa is particularly delightful!
- Spicy Kick: Mix in a tablespoon of sriracha or crushed red pepper flakes to the rice mixture for an exciting spicy twist. This will make your rice balls an unforgettable experience!
- Crunchy Veggie: Fold in finely chopped vegetables like carrots or cucumbers for added color, crunch, and nutrition. These veggies not only enhance flavor but also contribute a fresh texture.
- Herbaceous Twist: Add chopped fresh herbs like cilantro or parsley for an aromatic burst in every bite. This simple twist gives a delightful freshness that pairs beautifully with the savory notes.
- Sushi-Style: Roll the rice balls in crushed nori sheets for an authentic sushi taste. Not only does this add flavor, but it also appeals visually!
- Zesty Flavor: A splash of lime juice added to the rice mixture can brighten up the dish and provide a zesty finish to your Tuna Rice Balls. This lively twist brings each flavor to life!
Curious about more delicious rice-based recipes? Why not explore Greek Chicken Meatballs for another delightful meal idea or try the heartwarming Fryer Fried Rice?
What to Serve with Easy Tuna Rice Balls
Elevate your lunch experience with delightful side options that perfectly complement these savory bites.
-
Crispy Vegetable Tempura: Lightly battered and fried veggies add a crunchy texture contrast, enhancing the overall dining experience. A flavorful dip can turn this into a delectable starter.
-
Simple Cucumber Salad: This refreshing dish offers a cool, crisp bite, balancing the savory tuna flavors and providing a burst of freshness on your plate.
-
Oriental Slaw: A tangy mix of shredded cabbage and carrots dressed in sesame vinaigrette adds both crunch and vibrant color, enriching your meal visually and nutritionally.
-
Soy Sauce or Spicy Mayo: These dipping sauces enhance the flavor of your rice balls, offering a savory touch that ties everything together. A little heat will wake up those taste buds!
-
Edamame: These tender, nutrient-packed soybeans provide a perfect finger food complement, adding a delightful bite and a dose of protein to your meal.
-
Miso Soup: A warm and comforting option, this beloved Japanese soup serves as the perfect starter, balancing your meal with a salty umami flavor.
-
Pickled Vegetables: The tangy crunch of pickled cucumbers or radishes brightens each bite of tuna, providing a delightful contrast in flavors and enhancing your overall culinary experience.
Storage Tips for Tuna Rice Balls
-
Fridge: Store your Tuna Rice Balls in an airtight container for up to 2 days. This keeps them fresh and makes them perfect for quick meals.
-
Freezer: For longer storage, freeze the rice balls in a single layer on a parchment-lined baking sheet. Once frozen, transfer to a freezer-safe container; they’ll last up to 3 months.
-
Reheating: When ready to enjoy, thaw overnight in the fridge, then reheat in the microwave for about 30 seconds or until warmed through.
-
Serving: Enjoy them cold or warm! Pair with soy sauce or spicy mayo for added flavor—perfect for a unique snack or meal.
Expert Tips for Tuna Rice Balls
-
Cool the Rice: Ensure that the rice has cooled completely before mixing; warm rice can result in a mushy texture that won’t hold its shape in your Tuna Rice Balls.
-
Pack Tightly: When shaping the balls, pack the rice mixture tightly to prevent them from falling apart. A firm grip will create the perfect bite-sized treat.
-
Taste as You Go: Don’t hesitate to taste the mixture before shaping; adjust the seasoning as needed. This ensures rich flavor in your Tuna Rice Balls.
-
Experiment with Add-ins: Feel free to add chopped vegetables or herbs for extra color and nutrition, making your rice balls even more delicious and visually appealing.
-
Chill for Best Results: If you’re storing the rice balls, let them chill uncovered in the fridge for about 30 minutes. This helps them firm up, enhancing texture when served.
Tuna Rice Balls Recipe FAQs
What type of rice should I use for my Tuna Rice Balls?
You can use white or brown rice as a base, providing a satisfying structure. Brown rice will add extra nutrition and fiber, making it a great choice for health-conscious cooks.
How should I store my leftover Tuna Rice Balls?
Store your Tuna Rice Balls in an airtight container in the refrigerator for up to 2 days. This keeps them fresh and makes them perfect for quick meals. I often pack them for lunches, and they still taste delicious!
Can I freeze Tuna Rice Balls for later?
Absolutely! For longer storage, freeze the rice balls in a single layer on a parchment-lined baking sheet. Once they’re frozen (about 2 hours), transfer them to a freezer-safe container or bag. They can last up to 3 months. When ready to enjoy, thaw overnight in the fridge and reheat in the microwave for about 30 seconds or until warmed through.
What can I substitute for canned tuna in this recipe?
If you’re looking for vegetarian or vegan options, you can swap the canned tuna with mashed chickpeas or crumbled firm tofu. These alternatives still provide a protein punch and maintain the delightful texture you’re after!
How can I ensure my Tuna Rice Balls hold their shape?
Make sure the cooked rice has cooled completely before mixing; warm rice can lead to a mushy texture. When shaping the balls, pack the mixture tightly to form firm yet tender treats that won’t fall apart. This trick is key for perfect bite-sized goodness!
Are there any common allergens in Tuna Rice Balls I should be aware of?
Yes, the primary allergens in this recipe can include fish from the tuna and eggs if using traditional mayonnaise. For a vegan option, use vegan mayonnaise. Be sure to check labels on store-bought ingredients to avoid specific allergens as needed.
Savory Tuna Rice Balls You'll Love for Quick Lunches
Ingredients
Equipment
Method
- Prepare the rice mixture by cooking 2 cups of rice. Let it cool completely.
- Combine cooled rice with sesame oil, mayonnaise, and drained tuna.
- Mix well and add nori if desired; adjust with more mayonnaise if too dry.
- Divide mixture into 8 portions, shape into balls, ensuring they are tightly packed.
- Chill in the fridge for 30 minutes before serving or store in an airtight container.
- Serve with soy sauce or spicy mayo for dipping.
Leave a Reply