
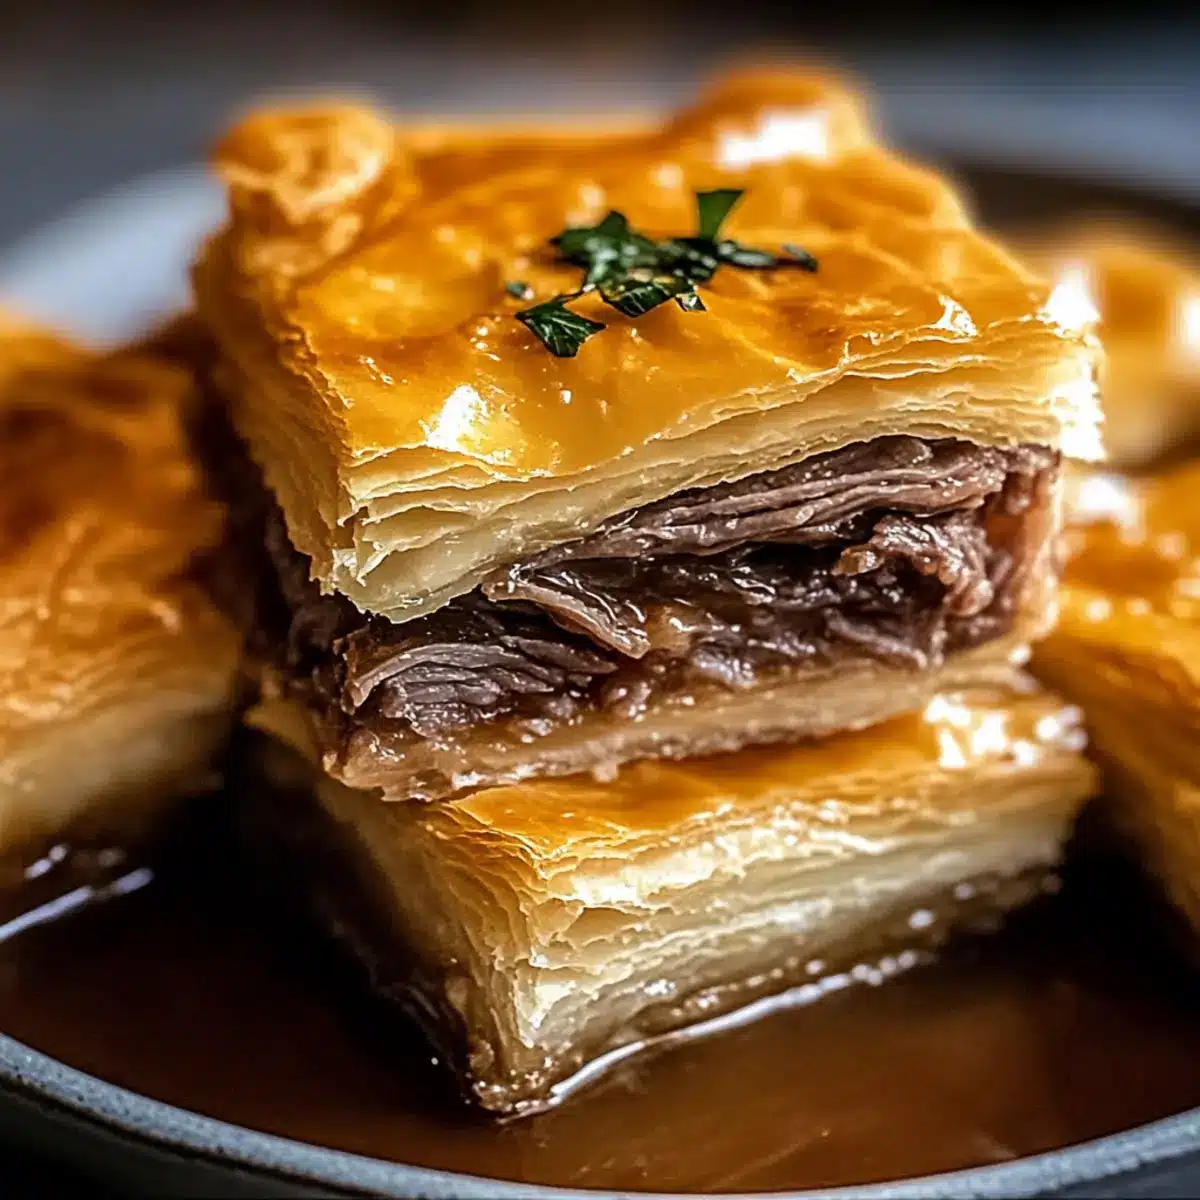
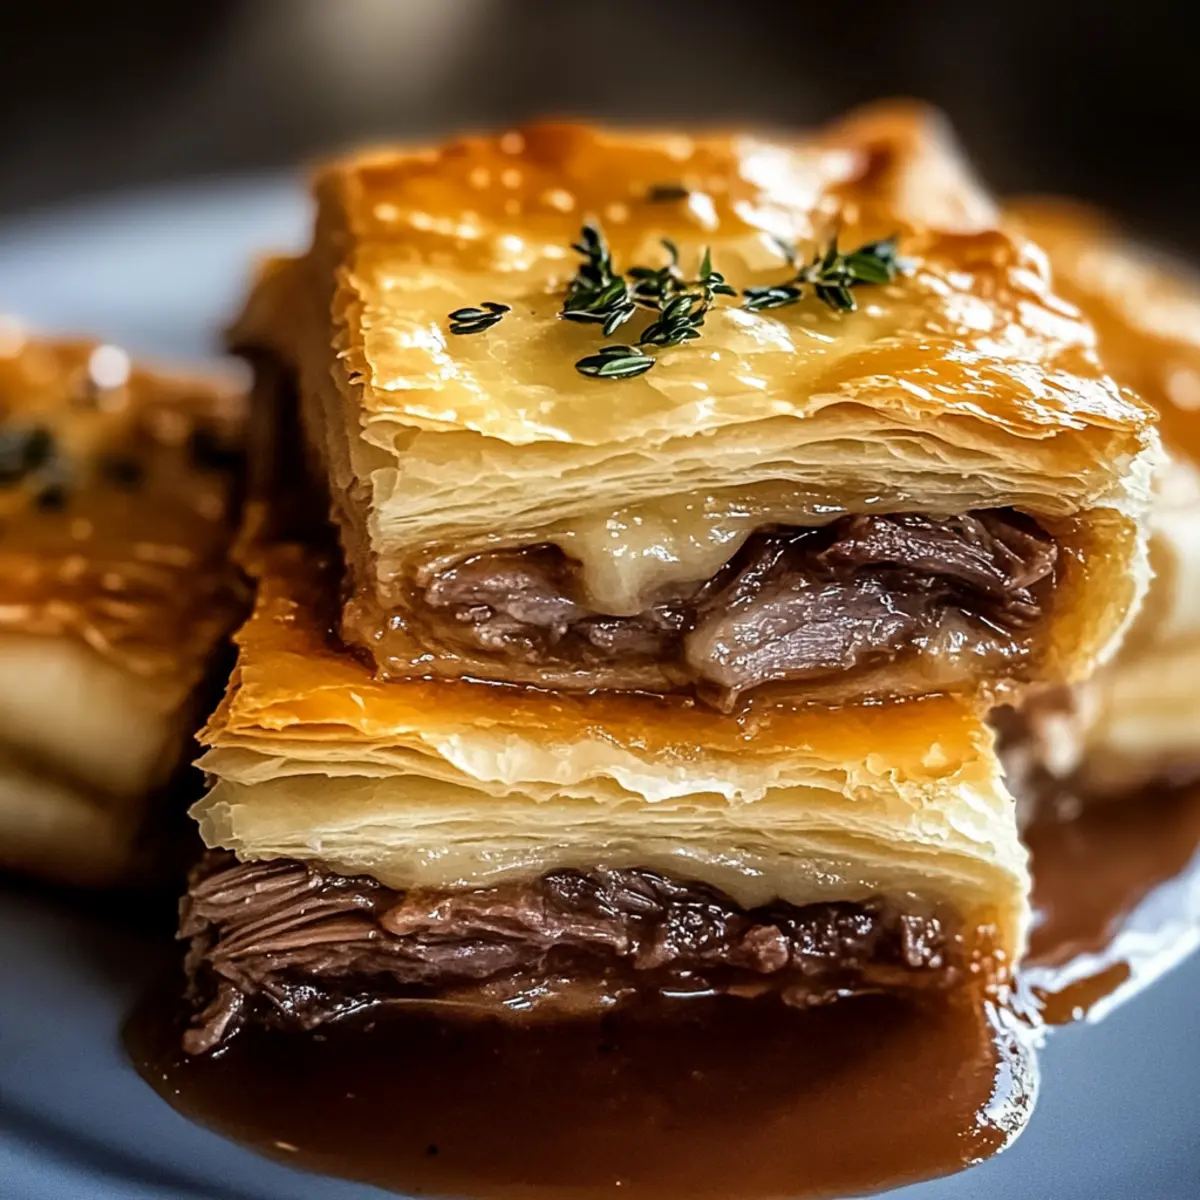
As I rummaged through my fridge one evening, I stumbled upon a delightful medley of ingredients that sparked an idea. What if I could transform the classic French Dip sandwich into something easy, shareable, and absolutely scrumptious? Enter my Easy French Dip Squares. This comforting dish combines tender roast beef and gooey Swiss cheese, all wrapped in flaky crescent roll dough, making for the ultimate crowd-pleaser at any gathering. With quick prep and minimal fuss, these squares are perfect for weeknight dinners or casual parties. Plus, they just beg to be dipped into warm beef broth! Curious to see how this beloved classic gets a fun twist? Let’s dive in!
Why Are French Dip Squares So Irresistible?
Simplicity at Its Best: With just a few simple ingredients, this recipe comes together quickly without any complicated steps.
Crowd-Pleasing Flavor: The combination of tender roast beef, gooey Swiss cheese, and a buttery crust is sure to impress even the pickiest eaters.
Perfect for Any Occasion: Whether it’s a cozy family dinner or a lively get-together, these bite-sized squares fit right in.
Customization Options: Feel free to tweak the filling or swap out cheeses to cater to your taste buds—options are endless! You might also check out my tips for making the best party snacks to elevate your hosting game.
Serve It Warm: Pair with warm beef broth for dipping, and watch your guests delight in this comforting experience!
French Dip Squares Ingredients
• Get ready for a delicious combination!
For the Dough
- Refrigerated Crescent Rolls – These rolls provide a flaky, buttery crust that’s easy to work with and bakes quickly.
For the Filling
- Deli Roast Beef – This savory protein is tender and flavorful, perfect for layering inside your squares.
- Swiss Cheese – Melting beautifully, this cheese adds a mild, nutty flavor that complements the roast beef wonderfully.
For the Flavor Boost
- Dry Onion Soup Mix – This mix adds a wonderfully onion-forward depth of flavor that elevates the dish.
- Worcestershire Sauce – A dash of this sauce introduces a savory richness that enhances all the flavors.
- Garlic Powder – Sprinkling some garlic powder adds a subtle depth to the taste of your French Dip Squares.
For Assembly
- Melted Butter – Drizzling melted butter helps create a rich topping while ensuring an even bake.
- Beef Broth – Served warm for dipping, this broth captures the traditional French Dip experience perfectly.
Step‑by‑Step Instructions for French Dip Squares
Step 1: Preheat Oven
Begin by preheating your oven to 375°F (190°C). As it heats, take a 9×13 inch baking dish and give it a light coat of non-stick spray to ensure your French Dip Squares lift out easily once baked. This preparation sets the foundation for a seamless cooking experience.
Step 2: Base Layer
Unroll one can of refrigerated crescent rolls and carefully press it into the bottom of the prepared baking dish. Make sure to pinch the seams together to form a cohesive layer. This flaky crust will cradle the savory filling and help hold everything together beautifully while it bakes.
Step 3: Layer Filling
Evenly distribute the deli-sliced roast beef over the crescent roll base, ensuring every bite will be packed with robust flavor. Next, sprinkle a generous amount of grated Swiss cheese across the beef layer, allowing it to melt beautifully during baking. This combination is what makes these French Dip Squares irresistibly delicious.
Step 4: Prepare Drizzle
In a small bowl, mix together the dry onion soup mix, melted butter, Worcestershire sauce, and garlic powder. Once combined, drizzle this flavorful mixture evenly over the cheese layer. This step adds richness and depth to your French Dip Squares, infusing each bite with delicious taste.
Step 5: Top Layer
Unroll the second can of crescent rolls and carefully layer it over the filling, pinching the seams just like you did for the base. Aim for a smooth, even top to ensure the filling doesn’t spill out during baking. This top layer will turn golden and flakey, providing a wonderful contrast to the savory interior.
Step 6: Bake
Place the baking dish in the preheated oven and bake for 15-20 minutes. Keep an eye on the French Dip Squares; they are ready when the top is golden brown and the cheese is bubbling underneath. The lovely aroma will have your guests eagerly awaiting this comforting treat.
Step 7: Prepare Broth
While the squares are baking, pour beef broth into a small saucepan and heat it gently over medium heat. This will ensure that your broth is warm and flavorful, ready for dipping when you serve the French Dip Squares. The combination of the squares and warm broth is simply delightful.
Step 8: Cool and Cut
Once baked, remove the dish from the oven and allow the French Dip Squares to cool for about 5-10 minutes. This cooling time will help the cheese set slightly, making it easier to cut into clean squares. The anticipation will build for the first delicious bite!
Step 9: Serve
Cut the squares into even portions, and serve them warm with a bowl of beef broth for dipping. The combination of flaky pastry, gooey cheese, and savory broth creates an irresistible experience that your friends and family will absolutely love. Enjoy this delightful dish together!
Expert Tips for French Dip Squares
-
Seal Those Edges: Always pinch the seams of the crescent roll dough tightly to prevent any leaks during baking. Clean cuts result in perfect squares.
-
Avoid Overbaking: Watch the squares closely in the oven. If they begin to brown too quickly, tent them with foil to prevent burning and retain moisture.
-
Cooling Time Matters: Allow the squares to cool for 5-10 minutes before cutting. This helps the cheese set and prevents a gooey mess, ensuring beautiful slices.
-
Broth Perfection: For the best dipping experience, heat the beef broth gently to avoid boiling, which preserves flavor and ensures a comfy dip.
-
Flavor Elevation: Don’t hesitate to mix up the filling! Add caramelized onions, sautéed mushrooms, or even a hint of horseradish to turn up the flavor on your French Dip Squares.
Make Ahead Options
These Easy French Dip Squares are perfect for busy home cooks looking to save time during hectic weeknights! You can assemble the entire dish and refrigerate it for up to 24 hours before baking—just be sure to cover it tightly with plastic wrap to maintain freshness and prevent the dough from drying out. To finish, simply preheat your oven and bake like normal, adding a couple of extra minutes if needed to ensure a golden top. For even longer storage, consider prepping the filling (roast beef, cheese, and onion mixture) and refrigerating it separately for up to 3 days. With these make-ahead tips, you’ll have comforting, shareable French Dip Squares ready with minimal effort on serving day!
What to Serve with Easy French Dip Squares
Get ready to create a delightful meal that pairs perfectly with the comforting flavors of your freshly baked French Dip Squares!
- Creamy Coleslaw: A crunchy, tangy coleslaw adds a refreshing contrast to the warm and savory squares, balancing each bite perfectly.
- Garlic Breadsticks: Soft and buttery, these breadsticks provide an additional doughy element that’s fun for dipping into the warm beef broth.
- Steamed Broccoli: Tender, steamed broccoli offers a pop of color, nutrition, and a subtle earthy flavor that complements the richness of the squares.
- French Fries: Crispy fries are a classic partner for these squares, ideal for dipping into the accompanying beef broth while providing that satisfying crunch.
- Caesar Salad: A crisp Caesar salad with creamy dressing adds a deliciously rich contrast that enhances the overall meal experience without overwhelming it.
- Potato Wedges: Seasoned potato wedges bring a hearty element to the table, with their crispy exterior and fluffy inside, making for a comforting pairing.
- Sweet Tea or Lemonade: A refreshing glass of sweet tea or homemade lemonade creates a wonderful balance, countering the richness of the French Dip Squares with sweetness.
- Chocolate Brownies: For dessert, warm chocolate brownies will satisfy your sweet tooth and complete your meal with a decadent finish.
Storage Tips for French Dip Squares
-
Fridge: Store leftover French Dip Squares in an airtight container for up to 3 days. This keeps the flavors intact while preserving that flaky crust.
-
Freezer: To freeze, wrap individual squares in plastic wrap and place them in a freezer-safe bag. They can last up to 3 months, ensuring you always have a delightful meal ready to go!
-
Reheating: For best results, reheat in the oven at 350°F (175°C) for about 10-15 minutes. This will revive the flaky texture and melty cheese for a delicious experience.
-
Thawing: When ready to enjoy, thaw the frozen squares in the fridge overnight before reheating. This gentle thawing method helps maintain their original taste and consistency.
French Dip Squares Customization Ideas
There’s so much room for creativity with this recipe, allowing you to make it truly your own.
- Turkey or Ham: Swap out the roast beef for turkey or ham for a lighter, yet still satisfying option. Both add a unique twist while maintaining that comforting quality.
- Cheese Variations: Try provolone or cheddar instead of Swiss to introduce different flavor profiles. Each cheese brings its own character to the dish!
- Vegetable Boost: Add caramelized onions or sautéed mushrooms to enhance the flavor profile further. They add a delicious depth and richness, perfect for those wanting a heartier filling.
- Spicy Kick: For those who enjoy a bit of heat, add a touch of horseradish or Dijon mustard within the layers. This gives the dish an exciting flavor twist that truly wakes up the taste buds!
- Gluten-Free Alternative: Use gluten-free crescent rolls to accommodate those with dietary restrictions without compromising on flavor or texture. The love of comfort food is for everyone!
- Herb Infusion: Mix in some fresh herbs like thyme or rosemary with the filling for a fragrant aromatic boost that will elevate your squares to gourmet status.
- Savory Additions: Incorporating a splash of balsamic vinegar into the filling can add a lovely tang. It pairs wonderfully with the savory elements and will surprise your guests in the best way!
- Creamy Twist: For a richer flavor, consider spreadable cheese like cream cheese or goat cheese in the layers. It not only enhances creaminess, but also spreads a lovely tang throughout each bite.
Feel free to explore and combine these variations! And if you’re looking for more tips on transforming classic favorites, check out my guide on innovative takes on traditional recipes. Your French Dip Squares will never be the same!

French Dip Squares Recipe FAQs
How do I choose the best roast beef for my French Dip Squares?
Absolutely! When selecting deli roast beef, look for slices that are tender and juicy, preferably with a marbled texture. This ensures flavor and moisture in your squares. Opt for medium-rare to medium cuts, as they tend to be more delicious and savory, enhancing your dish’s overall experience.
How should I store leftover French Dip Squares?
Very! Place any leftover squares in an airtight container and store them in the refrigerator for up to 3 days. This keeps them fresh while maintaining that flaky texture. Just remember to let them cool completely before sealing to avoid moisture buildup which could make the pastry soggy.
Can I freeze French Dip Squares and how do I do it?
Certainly! To freeze your delicious French Dip Squares, allow them to cool completely first. Then, wrap each square individually in plastic wrap and place them in a freezer-safe bag. They can last for up to 3 months. When you’re ready to enjoy them, just thaw in the fridge overnight before reheating in the oven at 350°F (175°C) for about 10-15 minutes until warmed through.
What should I do if my crescent roll dough isn’t sealing properly?
No worries! If you are having trouble sealing the seams of your crescent roll dough, simply press the dough with your fingers or a rolling pin to ensure a tight seal. If you find that it tears easily, keep a bit of flour nearby to dust the surface. You can also patch small holes with extra dough; just be gentle so you don’t compromise the flaky texture.
Are there any dietary considerations for French Dip Squares?
Absolutely! If you’re concerned about allergies, be aware that this recipe includes gluten and dairy. You can opt for gluten-free crescent rolls and alternative cheeses like vegan cheese or lactose-free options if needed. Always check the labels on your ingredients to avoid allergens. Additionally, this dish is not suitable for pets, as certain cheeses and seasonings may be harmful to them.

Irresistible French Dip Squares for Ultimate Comfort Food Bliss
Ingredients
Equipment
Method
- Preheat your oven to 375°F (190°C) and prepare a 9x13 inch baking dish with non-stick spray.
- Unroll one can of crescent rolls and press it into the bottom of the baking dish, pinching the seams together.
- Layer the deli-sliced roast beef evenly over the crescent roll base, then sprinkle the grated Swiss cheese on top.
- Mix the dry onion soup mix, melted butter, Worcestershire sauce, and garlic powder in a bowl, then drizzle over the cheese.
- Unroll the second can of crescent rolls and layer it over the filling, pinching seams to secure.
- Bake in the preheated oven for 15-20 minutes until golden brown and cheese is bubbling.
- Heat beef broth in a small saucepan while the squares bake.
- Allow the French Dip Squares to cool for 5-10 minutes, then cut into portions.
- Serve warm with a bowl of beef broth for dipping.
Leave a Reply