
As I unwrapped my lunch one afternoon, a bright splash of color caught my eye—the simple sushi cups I’d whipped up the night before. These little delights are not just visually appealing; they are a high-protein, vegetarian snack that offers a fresh twist on traditional sushi without the rolling fuss. Packed with crunchy veggies, creamy avocado, and a tantalizing drizzle of spicy mayo, these Healthy No-Bake Sushi Cups are perfect for impressing guests or enjoying as a quick meal at home. What’s more, their customizable nature means you can adapt the ingredients to fit your taste buds, making them a versatile addition to your culinary repertoire. Ready to take a bite into this fun sushi adventure? Let’s dive in!
Why Are Sushi Cups So Amazing?
Customizable to your heart’s content, sushi cups let you mix and match your favorite fillings with endless possibilities! No-Bake means they’re easy and quick to prepare, perfect for busy days or spontaneous gatherings. Healthy and High-Protein, these cups are not just a snack but a nutritious meal option, making them guilt-free indulgences. Visually Stunning, they are guaranteed to impress guests, elevating your appetizer game effortlessly. Perfect for Meal Prep, you can whip up a batch in advance, ensuring you always have delicious bites ready to enjoy!
Sushi Cups Ingredients
Dive into creating your delectable sushi cups with these simple yet vibrant ingredients!
For the Rice Base
- 1 cup sushi rice – Provides a perfectly sticky texture for forming cups; rinse well to remove excess starch.
- 1 ½ cups water – Ensures the rice cooks tender and fluffy; the right ratio is key.
For the Filling
- ½ cup finely chopped veggies – Adds a delightful crunch and freshness; use carrots, cucumber, or bell peppers for variety.
- ¼ cup steamed mukimame (shelled edamame) – Boosts protein content and texture; regular edamame works if mukimame isn’t available.
- ¼ cup diced avocado (~½ small avocado) – Brings creaminess and richness; ensure it’s ripe for the best flavor.
- 1 tablespoon sauce of choice – Amplifies flavors (options include soy sauce, tamari, or coconut aminos).
For the Spicy Mayo
- ¼ cup mayonnaise – Forms a creamy base; substitute with vegan mayo for a dairy-free option.
- 1 teaspoon Sriracha sauce – Adds a kick of heat; adjust according to your spice preference.
- 1 teaspoon coconut aminos or soy sauce – Enhances umami flavor for a savory touch.
- 1 teaspoon honey – Balances the spiciness; maple syrup can be used for a vegan alternative.
- ½ teaspoon sesame oil – Infuses aromatic depth to the sauce.
For Garnish
- Black sesame seeds – Optional but recommended for a pop of flavor and appealing presentation; truly enhances your sushi cups!
Now that you have all your sushi cups ingredients gathered, it’s time to create these healthy, customizable bites that are perfect for any occasion!
Step‑by‑Step Instructions for Sushi Cups
Step 1: Cook the Sushi Rice
In a medium pot, combine 1 cup of rinsed sushi rice with 1 ½ cups of water. Bring the mixture to a boil over high heat, then reduce the heat to low, cover, and simmer for 15 minutes until the rice is tender and the water is absorbed. Once cooked, remove from heat, fluff the rice with a fork, and allow it to cool slightly.
Step 2: Form the Rice Cups
Preheat your fridge while the rice cools. Grab a muffin tin or silicone liners and fill each cup with the slightly cooled sushi rice. Use the back of a spoon to firmly press the rice into the mold, ensuring it’s compact and forms a cup shape. Chill the filled molds in the refrigerator for about 20 minutes to set.
Step 3: Prepare the Filling
In a mixing bowl, combine ½ cup of finely chopped veggies, ¼ cup of steamed mukimame, and ¼ cup of diced avocado. Drizzle in 1 tablespoon of your choice of sauce, like soy sauce or tamari. Gently mix the ingredients together until well combined, making sure to maintain the chunkiness of the avocado for a fresh taste in your sushi cups.
Step 4: Whisk the Spicy Mayo
In a separate bowl, whisk together ¼ cup of mayonnaise, 1 teaspoon of Sriracha, 1 teaspoon of soy sauce, 1 teaspoon of honey, and ½ teaspoon of sesame oil. Adjust the Sriracha to your preferred spice level for those sushi cups. The goal is a creamy, zesty sauce that complements the filling beautifully.
Step 5: Assemble the Sushi Cups
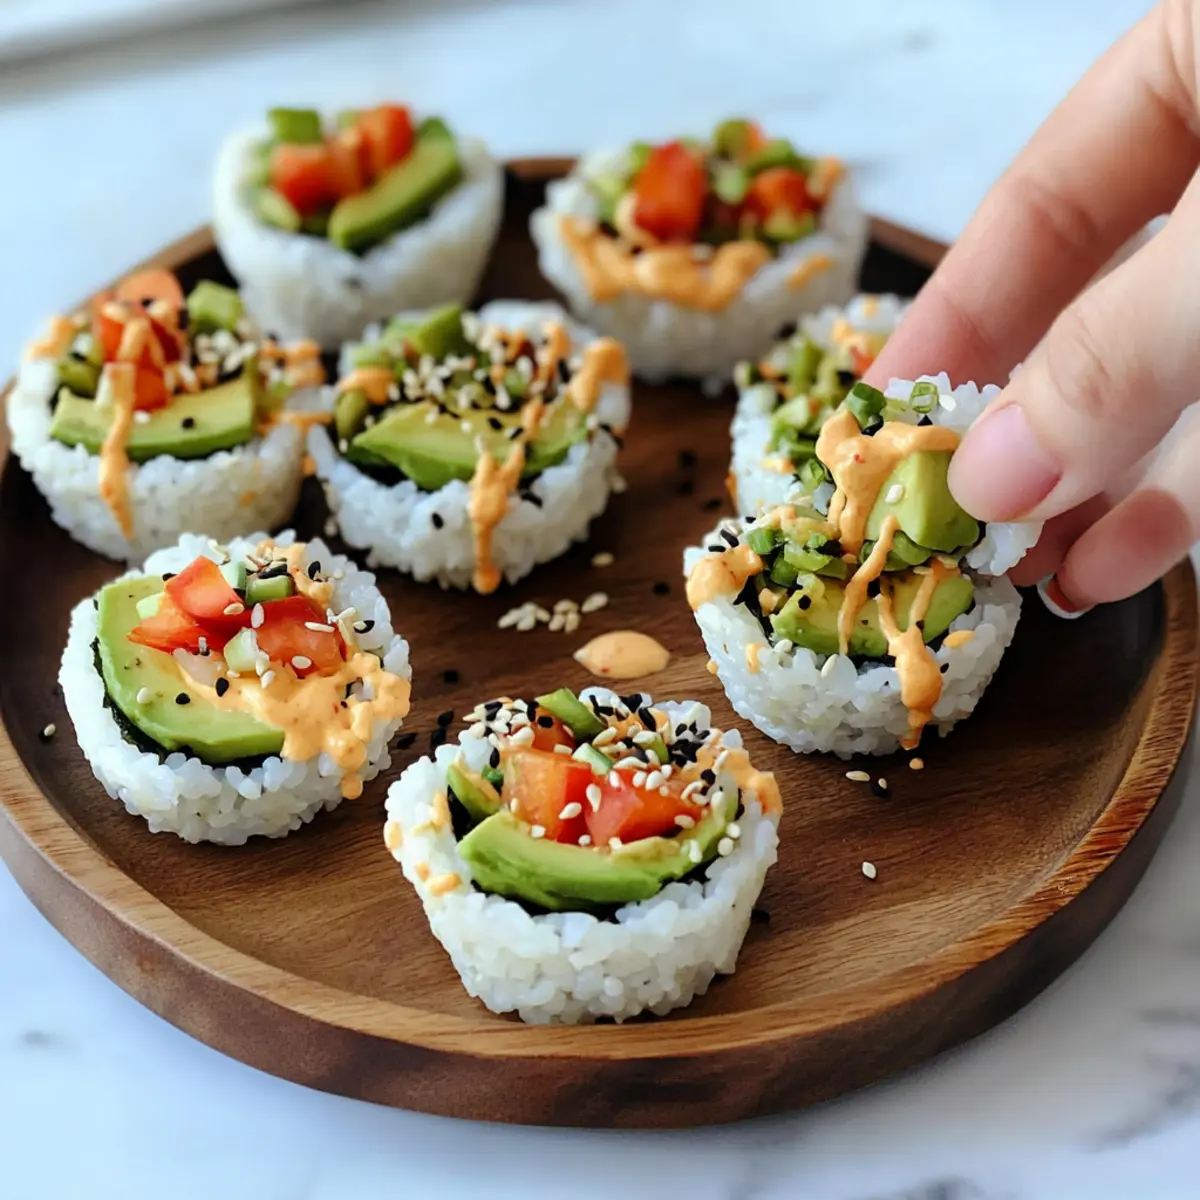
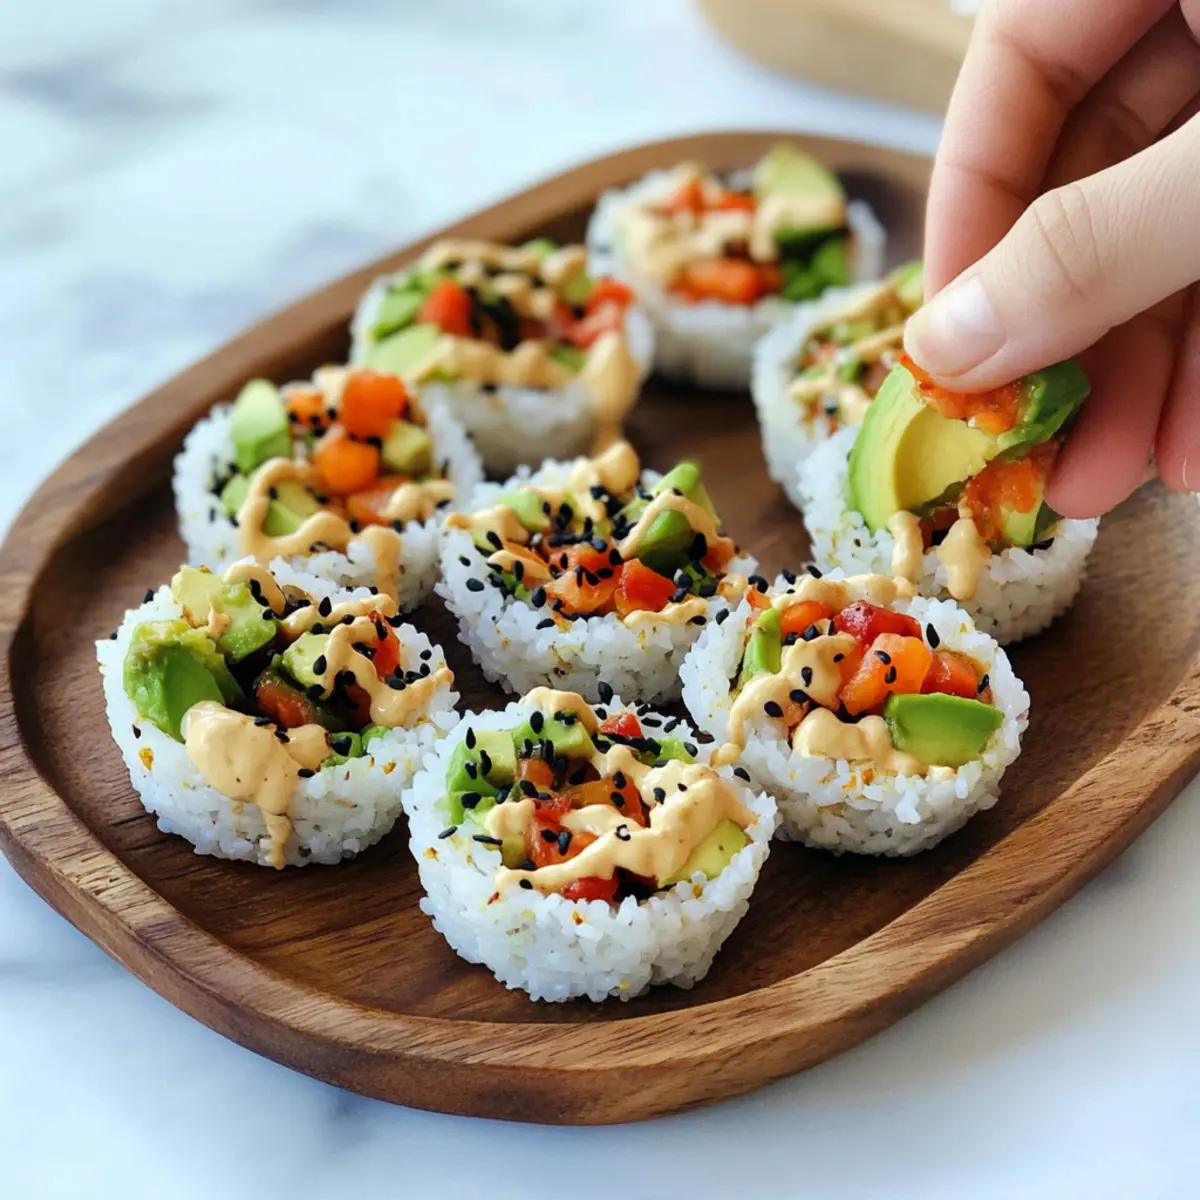
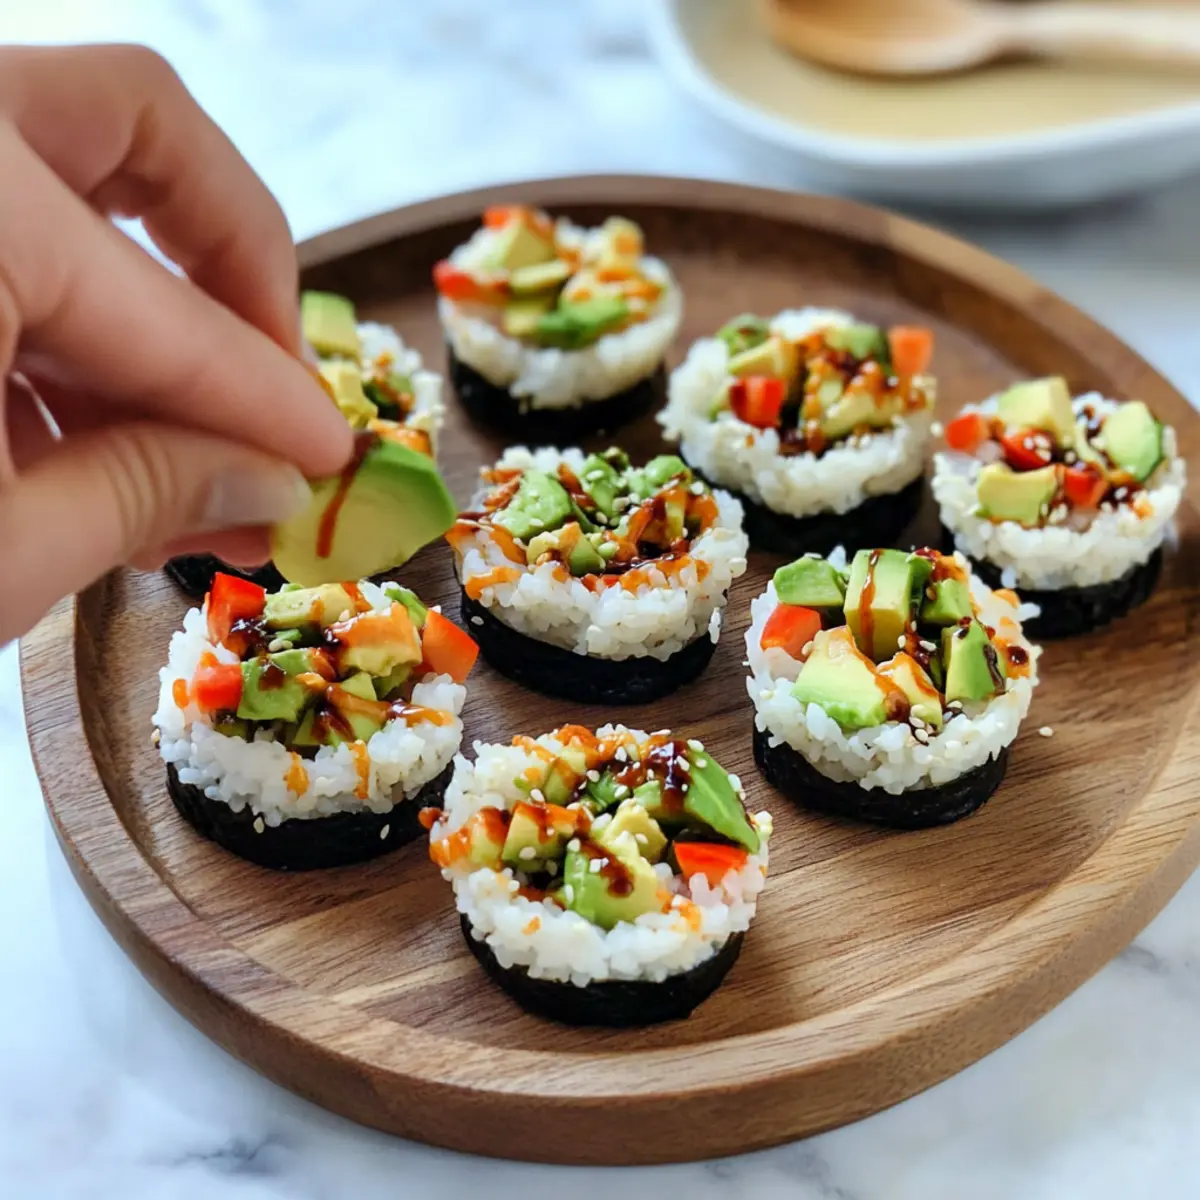
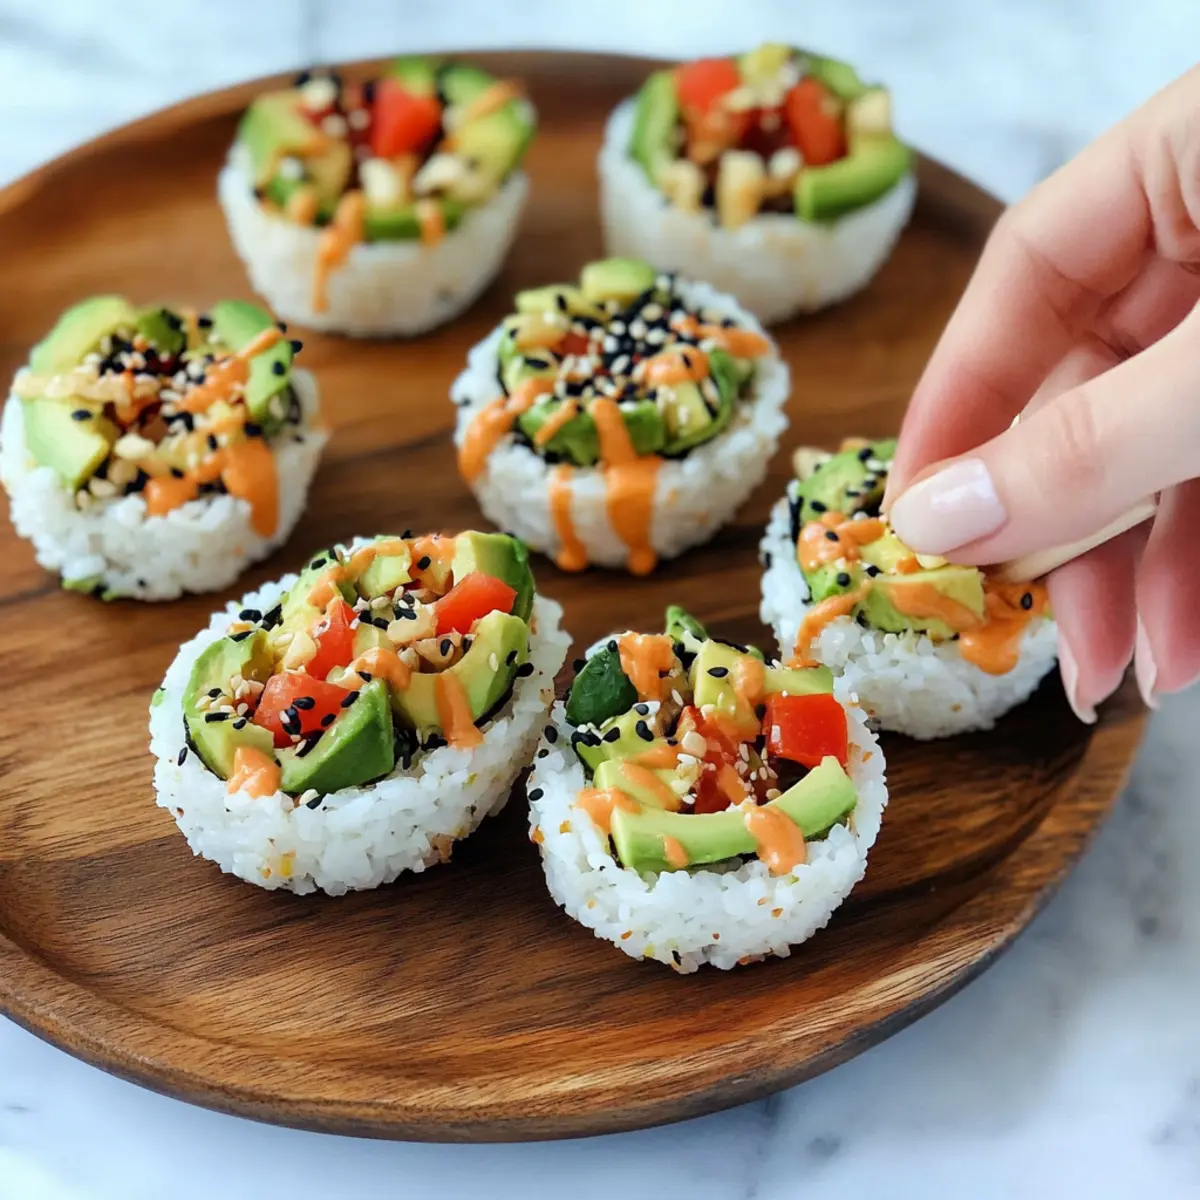
Once the rice cups have chilled, carefully remove them from the muffin tin or silicone molds. Fill each rice cup generously with the veggies and edamame mixture, then drizzle a generous amount of spicy mayo on top. Finish by sprinkling black sesame seeds for an extra crunch and eye-catching presentation.
Step 6: Serve and Enjoy
These delightful sushi cups are perfect for a quick snack, appetizer, or light meal. Serve them immediately for a fresh experience, or keep them refrigerated for up to two days. Enjoy the vibrant flavors and textures of your homemade sushi cups, sure to impress family and friends alike!
Tips for the Best Sushi Cups
-
Rice Rinsing: Rinse sushi rice thoroughly before cooking to remove excess starch. This helps achieve a perfect, non-sticky texture in your sushi cups.
-
Cooling Time: Allow the rice to cool slightly before pressing it into molds. This helps the rice maintain its shape when forming cups.
-
Fillings Galore: Get adventurous! Use a variety of toppings like colorful veggies or even proteins for a unique twist on your sushi cups.
-
Adjust Spice: When making the spicy mayo, start with less Sriracha and taste as you go. It’s easier to add more heat than to fix an overly spicy sauce.
-
Storage Savvy: Sushi cups are best eaten within two days. If not serving immediately, store in an airtight container in the fridge to keep them fresh.
-
Presentation Matters: Garnish with black sesame seeds, as it not only adds flavor but also elevates the visual appeal of your sushi cups!
Make Ahead Options
These sushi cups are perfect for meal prep enthusiasts! You can cook the sushi rice and form the cups up to 24 hours in advance to save time on busy days. Simply refrigerate the formed rice cups in an airtight container to maintain their quality. The veggie filling can also be prepared ahead of time; just chop the veggies and mix them with edamame and avocado, then store it separately in the fridge for up to 3 days. When you’re ready to enjoy, simply fill the chilled rice cups with the veggie mixture, drizzle with spicy mayo, and garnish with black sesame seeds for a quick and delicious meal that’s just as delightful as freshly made sushi cups!
Sushi Cups Variations & Substitutions
Feel free to get creative and make these sushi cups your own with these fun variations!
- Protein-Packed: Add imitation crab or shrimp for a savory seafood twist that amps up the protein. A little seafood can go a long way, adding not just taste but texture too.
- Quinoa Twist: Use quinoa instead of sushi rice for a nutty flavor and a wholesome grain alternative. Just keep in mind, quinoa will yield a different cup shape!
- Spicy Upgrade: For those who crave heat, toss in chopped jalapeños or a sprinkle of red pepper flakes into the filling mix for an extra kick. Spice lovers will delight in this version!
- Herb Infusion: Enhance the flavor with fresh herbs like cilantro or mint mixed into your filling. Fresh herbs give a burst of flavor that retains that wonderful summer vibe.
- Vegan Option: Use vegan mayo and replace honey with maple syrup to make the spicy mayo fully plant-based. Everyone deserves to enjoy this delight!
- Crunchy Texture: For an added crunch, sprinkle in crushed seaweed snacks or toasted sesame seeds into the filling or as a topping. It adds depth, flavor, and texture in every bite!
- Sweet and Spicy: Drizzle some sweet chili sauce over the top instead of the spicy mayo for a unique and tangy flavor difference. It’s a perfect pairing with fresh veggies!
These variations allow you to customize your sushi cups to suit your tastes or dietary preferences. For more inspiration, check out our healthy homemade sushi recipes or learn about different vegetarian options to bring even more flavor to your kitchen adventures!
What to Serve with Healthy No-Bake Sushi Cups?
Elevate your sushi cups and create a memorable meal with these delightful pairings that harmonize in flavor and texture.
- Crispy Tempura Vegetables: The light and crispy coating complements the tender texture of sushi cups, adding a satisfying crunch.
- Edamame Pods with Sea Salt: These nutritious bites add a pop of freshness and protein, enhancing the healthy theme of your meal.
- Savory Miso Soup: A warm bowl of miso soup brings depth and comfort, perfectly rounding out your sushi experience.
- Rainbow Salad: A refreshing mix of greens, carrots, and radishes infuses vibrant colors and additional crunch, balancing the rich avocado.
- Light Soy Sauce Dressing: Drizzling a mild soy sauce dressing over your sushi cups can accentuate their flavors, enriching every bite.
- Green Tea: Sipping on warm green tea enhances the flavors of your sushi cups while offering a calming, aromatic experience.
- Coconut Sorbet: For dessert, a refreshing coconut sorbet cleanses the palate while providing a sweet finish to your meal.
- Chilled Sake: Serve alongside a glass of chilled sake that complements the sushi’s freshness and adds a festive touch to your gathering.
- Fruit Platter: Offering a colorful fruit platter with fresh seasonal fruits can provide a sweet contrast, making the meal more delightful.
How to Store and Freeze Sushi Cups
Fridge: Keep your sushi cups stored in an airtight container in the refrigerator for up to 2 days. This will help maintain their freshness and prevent the rice from becoming stale.
Freezer: While freezing isn’t ideal due to potential texture changes, you can freeze individual sushi cups for up to 1 month. Wrap each cup tightly in plastic wrap and then place them in a freezer-safe bag.
Thawing: When ready to enjoy, transfer the sushi cups to the fridge to thaw overnight. Reheat gently in the microwave if you prefer them warm, but they are best enjoyed fresh!
Assembling Freshly: If you’ve prepped components ahead of time, consider assembling your sushi cups just before serving to preserve their crisp textures and vibrant colors.
Sushi Cups Recipe FAQs
What is the best way to select ripe avocado for sushi cups?
Absolutely! Look for avocados that feel slightly soft when gently squeezed but aren’t mushy. A ripe avocado should have a dark green skin (or purplish, depending on the variety) and will yield to gentle pressure. If it’s still hard, give it a day or two at room temperature to ripen further.
How should I store leftover sushi cups?
Very! Place any leftover sushi cups in an airtight container and refrigerate for up to 2 days. This helps keep the rice fresh and the veggies crunchy, ensuring you can enjoy the deliciousness before they go stale!
Can I freeze sushi cups for later? What’s the best way to do it?
Indeed, you can freeze them! To do so, wrap each sushi cup tightly in plastic wrap and then place them in a freezer-safe bag. They can last in the freezer for up to 1 month. When you’re ready to enjoy them, thaw the cups in the refrigerator overnight. If you prefer them warm, warm them up gently in the microwave. Just remember that the texture may slightly change upon freezing.
What should I do if my sushi rice isn’t sticky enough?
No need to worry! If your sushi rice didn’t turn out as sticky as you hoped, it may require more rinsing to remove excess starch or may not have had enough cooking time. For the next try, ensure you rinse the sushi rice thoroughly until the water runs clear and check that you’re cooking it with the right water-to-rice ratio (1 ½ cups water for every 1 cup sushi rice) for optimal texture!
Are there any dietary considerations when making these sushi cups?
Absolutely! If you’re making sushi cups for guests or family with dietary restrictions, you can easily customize them. Use vegan mayo in the spicy mayo for a dairy-free option, and check that all ingredients are gluten-free if needed. Additionally, always inform about possible allergens in your vegetable choices, such as soy in the sauces or any cross-contamination if you’re serving people with allergies.
What are some good alternatives to sushi rice if I want to switch things up?
Very good question! You can try using quinoa for a different texture or even cauliflower rice for a low-carb alternative. Just keep in mind that you’ll need to adjust the liquid ratio and cooking time if you opt for any substitutes. Quinoa will need about 2 cups of water to 1 cup of quinoa and should be rinsed just like sushi rice!
Irresistible Sushi Cups: A Healthy No-Bake Delight!
Ingredients
Equipment
Method
- Cook the Sushi Rice: In a medium pot, combine 1 cup of rinsed sushi rice with 1 ½ cups of water. Bring to a boil, reduce heat, cover, and simmer for 15 minutes until tender. Fluff with a fork and let cool slightly.
- Form the Rice Cups: Preheat the fridge. Fill muffin tin or silicone liners with slightly cooled sushi rice, pressing firmly to shape cups. Chill for about 20 minutes.
- Prepare the Filling: In a bowl, combine ½ cup of finely chopped veggies, ¼ cup of steamed mukimame, and ¼ cup of diced avocado. Add 1 tablespoon of sauce, mixing gently.
- Whisk the Spicy Mayo: In a bowl, whisk together ¼ cup mayonnaise, 1 teaspoon Sriracha, 1 teaspoon soy sauce, 1 teaspoon honey, and ½ teaspoon sesame oil.
- Assemble the Sushi Cups: Carefully remove rice cups from molds. Fill each with veggie and edamame mixture, and drizzle with spicy mayo. Sprinkle with black sesame seeds.
- Serve and Enjoy: Serve immediately or store in the fridge for up to two days.
Leave a Reply