
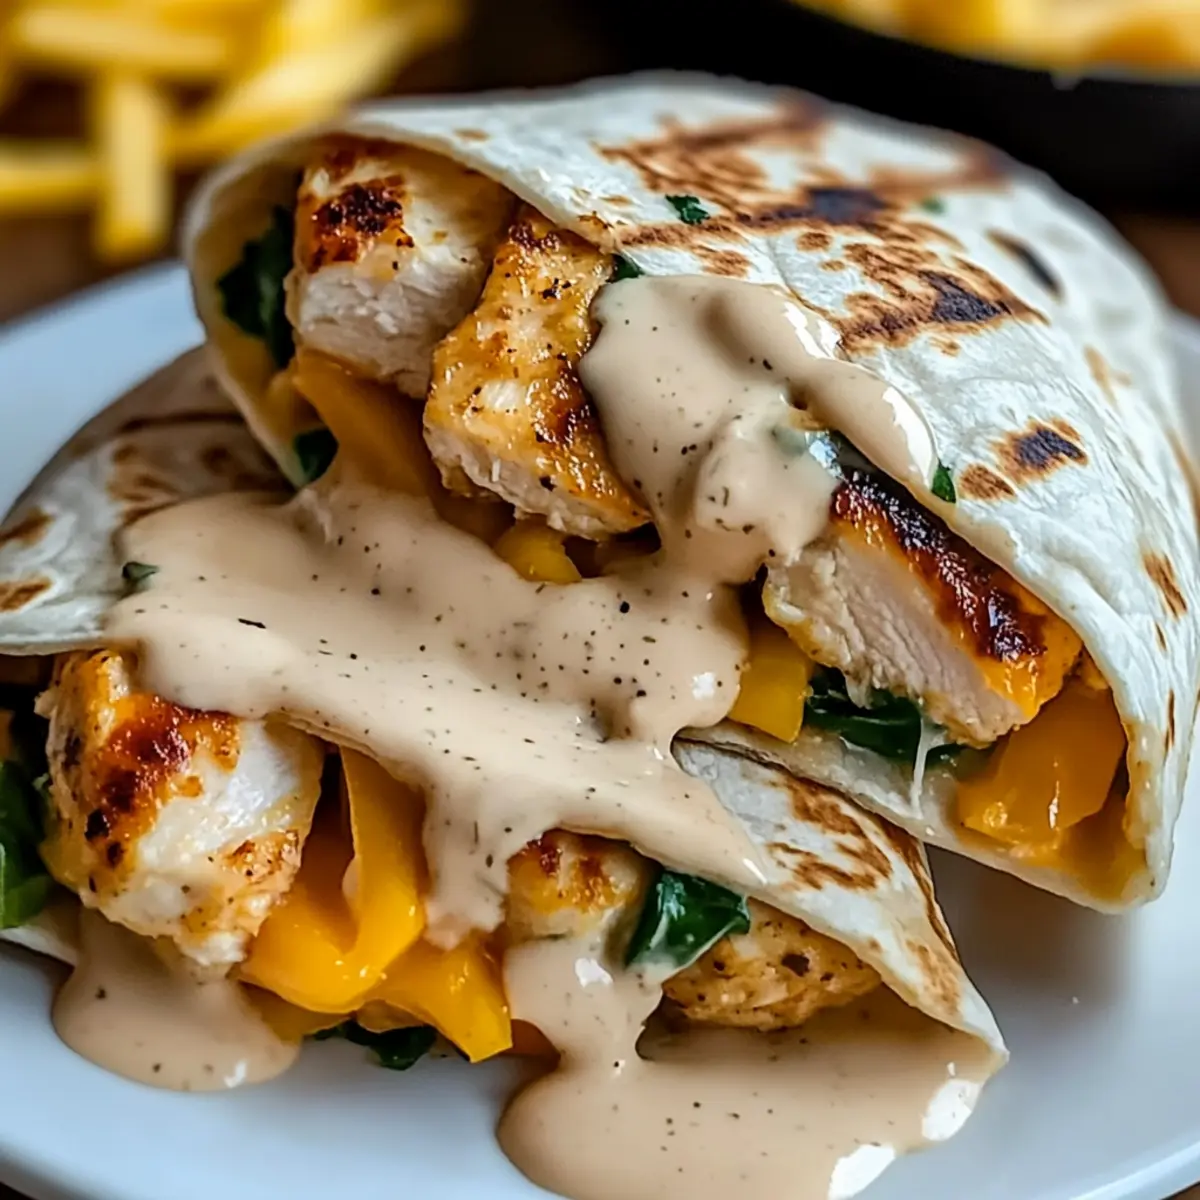
As I stood in my kitchen, the comforting scent of garlic wafted through the air, mingling with the promise of cheesy goodness. That’s when I knew: it was time for my Cheesy Garlic Chicken Wraps. These wraps bring together crispy tortillas, tender chicken, and a melty cheese blend, creating a delicious meal that warms the heart. Perfect for busy weeknights, this recipe stands out not only for its quick preparation time but also for its irresistible ability to satisfy even the pickiest eaters. Imagine customizing them with flavors ranging from Mediterranean to Southwest; they’re destined to become your go-to comfort food for any occasion. Are you ready to dive into the world of flavor with just a few simple ingredients? Let’s unwrap the magic of these wraps together!
Why Are These Wraps So Irresistible?
Flavor Explosion: The combination of rich garlic and creamy cheeses creates a mouthwatering experience that you’ll crave again and again.
Quick and Easy: Perfect for bustling weeknights, these wraps come together in under 30 minutes, making dinner a breeze!
Customizable Delight: With variations like Mediterranean or Buffalo Chicken, you can tailor these wraps to fit any taste preference or dietary need, including vegetarian and gluten-free options.
Crowd-Pleasing: Whether it’s a family meal or a casual gathering, these wraps, served alongside a fresh salad or Guacamole, are sure to impress.
Meal Prep Friendly: Make-ahead in batches and freeze for effortless weeknight dinners when you’re short on time. You’ll love having them on hand!
Cheesy Garlic Chicken Wraps Ingredients
-
For the Wraps
-
Flour Tortillas – Holds the delicious fillings together; opt for corn tortillas for a gluten-free version.
-
Melted Butter – Adds richness and promotes a lovely golden crust; you can use olive oil for a lighter alternative.
-
For the Chicken Filling
-
Extra Virgin Olive Oil – Provides flavor and aids in cooking the chicken; any neutral cooking oil can be substituted.
-
Chicken Breast – The star of the dish; ensures a filling meal – swap for turkey or firm tofu for a lighter choice.
-
Garlic – Elevates the flavor profile, with fresh minced garlic being ideal; garlic powder works in a pinch.
-
Sea Salt and Cracked Black Pepper – Simple seasoning to enhance flavor; adjust to your taste preference.
-
Sweet Onion – Offers a sweet and savory note when sautéed; yellow onion or shallots work as alternatives.
-
Red Bell Pepper – Adds a crunch and a hint of sweetness; feel free to use any bell pepper variety or zucchini.
-
Fresh Spinach Leaves – A nutritious boost; can be substituted for kale or simply omitted.
-
For the Cheese Blend
-
Shredded Mozzarella – Provides a creamy texture; freshly grated cheese melts best.
-
Sharp Cheddar – Adds a bold flavor to the wrap; another cheese variety can be easily substituted.
-
Cream Cheese – Gives a rich creaminess; consider Greek yogurt as a lighter alternative.
-
Sour Cream – Contributes tanginess; plain yogurt is a healthier substitute.
-
Fresh Chives – Perfect finishing touch for flavor; green onions work well if you’re out of chives.
-
Roasted Garlic Powder – Adds a nutty depth of flavor; use fresh garlic if preferred for a more vibrant taste.
-
For Variations
-
Mediterranean Herb Blend – Infuses aromatic notes into the dish; feel free to swap it with Italian seasoning.
-
Smoky Paprika – Enhances the flavor with a hint of smokiness; opt for sweet paprika or omit for a mild taste.
These Cheesy Garlic Chicken Wraps are ready to be customized to your liking, making them a delightful meal for any occasion. Enjoy the ease and flavor that transforms your dinner into a memorable experience!
Step‑by‑Step Instructions for Cheesy Garlic Chicken Wraps
Step 1: Cook the Chicken
In a large skillet, heat 2 tablespoons of extra virgin olive oil over medium heat until shimmering. Add seasoned chicken breasts and cook for 5-6 minutes, turning once, until golden brown and cooked through, reaching an internal temperature of 165°F (74°C). Remove from the skillet and allow to rest while you prepare the vegetables.
Step 2: Sauté the Vegetables
In the same skillet, sauté diced sweet onion and red bell pepper for about 3-4 minutes until they become tender and fragrant. Add 2-3 cloves of minced garlic and cook for an additional 1-2 minutes, stirring frequently until the garlic is fragrant but not burnt. Remove the vegetable mixture from the heat and set it aside.
Step 3: Make the Cheese Blend
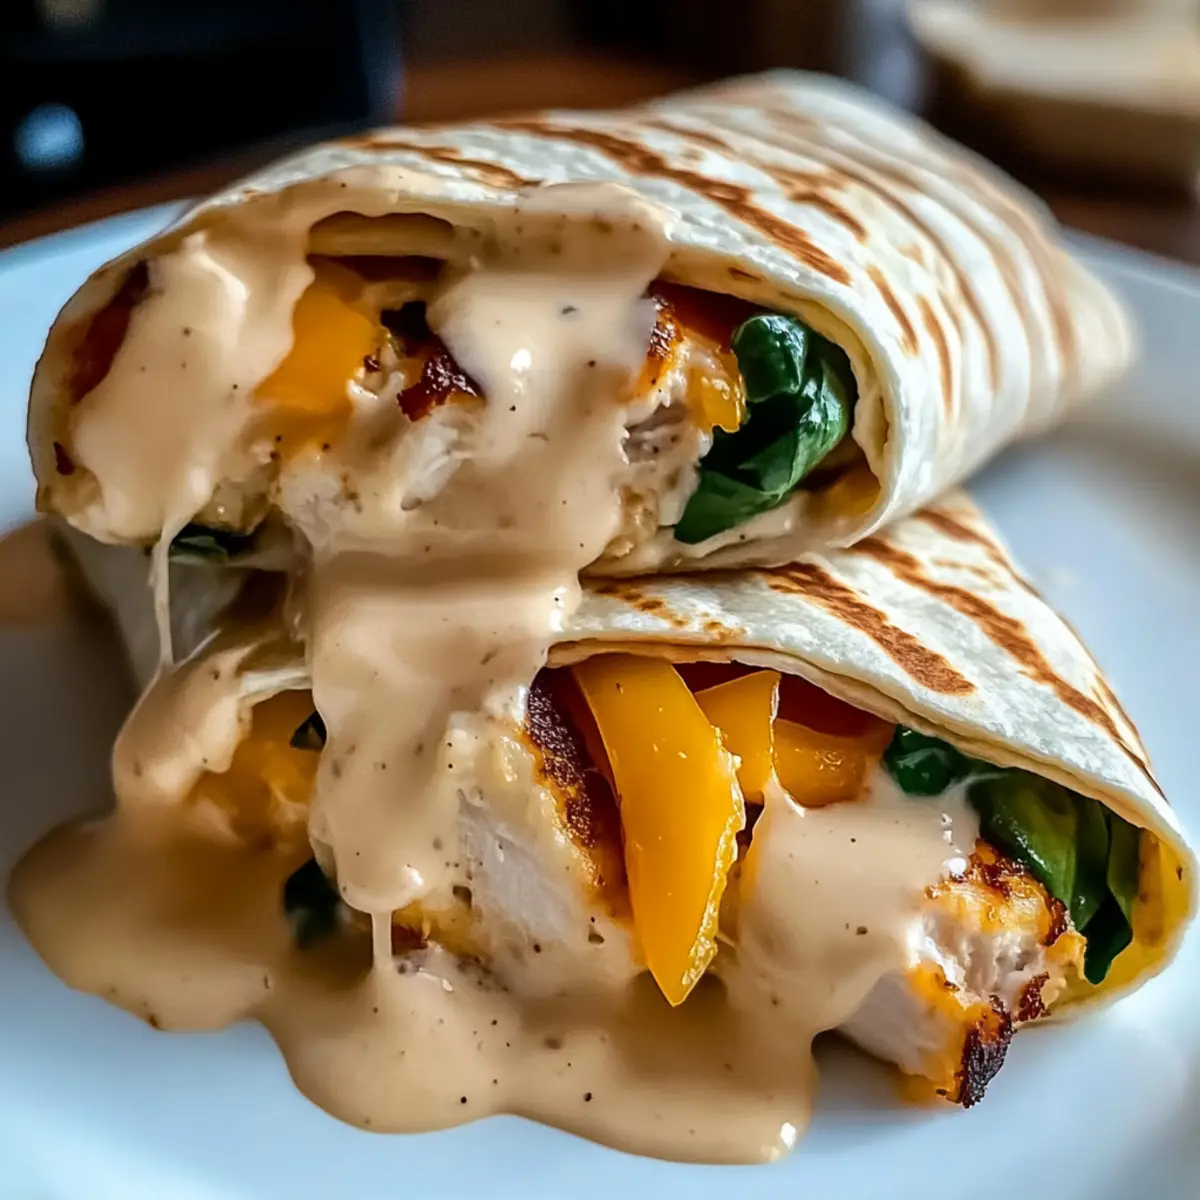
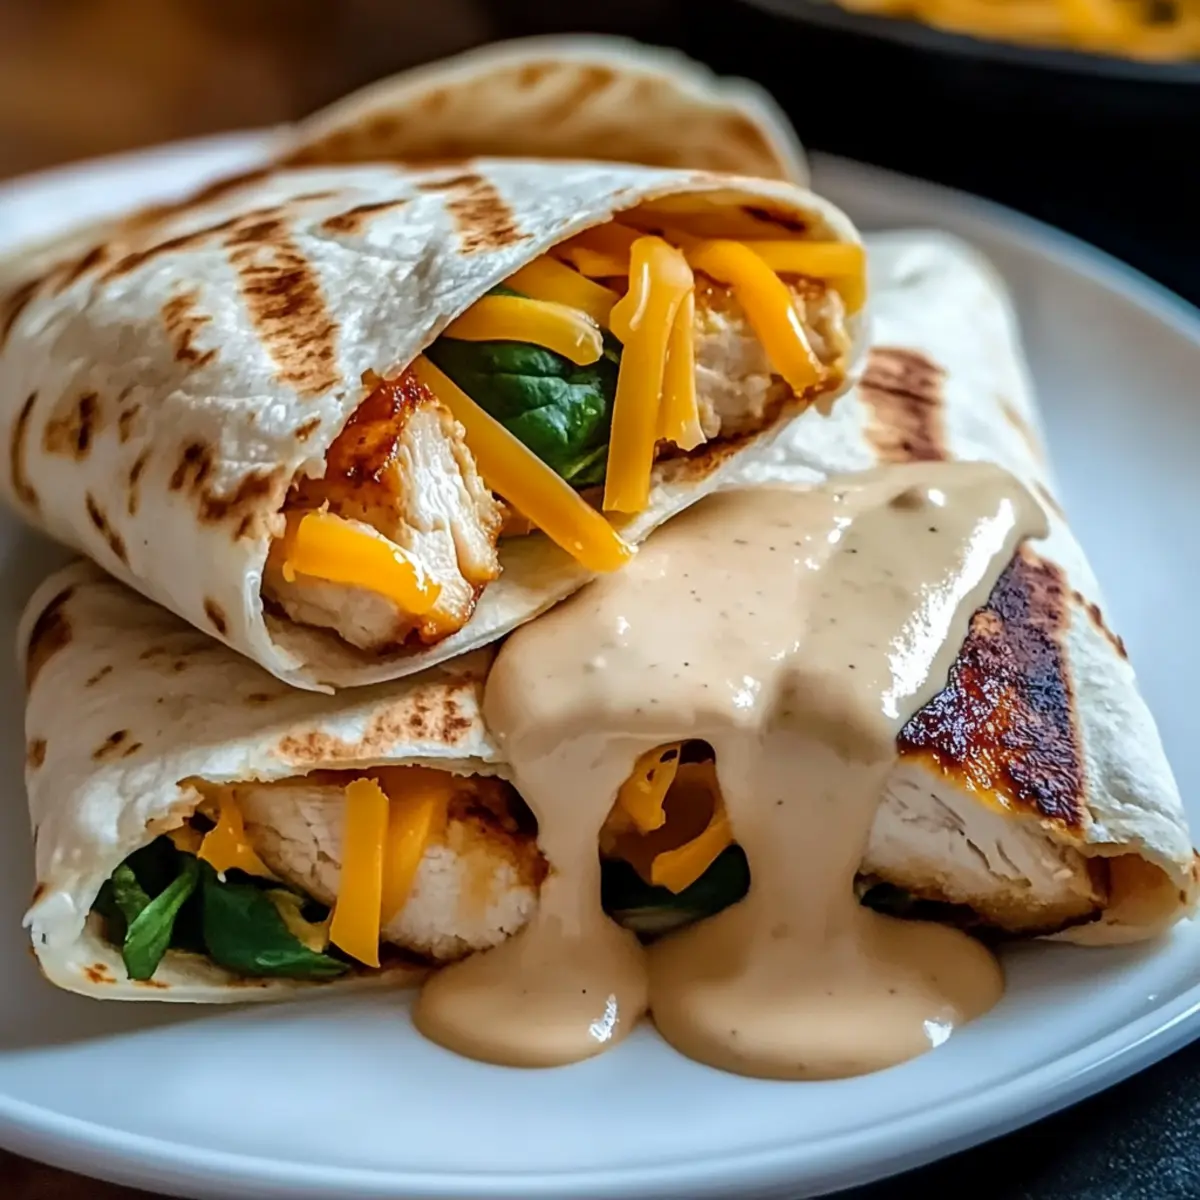
In a mixing bowl, combine 1 cup of shredded mozzarella, 1/2 cup of sharp cheddar, 4 oz of softened cream cheese, and 1/4 cup of sour cream. Mix until well blended and creamy. This cheesy filling will enhance the flavor of your Cheesy Garlic Chicken Wraps, giving them a rich and savory taste that melts beautifully.
Step 4: Prepare the Tortillas
Brush both sides of each flour tortilla with melted butter, then sprinkle a light dusting of roasted garlic powder on each side for extra flavor. To make the tortillas more pliable, warm them in the microwave for about 20 seconds. This step prevents them from breaking while you’re rolling your wraps.
Step 5: Assemble the Wraps
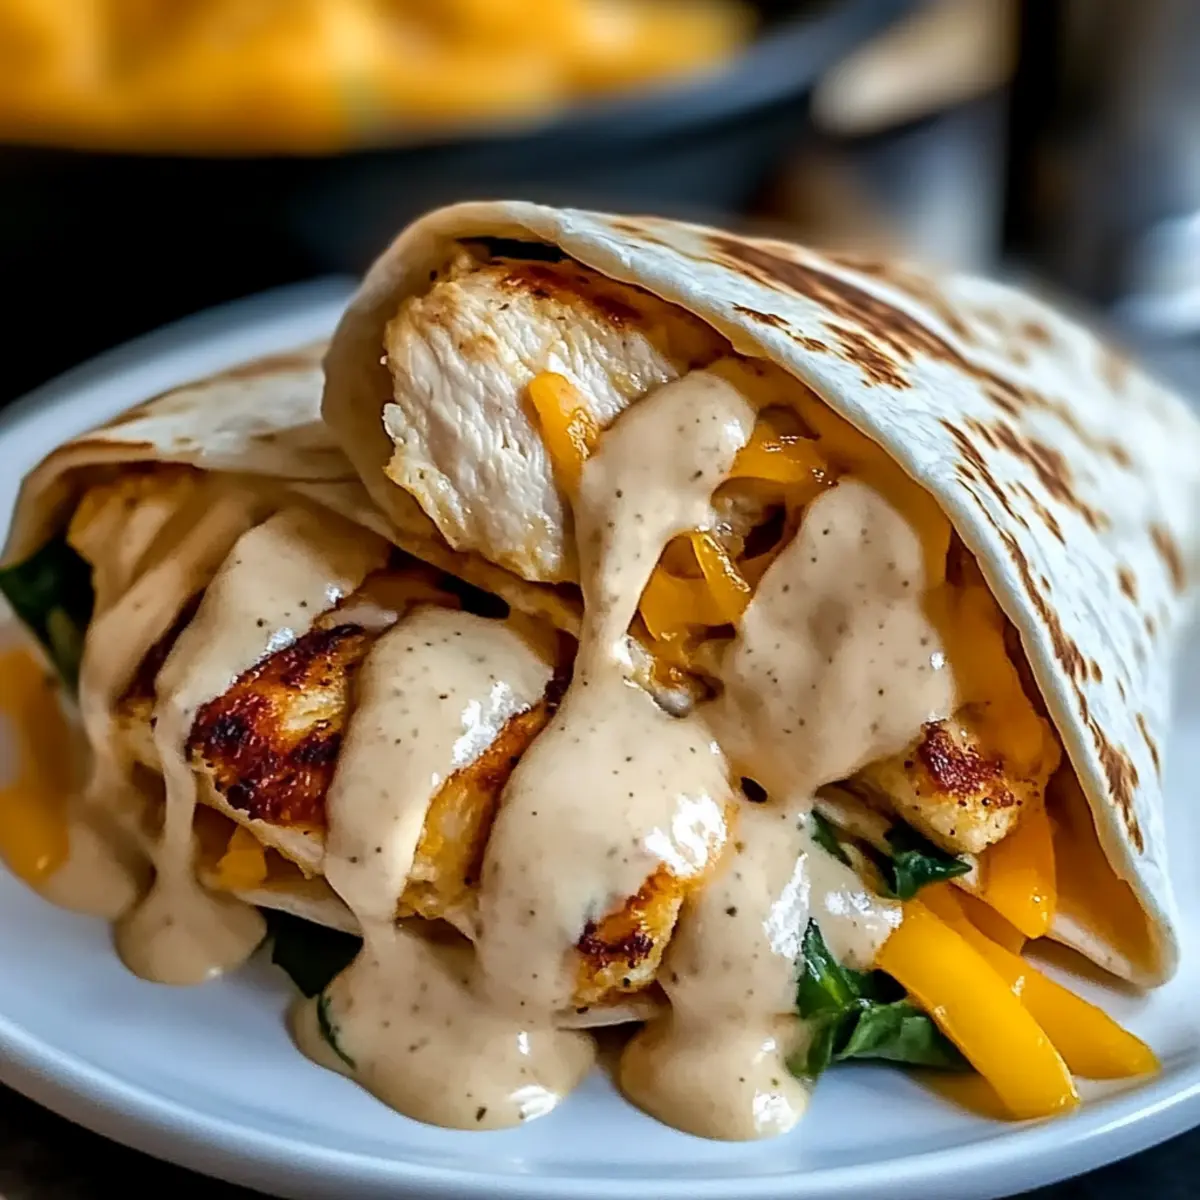
Lay each tortilla flat and scoop a portion of the chicken, sautéed vegetables, and cheese blend onto the center. Fold the sides of the tortilla inwards, then roll it tightly from the bottom, encasing all the delicious fillings. Be sure to keep everything packed securely for optimal flavor in your Cheesy Garlic Chicken Wraps.
Step 6: Toast the Wraps
In the same skillet over medium heat, place the wraps seam-side down and toast for about 2-3 minutes, or until golden brown and crispy. Carefully flip each wrap and toast the other side for an additional 2-3 minutes. They should have a crunchy exterior while the cheese melts beautifully inside.
Step 7: Serve Hot
Once golden and crispy, remove the wraps from the skillet and slice them in half diagonally for a delightful presentation. Serve your Cheesy Garlic Chicken Wraps warm, perhaps with fresh salsa or guacamole on the side for a refreshing contrast. Enjoy the cozy, satisfying flavors this dish brings to your dining experience!
What to Serve with Cheesy Garlic Chicken Wraps
The magic of a meal comes to life when you pair these wraps with delightful sides that complement their rich flavors and textures.
- Fresh Side Salad: Perfect for adding crunch and brightness, a salad of mixed greens with a lemon vinaigrette cuts through the richness of the wraps.
- Creamy Guacamole: Rich and creamy avocado dip provides a smooth contrast, ideal for dipping and adding a fresh, zesty flavor.
- Cauliflower Rice: Light and fluffy, cauliflower rice serves as a low-carb side, soaking up the delicious flavors of the wraps while adding a nutritious touch.
- Sweet Potato Fries: Crispy and slightly sweet, they introduce a comforting, contrasting texture that pairs beautifully with the wraps.
- Grilled Vegetables: Seasoned and charred veggies like zucchini and bell peppers enhance the wrap’s garlic flavor while offering a healthy, colorful addition.
- Spicy Salsa: A dollop of homemade or store-bought salsa adds a refreshing kick, balancing the creamy filling with vibrant flavors.
- Zesty Lemonade: This refreshing drink complements the wraps’ richness with a bright, tangy flair, making every bite even more enjoyable.
- Chocolate Chip Cookies: For dessert, warm, gooey cookies provide a sweet ending to this comfort meal, capturing the heart and warmth of home cooking.
Expert Tips for Cheesy Garlic Chicken Wraps
-
Cool Fillings First: Allow chicken and veggies to cool slightly before assembling wraps to prevent sogginess. This helps keep your Cheesy Garlic Chicken Wraps crispy!
-
Grate Your Cheese: For optimal meltiness, always use freshly grated cheese. Pre-packaged options often contain anti-caking agents that can hinder melting.
-
Microwave Tortillas: Warm tortillas in the microwave for 10-15 seconds to make them pliable and easier to roll, reducing the risk of tearing.
-
Consistent Portions: Ensure even filling in your wraps by measuring out portions. This not only looks great but keeps cooking times consistent across all wraps.
-
Secure Wraps: If you’re having trouble keeping wraps tight, use toothpicks to secure them while toasting. Just remember to remove them before serving!
Cheesy Garlic Chicken Wraps Variations
Feel free to get creative and tailor these wraps to your taste buds—let’s make magic in the kitchen!
-
Mediterranean: Mix in olives and crumbled feta for a zesty, briny bite. The addition of these tangy ingredients gives every bite an exciting twist!
-
Southwest: Incorporate black beans, corn, and a touch of diced jalapeños for a heartier option. Serve with avocado on the side for that creamy contrast, making it truly satisfying.
-
Buffalo Chicken: Spice things up by tossing the chicken in buffalo sauce before assembly. A side of ranch or blue cheese dressing would perfectly complement the heat, leaving you wanting more!
-
Breakfast: Swap the chicken for scrambled eggs and add crispy bacon bits or sausage. The savory goodness creates a delightful morning feast wrapped up just for you!
-
Vegetarian Delights: Replace the chicken with hearty roasted veggies like zucchini and mushrooms. Add a touch of balsamic glaze for a rich, tangy flavor that will make your taste buds dance.
-
Lower-Carb: Use large lettuce leaves instead of tortillas for a lighter, refreshing wrap. This option is perfect if you’re keeping an eye on carbs but don’t want to miss out on flavor.
-
Cheesy BBQ: Mix in your favorite BBQ sauce with the chicken and top with shredded coleslaw for added crunch. This gives a smoky, sweet flavor burst that everyone will love.
-
Spinach and Artichoke: Blend spinach and canned artichokes into your cheese mixture for a creamy, indulgent experience. It’s like enjoying your favorite dip wrapped in a delightful tortilla.
With these variations in mind, you’ll never get bored of your Cheesy Garlic Chicken Wraps! If you’re looking for more inspiration, try our delicious Black Pepper Chicken for a flavor-packed option.
How to Store and Freeze Cheesy Garlic Chicken Wraps
Room Temperature: Store wraps in an airtight container for up to 2 hours after cooking. Beyond this time, it’s best to refrigerate to maintain freshness.
Fridge: Keep assembled Cheesy Garlic Chicken Wraps in an airtight container for up to 3 days. To reheat, use a skillet over medium heat until warmed through, ensuring a crispy texture.
Freezer: Wrap individually in plastic wrap or foil, then place in a freezer-safe container for up to 3 months. Thaw overnight in the fridge before reheating in a skillet or oven for best results.
Reheating: For optimal flavor, reheat wraps in a skillet until crispy, about 3-4 minutes on each side. Enjoy your delicious leftovers as if they were just made!
Make Ahead Options
These Cheesy Garlic Chicken Wraps are perfect for meal prep enthusiasts! You can prepare the chicken and cheese mixture up to 3 days in advance and refrigerate them separately to maintain their delicious flavor and texture. Simply cook the chicken, let it cool, and store it alongside the creamy cheese blend. When you’re ready to serve, just assemble the wraps, toast them in a skillet for about 3-4 minutes per side, and enjoy that gooey goodness. Additionally, you can fully assemble the wraps, wrap them tightly in foil, and freeze for up to 3 months. Thaw overnight in the fridge before toasting, and you’ll have satisfying, homemade comfort food ready with minimal effort!
Cheesy Garlic Chicken Wraps Recipe FAQs
What kind of chicken should I use for the wraps?
Absolutely! Chicken breast is a fantastic choice for these wraps due to its hearty texture. If you’re looking for lighter options, turkey breast or even firm tofu work beautifully as substitutes, ensuring everyone can enjoy this dish.
How should I store leftover Cheesy Garlic Chicken Wraps?
Store any leftover wraps in an airtight container in the fridge for up to 3 days. To maintain their delightful crunch when reheating, I recommend using a skillet over medium heat for about 3-4 minutes on each side until they are warmed through and crispy.
Can I freeze these wraps for later use?
Absolutely! To freeze assembled Cheesy Garlic Chicken Wraps, individually wrap each one in plastic wrap or aluminum foil and place them in a freezer-safe container. They can be frozen for up to 3 months. When you’re ready to enjoy them, thaw overnight in the fridge, then reheat in a skillet or oven until crispy.
What if my wraps turn out soggy?
To prevent soggy wraps, it’s essential to let the cooked chicken and sautéed vegetables cool slightly before filling the tortillas. This minimal cooling allows steam to dissipate. Additionally, always use freshly grated cheese for optimal melting and texture, which helps keep everything nicely layered and less prone to moisture.
Are there vegetarian options for this recipe?
Very! You can easily transform this recipe into a vegetarian delight by swapping the chicken for some scrambled eggs, sautéed mushroom, or even a mix of beans and corn. Just ensure to season your veggies well, so you still get that delicious flavor profile we all love in Cheesy Garlic Chicken Wraps!
Can pets safely eat any ingredients from this recipe?
It’s always essential to consider our furry friends’ safety! While cooked chicken is generally safe for pets, avoid giving them ingredients like garlic and onions, which can be harmful. Always check with your vet for specific dietary concerns for your pets.
Cheesy Garlic Chicken Wraps That Will Brighten Your Dinner
Ingredients
Equipment
Method
- Heat a large skillet over medium-high heat and add a drizzle of extra virgin olive oil. Season the chicken breast with sea salt, cracked black pepper, and the Mediterranean herb blend. Sear the chicken for about 5-6 minutes on each side, or until golden brown and fully cooked through, reaching an internal temperature of 165°F. Remove from skillet and let rest while you prepare the vegetables.
- In the same skillet, add a bit more olive oil if needed, then toss in the sweet onion and red bell pepper. Sauté for about 4-5 minutes, stirring frequently, until vegetables are soft and slightly caramelized. Add the fresh spinach leaves and cook for another 1-2 minutes until wilted. Remove the vegetable mixture from the skillet and set aside.
- In a mixing bowl, combine shredded mozzarella, sharp cheddar, cream cheese, sour cream, and fresh chives. Stir until all ingredients are well incorporated into a creamy cheese blend.
- Lightly brush each flour tortilla with melted butter on one side and sprinkle with roasted garlic powder. Preheat your skillet over medium heat, preparing it for the assembled wraps.
- Place a tortilla on a clean surface and fill it with a portion of the cooked chicken, sautéed vegetables, and a generous spoonful of the cheese mixture. Roll each tortilla tightly, ensuring the filling is well secured inside.
- Carefully place the assembled wraps seam-side down in the preheated skillet. Toast each wrap for about 3-4 minutes until golden brown and crispy on one side. Flip the wraps and continue to toast for another 3-4 minutes until both sides are evenly browned and crispy, ensuring the cheese melts within.
- Once your Cheesy Garlic Chicken Wraps are toasted to perfection, remove them from the skillet and let cool slightly. Cut each wrap diagonally for an appealing presentation. Serve warm with your favorite dipping sauce, like fresh guacamole or sour cream.
Leave a Reply