
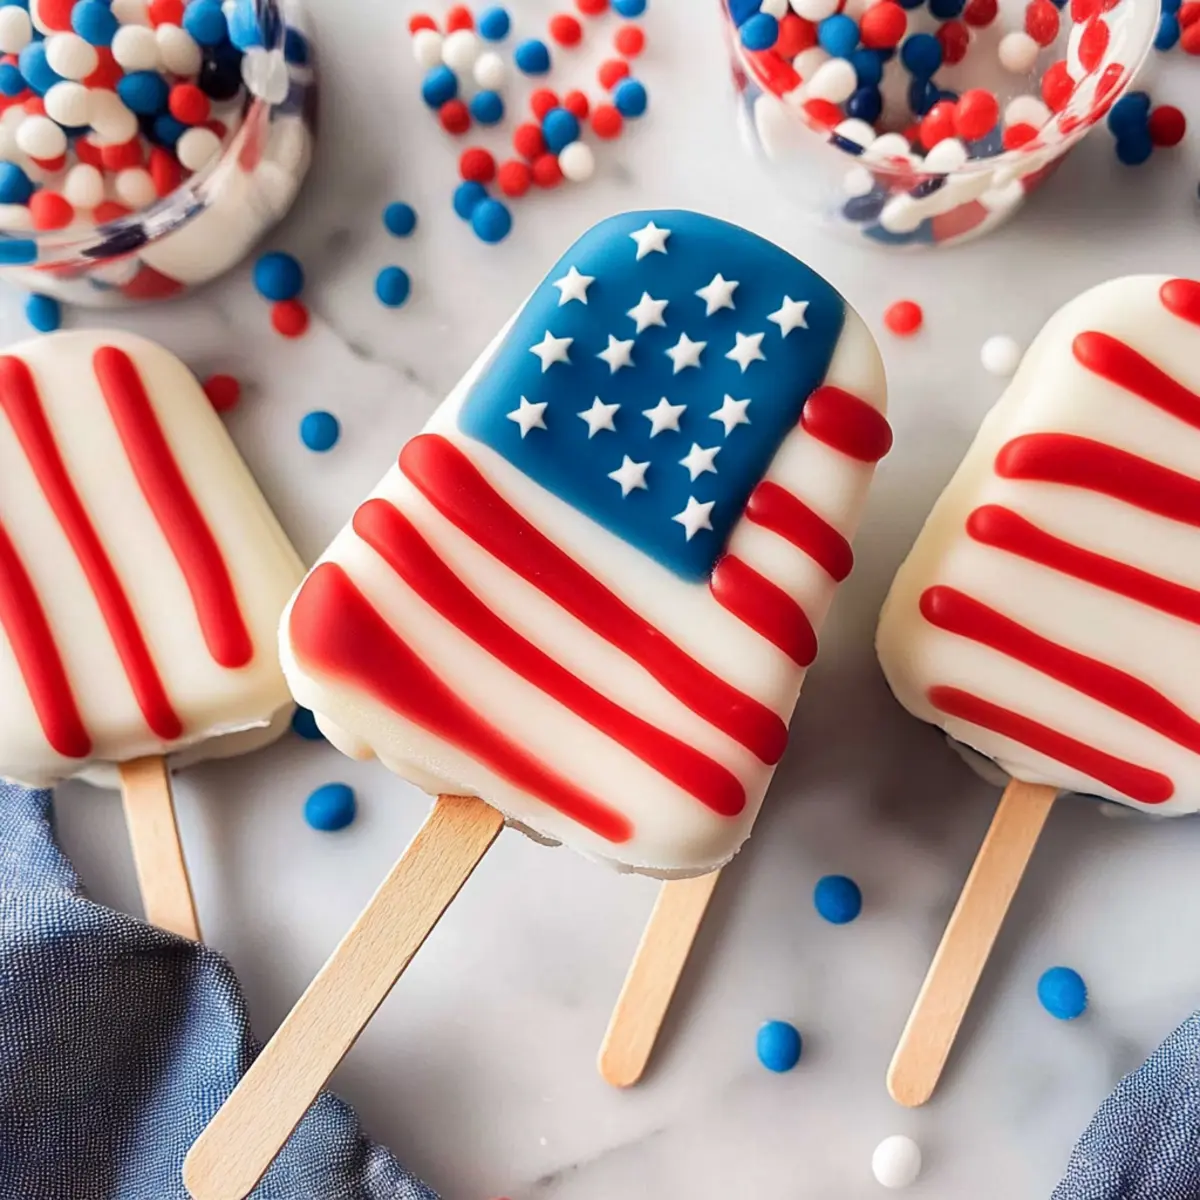
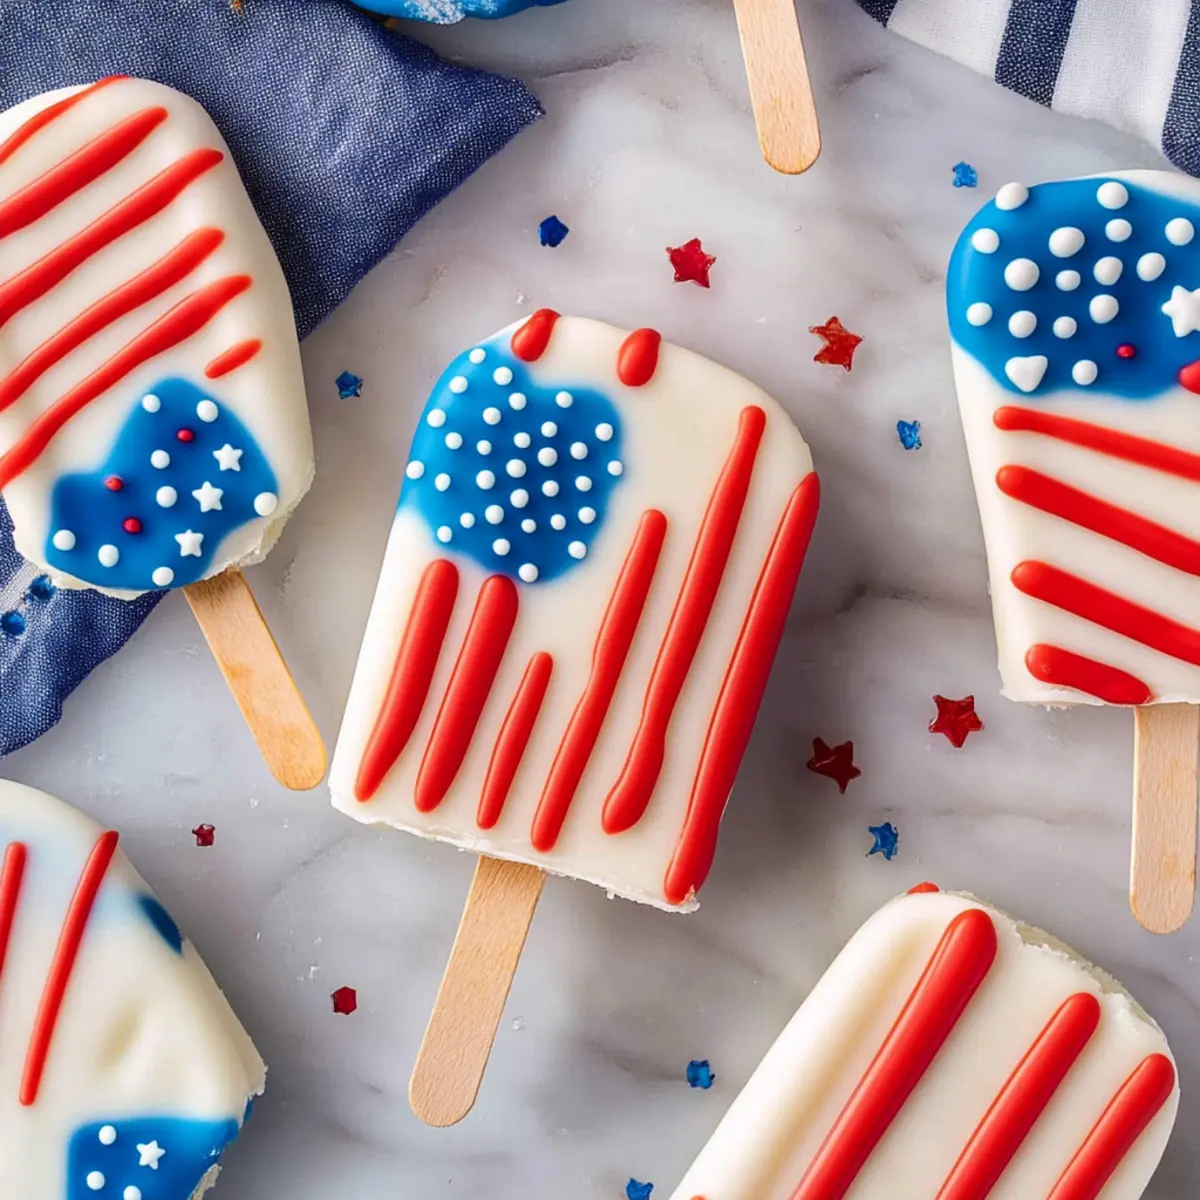
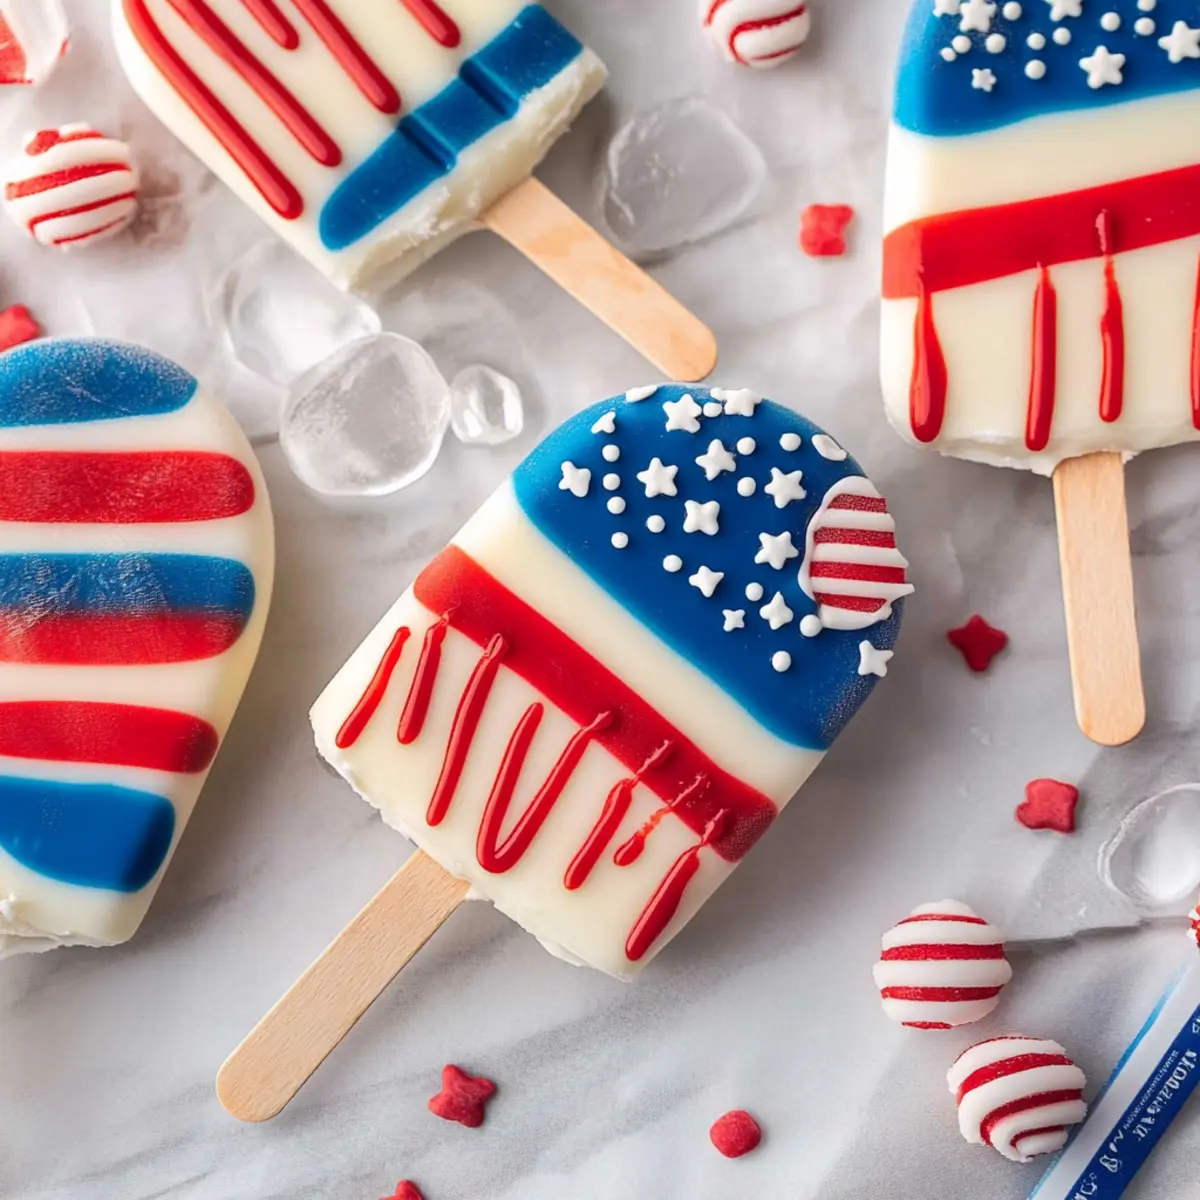
As I prepped for a summer soirée last year, I stumbled upon a brilliant way to transform leftover cake into something truly festive—4th of July Cakesicles! These delightful creations, dipped in smooth white chocolate and dressed in vibrant red and blue drizzles, not only spark joy but showcase creativity in the kitchen. The best part? They’re a breeze to make, requiring minimal effort for maximum impact. Perfect for summer celebrations, these cakesicles are a fun twist on traditional treats that keep you away from tedious, extensive baking. Whether you’re hosting a barbecue or just looking to add a sweet touch to your holiday potluck, these cakesicles are sure to impress. Ready to dive into this easy, crowd-pleasing recipe? Let’s get started!
Why are these Cakesicles a Must-Make?
Fun to Make: Crafting these 4th of July Cakesicles transforms baking into a creative adventure! Customization is key; you can use any leftover cake, making them unique to your taste. Easy to Assemble: You don’t need expert skills—just crumbled cake and frosting, and you’re good to go! Perfect for Sharing: Great for summer gatherings, these treats are sure to be a hit at barbecues or potlucks. Plus, their vibrant colors bring a festive touch to your table, elevating any celebration. Don’t forget to check out our tips for easy decorating ideas to take these treats to the next level!
Delicious 4th of July Cakesicle Ingredients
For the Cakesicle Base
• Crumble Cake – This forms the delicious foundation; use any leftover cake or even half of a boxed cake mix.
• Vanilla Frosting – Adds moisture and sweetness to bind your cake; feel free to use store-bought if you’re in a hurry.
For the Chocolate Coating
• White Candy Melts – Create a smooth, festive shell; consider using colored melts for an extra pop!
• Coconut Oil – Optional but helpful for thinning the candy coating if needed, leading to a better texture.
For the Icing Drizzle
• Powdered Sugar – Essential for creating that beautiful icing drizzle; it helps your colors really shine!
• Gel Food Coloring (Red & Blue) – Adds vibrant vivacity to your decorations and ensures your designs pop without altering consistency.
With these simple ingredients, you’ll be well on your way to creating fun and festive 4th of July cakesicles that everyone will love!
Step-by-Step Instructions for Festive 4th of July Cakesicles
Step 1: Prepare Cake Mixture
Begin by crumbling your leftover cake into a large mixing bowl until it resembles fine crumbs. Add vanilla frosting gradually, mixing with your hands until the mixture forms a dough-like consistency that holds together when pressed. This step should take about 5 minutes, ensuring every bite of your Festive 4th of July Cakesicles is deliciously sweet.
Step 2: Shape
Firmly press the cake mixture into a cakesicle mold, filling each cavity completely. Insert popsicle sticks into the center of each shape, ensuring they are secure. Place the filled mold in the freezer for 30 minutes to allow the cakesicles to firm up; they should be solid and retain their shape when removed from the mold.
Step 3: Melt Coating
In a microwave-safe bowl, add white candy melts and microwave on high for 30 seconds. Stir the melts and continue to microwave in 15–20 second intervals, mixing until the chocolate is completely smooth and glossy. If desired, add a teaspoon of coconut oil to improve consistency. This melted coating will beautifully envelop your Festive 4th of July Cakesicles.
Step 4: Dip Cakesicles
Carefully remove the cakesicles from the mold and dip each one into the melted white candy coating. Allow the excess coating to drip off back into the bowl before placing the dipped cakesicles onto a sheet of parchment paper. Let them cool for about 10 minutes; the coating will harden, providing a delightful shell for your treats.
Step 5: Make Icing
In a small bowl, mix powdered sugar with water to achieve a drizzling consistency. Start with a few teaspoons of water and gradually add more as needed. Once smooth, divide the icing into two separate bowls, tint each with a few drops of red and blue gel food coloring. This colorful icing will add a festive touch to your Festive 4th of July Cakesicles.
Step 6: Decorate
Using a spoon or piping bag, drizzle the red and blue icing over the hardened cakesicles to create a fun, festive pattern. Consider adding colorful sprinkles on top for an extra touch of celebration! Allow the icing to set for about 10 minutes before serving, ensuring those vibrant designs stay put while guests enjoy these delicious treats.

Variations & Substitutions for 4th of July Cakesicles
Feel free to explore different flavors and colors to make these cakesicles your own!
- Cake Flavor: Use any leftover cake—chocolate, red velvet, or lemon! Each variation adds a unique twist to the sweetness.
- Frosting Swap: For a fun tang, try cream cheese frosting instead of vanilla. It perfectly complements the sweetness of the chocolate coating.
- Colored Melts: Switch up the white candy melts with red or blue ones for a bolder look. They’ll be as festive as they are delicious!
- Add Sprinkles: Mix sprinkles or crushed candies into the cake mixture before molding for an extra pop of color and texture. Kids especially love this fun addition!
- Fruit Zest: Incorporate lemon or orange zest into the cake mixture for a refreshing citrus flavor. It livens up the cakesicles while keeping them festive!
- Nutty Crunch: Fold in finely chopped nuts or granola to the cake mixture for added crunch. This delightful texture contrast will surprise and please your guests.
- Healthier Version: Swap the frosting for yogurt for a lighter take. It’s a delicious way to enjoy these festive treats without the added sugar.
- Gluten-Free Option: Use a gluten-free cake mix to cater to dietary preferences. Everyone deserves a taste of your 4th of July creation!
With these variations, you can make each batch of cakesicles distinct. Don’t hesitate to check out our post on easy decorating ideas for more inspiration while you celebrate!
Expert Tips for 4th of July Cakesicles
-
Chill Before Dipping: Chill the cakesicles in the freezer for 10-15 minutes before dipping to minimize crumbling and ensure they hold their shape.
-
Use Quality Chocolate: Opt for high-quality white candy melts for a smooth coating. Cheaper options can impact texture and taste, making your cakesicles less enjoyable.
-
Avoid Air Bubbles: After dipping, gently tap the side of the bowl to release air bubbles from the coating, ensuring a smooth finish on your 4th of July cakesicles.
-
Don’t Overheat: When melting the candy coating, avoid overheating, as this will result in a thick consistency that’s hard to work with. Stir regularly for best results.
-
Experiment with Flavors: Feel free to mix different cake flavors or frostings to personalize your cakesicles. This creativity allows for a unique twist on the classic recipe!
-
Knife for Drizzling: If you don’t have a piping bag, use the corner of a plastic sandwich bag to drizzle icing. Just snip off a tiny piece for precise decorating!
Make Ahead Options
These delightful 4th of July Cakesicles are perfect for busy home cooks looking to save time! You can prepare the cakesicle base by crumbling leftover cake and mixing it with frosting up to 24 hours in advance, storing the mixture in an airtight container in the refrigerator. Alternatively, shape the cakesicles in the molds and freeze them for up to 3 weeks; just ensure they are tightly wrapped to prevent freezer burn. When you’re ready to serve, simply dip the frozen cakesicles into the melted candy coating and decorate them with icing and sprinkles before enjoying. This way, you can create stunning treats while freeing up precious time on the day of your celebration!
How to Store and Freeze 4th of July Cakesicles
Room Temperature: Keep cakesicles at room temperature for up to 2 days if consuming quickly; make sure they’re covered to prevent drying out.
Fridge: Store in an airtight container in the fridge for up to 5 days; this keeps them fresh and moist.
Freezer: For long-term storage, freeze cakesicles for up to 1 month. Ensure they are individually wrapped or placed in a freezer-safe container to maintain texture.
Reheating: Thaw in the refrigerator overnight before serving; avoid microwaving to prevent melting the chocolate coating.
What to Serve with Festive 4th of July Cakesicles?
Elevate your summer gathering with mouthwatering accompaniments that complement sweet treats while bringing festive flair to your table.
- Berry Salad: A colorful mix of fresh strawberries, blueberries, and raspberries adds a refreshing contrast to the rich sweetness of the cakesicles. The natural juices from the berries will brighten every bite.
- Grilled Corn on the Cob: The smoky flavor of grilled corn with butter provides a savory balance to the sweetness, making it a perfect summer side dish. Enjoy its warmth while you munch on chilled cakesicles.
- Watermelon Feta Salad: The juicy sweetness of watermelon, paired with salty feta and fresh mint, offers a delightful flavor contrast, lightening the dessert table while celebrating summer flavors. The colors align beautifully with your festive treats!
- Lemonade or Spritzers: Refreshing drinks with hints of lemon and mint can keep the heat at bay while offering a zesty kick that matches the joy of your cakesicles. Try a sparkling lemonade for a bubbly twist!
- Chocolate-Dipped Strawberries: Double the treat with these classic favorites! Their rich chocolate coating connects beautifully with the white chocolate of your cakesicles, enchanting your taste buds with each delicious bite.
- Ice Cream: A scoop of vanilla or berry ice cream alongside your festive cakesicles cools down the palate and makes for a perfect summer dessert experience. Top with sprinkles to echo your delightful cakesicle designs!
4th of July Cakesicles Recipe FAQs
What type of cake should I use for the cakesicles?
You can use any leftover cake or even half of a boxed cake mix for your 4th of July Cakesicles. Chocolate, vanilla, or even funfetti cakes work beautifully. Make sure the cake is well-crumbled for better binding with the frosting!
How should I store my cakesicles?
To keep your cakesicles fresh, you can store them at room temperature for up to 2 days if covered. For longer storage, place them in an airtight container in the fridge for up to 5 days. They will remain moist and delicious this way, ready for any surprise guests!
Can I freeze the cakesicles, and how will I thaw them?
Absolutely! You can freeze your 4th of July Cakesicles for up to 1 month. Just make sure to wrap each cakesicle individually or place them in a freezer-safe container. When you’re ready to enjoy them, simply thaw them in the refrigerator overnight to keep the chocolate coating intact and avoid any melting.
What should I do if the chocolate coating is too thick?
If you find that your melted white candy melts are too thick, you might want to add a teaspoon of coconut oil or vegetable shortening to improve its consistency. Stir well after adding, and you should see it become smoother and easier to dip. Remember to microwave in short intervals to avoid overheating!
Are these cakesicles suitable for gluten-free diets?
You can make gluten-free 4th of July Cakesicles by using gluten-free cake mixes or homemade gluten-free cakes. Always double-check the labels on your frosting and candy melts to ensure they meet gluten-free standards. This way, everyone can enjoy these festive treats!
How can I make the icing drizzle thicker or thinner?
If your icing drizzle is too thick, simply add a tiny amount of water, mixing in small increments until you reach the desired consistency. If it’s too thin, add a bit more powdered sugar to thicken it up. Aim for a smooth, flowy texture that easily drizzles but holds its shape on the cakesicles.
Delicious 4th of July Cakesicles for Your Summer Celebrations
Ingredients
Equipment
Method
- Begin by crumbling your leftover cake into a large mixing bowl until it resembles fine crumbs.
- Add vanilla frosting gradually, mixing with your hands until the mixture forms a dough-like consistency.
- Firmly press the cake mixture into a cakesicle mold, filling each cavity completely.
- Insert popsicle sticks into the center of each shape and freeze for 30 minutes.
- In a microwave-safe bowl, add white candy melts and microwave on high for 30 seconds, stirring until smooth.
- Carefully remove cakesicles from the mold and dip into melted white candy coating.
- Let excess coating drip off, then place dipped cakesicles onto parchment paper to cool.
- Mix powdered sugar with water to achieve drizzling consistency and divide into two bowls for coloring.
- Drizzle the colored icing over the hardened cakesicles and allow to set for 10 minutes.
Leave a Reply