
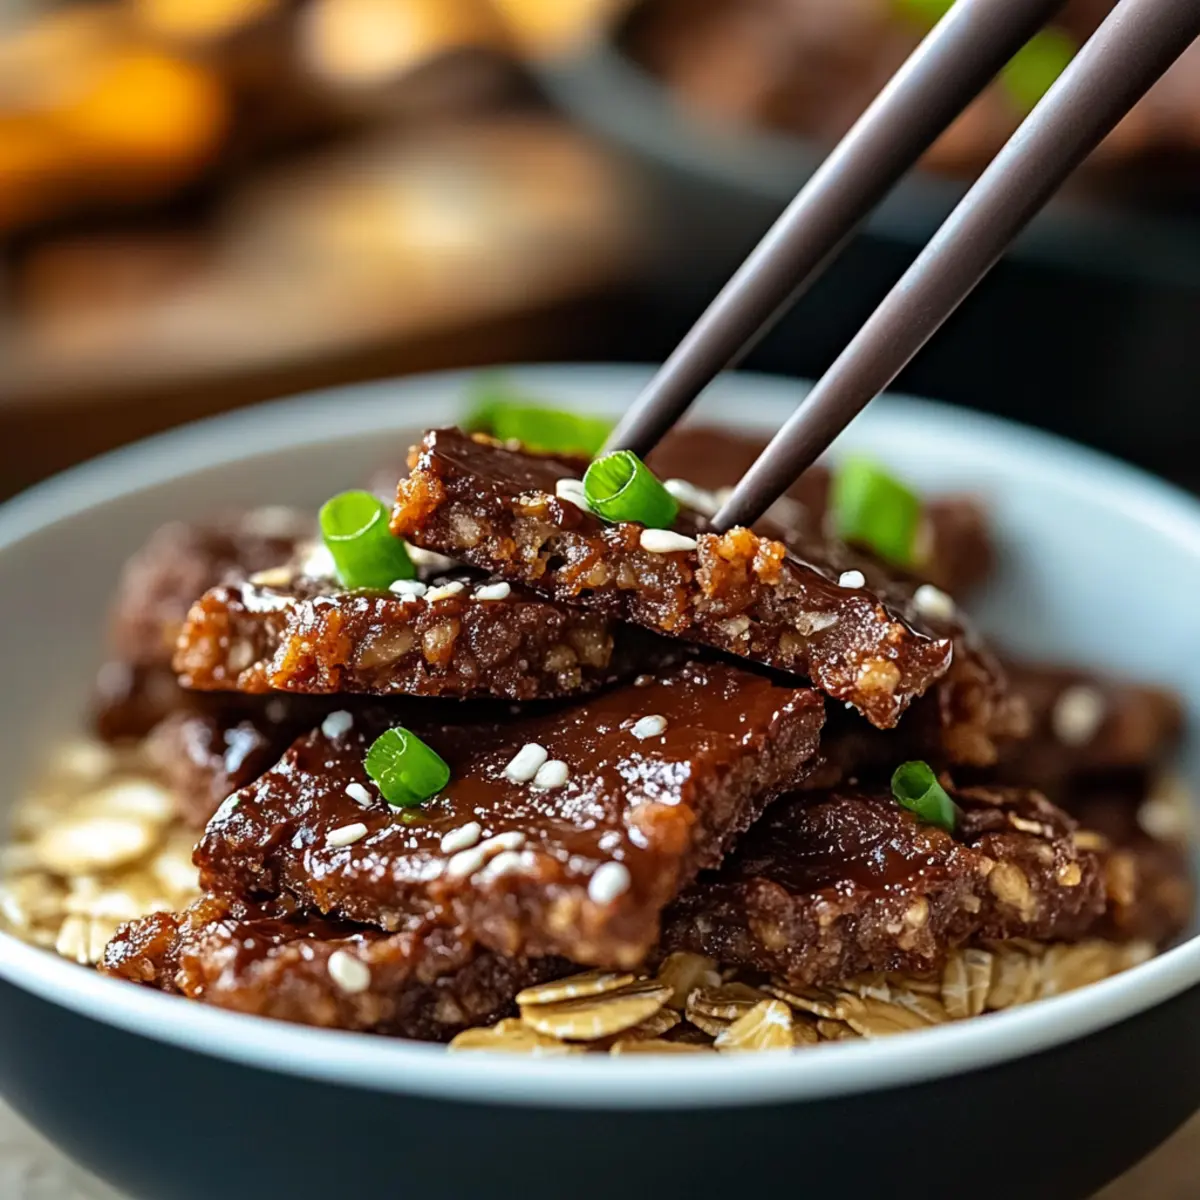
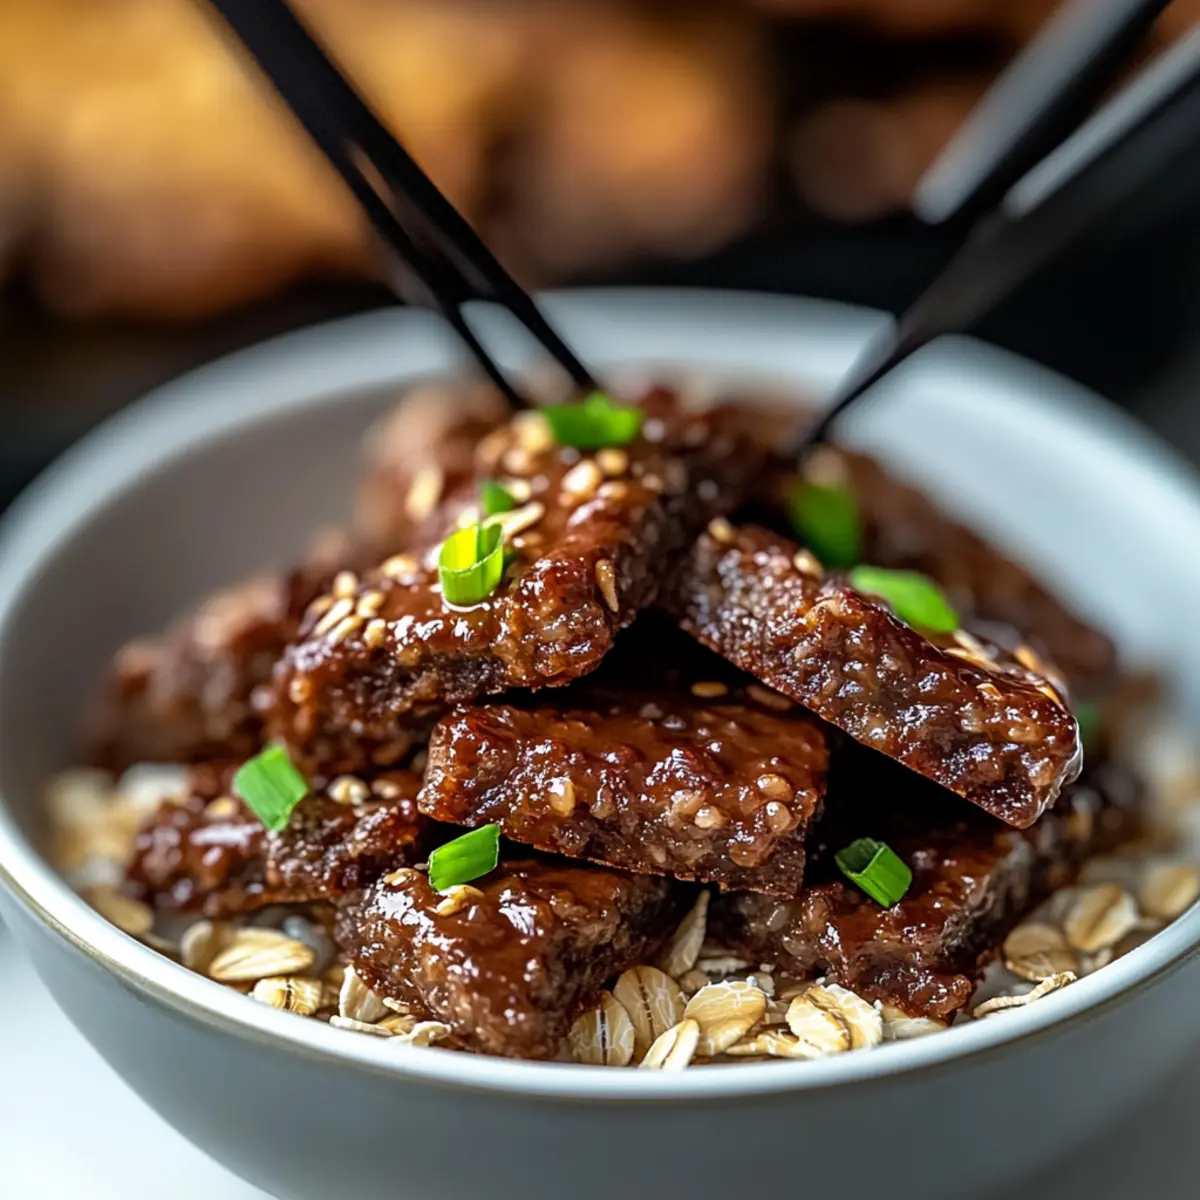
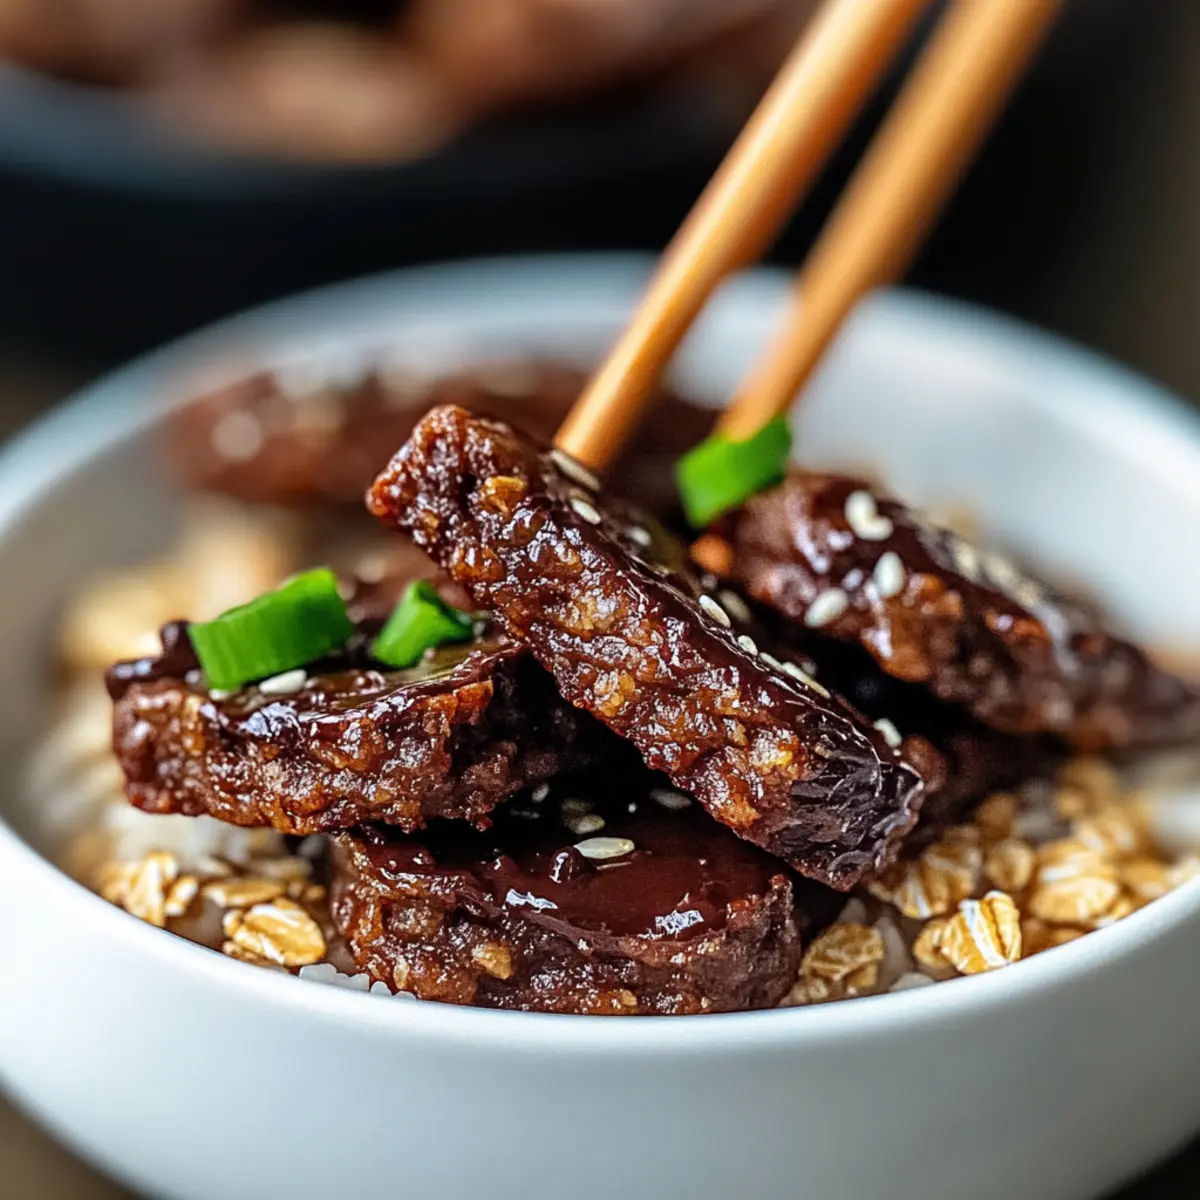
As I stood in my kitchen, the aroma of melting chocolate filled the air, pulling me into a delightful whirl of nostalgia. There’s something undeniably comforting about making cookies from scratch, especially when they can be whipped up in a matter of minutes. That’s where my 4-Ingredient Crispy Chocolate Oat Cookies come in—they’re a perfect antidote to fast food cravings and a joyous way to indulge your sweet tooth. Not only are they gluten-free, but these cookies also boast a quick preparation time that busy home-chefs will appreciate. Plus, with just four simple ingredients, you can easily adapt this recipe to fit your dietary needs. What if I told you that you can satisfy your cookie cravings without the guilt? Ready to dive into a world of delicious homemade goodness? Let’s bake!

Why Are These Cookies a Must-Try?
Simplicity at Its Finest: With just four simple ingredients, these cookies come together in a flash, making them perfect for anyone looking for a quick and easy treat.
Rich Chocolate Flavor: The cocoa powder pairs beautifully with the oats, creating a deliciously satisfying snack that will charm chocolate lovers.
Versatile Options: Whether you prefer gluten-free or vegan, this recipe can be easily adapted to suit your dietary needs, ensuring everyone can enjoy a bite.
Crowd-Pleasing Snack: Perfect for sharing, these cookies are bound to impress your family and friends, just like my Gordon Ramsay Beef recipe!
Great for Busy Days: Whip them up in under 30 minutes and have a tasty snack ready for those hectic afternoons or cozy movie nights.
These cookies are calling your name—are you ready to try your hand at baking delicious homemade treats?
Chocolate Oat Cookies Ingredients
• Discover the simplicity of making your own cookies!
For the Cookies
- Oats – Provide structure and texture; opt for rolled oats for the perfect crunch in your Chocolate Oat Cookies.
- Cocoa Powder – Adds deep rich chocolate flavor, ensuring a delightful treat you’re sure to love.
- Nut Butter (e.g., almond or peanut) – Acts as a binding agent, adding creaminess; sunflower seed butter is a great nut-free alternative.
- Sweetener (e.g., honey, maple syrup) – Brings sweetness and moisture; adjust to taste, and for vegan options, choose maple syrup.
Step‑by‑Step Instructions for 4-Ingredient Crispy Chocolate Oat Cookies
Step 1: Preheat the Oven
Begin by preheating your oven to 350°F (175°C). While it warms up, line a baking sheet with parchment paper to prevent sticking, ensuring easy cleanup. This preparation step is crucial to help the cookies bake evenly and achieve that perfect crispy texture.
Step 2: Mix Dry Ingredients
In a large mixing bowl, combine rolled oats and unsweetened cocoa powder. Stir them together until they are well blended and you can see the rich chocolate color throughout the oats. This step ensures that the flavors are evenly distributed in your delightful chocolate oat cookies.
Step 3: Add Nut Butter and Sweetener
Now, introduce your choice of nut butter and sweetener to the oat mixture. Stir vigorously until everything is fully combined and you have a sticky dough. Make sure the nut butter is at room temperature for easy mixing; this will help create a smooth, cohesive texture in your cookies.
Step 4: Scoop and Shape the Cookies
Using a spoon or cookie scoop, portion out dollops of the cookie dough onto the prepared baking sheet. Flatten them slightly with the back of the spoon to ensure they bake evenly. Keep them spaced apart to allow for spreading as they bake into delightful chocolate oat cookies.
Step 5: Bake the Cookies
Place the baking sheet into the preheated oven and bake for 10-12 minutes. Look for edges that turn crisp while the centers remain slightly soft. It’s crucial to keep an eye on them towards the 10-minute mark to avoid overbaking, which can lead to dryness.
Step 6: Cool Down the Cookies
Once baked, remove the cookies from the oven and let them cool on the baking sheet for about 5 minutes. This cooling step allows them to firm up a bit before transferring them to a wire rack. Letting them cool completely will ensure they reach that satisfying crunchy texture we all love.
Variations & Substitutions for Chocolate Oat Cookies
Feel free to play around with this recipe to create your perfect cookie! Every variation adds a delightful new twist to your creation.
-
Gluten-Free: Substitute traditional oats with certified gluten-free oats to ensure a safe and delicious treat for those with gluten sensitivities.
-
Nut-Free Option: Replace nut butter with sunflower seed butter for a creamy alternative that still binds the cookies beautifully, perfect for school lunches!
-
Vegan Delight: Use maple syrup as a sweetener instead of honey and sunflower seed butter for a completely vegan version everyone can enjoy.
-
Crispy Treat: For an extra crunchy texture, add a handful of chopped nuts or seeds, elevating the cookie experience with delightful crunch.
-
Sweet Add-ins: Toss in a handful of chocolate chips or dried fruit such as cranberries or apricots for a burst of flavor and added sweetness in every bite.
-
Flavor Boost: Enhance the flavor profile by adding a teaspoon of cinnamon or vanilla extract, turning these cookies into a cozy and aromatic treat.
-
Low-Carb Version: Swap out oats for almond flour to create a low-carb cookie that’s still deliciously satisfying without the extra carbs.
As you explore these variations, don’t forget to check out my recipes for Cheesy Ground Beef or Mongolian Ground Beef for other quick, satisfying meals! Each twist you try can transform your cookie experience into something uniquely yours. Enjoy!
Make Ahead Options
These 4-Ingredient Crispy Chocolate Oat Cookies are perfect for meal prep, saving you precious time on busy days! You can mix the dry ingredients (oats and cocoa powder) up to 3 days in advance and store them in an airtight container to keep them fresh. Additionally, you can prepare the cookie dough and refrigerate it for up to 24 hours; this allows the flavors to meld beautifully and keeps the cookies just as delicious when baked. When you’re ready to serve or enjoy them, simply scoop the dough onto a baking sheet and bake as directed. This way, you’ll have freshly baked treats with minimal effort, ideal for any snack attack!
Expert Tips for Chocolate Oat Cookies
-
Nut Butter Temperature: Ensure your nut butter is at room temperature for easier mixing. It’s the key to a smooth cookie dough.
-
Watch the Bake Time: Overbaking can lead to dryness, so keep a close eye on the cookies after the 10-minute mark to retain their chewy texture.
-
Cooling is Key: Allow the cookies to cool completely before serving to achieve maximum crispness—this step truly elevates their delightful texture.
-
Measuring Sweeteners: Adjust the amount of sweetener based on your preference; start with less and add more if needed to perfectly balance the richness of the chocolate.
-
Explore Variations: Don’t hesitate to experiment with mix-ins like shredded coconut or nutty toppings to customize your chocolate oat cookies, making them uniquely yours!
Storage Tips for Chocolate Oat Cookies
-
Room Temperature: Store your cookies in an airtight container at room temperature for up to one week. This keeps them chewy and ready to enjoy any time of day.
-
Fridge: If you prefer a firmer texture, your chocolate oat cookies can be stored in the fridge for up to two weeks. Just ensure they’re well-covered to prevent them from drying out.
-
Freezer: For long-term storage, freeze the cookies in a single layer on a baking sheet, then transfer to a freezer bag, where they can last for up to three months. Thaw at room temperature or pop them in the microwave for a quick treat.
-
Reheating: To enjoy a warm cookie, reheat in the microwave for 10-15 seconds. This will refresh their delightful chocolatey goodness, bringing back that fresh-baked taste!
What to Serve with 4-Ingredient Crispy Chocolate Oat Cookies
Indulging in these delightful cookies opens up a world of delicious pairing possibilities, elevating your treat time to new heights.
-
Creamy Milk: A classic pairing that beautifully balances the sweetness and richness of the cookies, making each bite even more satisfying.
-
Vanilla Ice Cream: A scoop of cool, creamy ice cream adds a luxurious touch, creating a delightful contrast to the warmth of the cookies.
-
Fresh Berries: Bright, tart berries like raspberries or strawberries add a refreshing pop of flavor, beautifully cutting through the richness of the chocolate.
-
Nutty Trail Mix: A crunchy trail mix alongside your cookies introduces diverse textures and flavors, enhancing your snacking experience while providing a nutritious boost.
-
Chai Tea: The warm spices in chai tea provide comforting notes that enhance the flavors of the cookies, making for a perfect afternoon treat.
-
Dark Chocolate Drizzle: Elevate your cookies by drizzling with melted dark chocolate. This decadent touch enhances that rich chocolate flavor, making them irresistible!
-
Coconut Whipped Cream: For a delightful twist, serve the cookies with a dollop of coconut whipped cream. It adds a light, tropical flavor that pairs beautifully with the rich chocolate oat goodness.
-
Milkshake: Blend your favorite milkshake flavor with a hint of chocolate, and sip alongside the cookies for a blissful indulgence that transports you back to childhood.
These pairings not only complement the cookies but also create a memorable moment of enjoyment!
Chocolate Oat Cookies Recipe FAQs
What type of oats should I use for these cookies?
For the best texture and structure, I recommend using rolled oats. They provide that perfect crunch. Quick oats can make the cookies softer, so stick with rolled oats for an ideal outcome.
How should I store the cookies?
You can store your chocolate oat cookies in an airtight container at room temperature for up to one week. This keeps them nice and chewy and always ready for a snack. If you prefer a firmer texture, try storing them in the fridge for up to two weeks, but be sure they are well-covered.
Can I freeze these cookies? How do I do it?
Absolutely! For long-term storage, freeze the cookies in a single layer on a baking sheet. Once frozen, transfer them to a freezer bag. They can last for up to three months. To enjoy, simply thaw at room temperature or pop them in the microwave for about 10-15 seconds for that fresh-baked taste!
What are some troubleshooting tips if my cookies don’t turn out?
If your cookies turn out dry, it might be due to overbaking, so keep a close eye on them after the 10-minute mark. Also, make sure your nut butter is at room temperature when mixing; this helps achieve a smooth, sticky dough. If they spread too much, try flattening them less before baking.
Are these cookies suitable for people with nut allergies?
Yes! You can easily adapt this recipe by substituting nut butter with sunflower seed butter, which offers a nut-free option while still binding the ingredients together. Always check labels for allergens, but this makes it friendly for everyone!
Can I adjust the sweetness in my cookies?
Very! You can adjust the amount of sweetener based on your taste preference. Start with a smaller amount, then gradually add more until you reach the desired level of sweetness. This flexibility allows you to create a cookie that perfectly suits your palate!
Savory Korean Beef Bulgogi: Quick Flavor Explosion at Home
Ingredients
Equipment
Method
- Preheat your oven to 350°F (175°C) and line a baking sheet with parchment paper.
- In a large mixing bowl, combine rolled oats and cocoa powder until well blended.
- Add nut butter and sweetener to the oat mixture and mix until fully combined.
- Scoop and shape the cookie dough onto the prepared baking sheet, flatten slightly.
- Bake for 10-12 minutes until edges are crisp and centers are slightly soft.
- Let cookies cool on the baking sheet for about 5 minutes before transferring to a wire rack.
Leave a Reply